How to Build a Key Rack For Your Wall
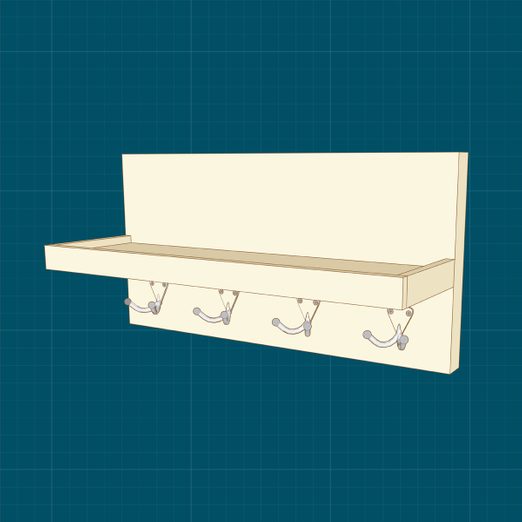
If you're always misplacing your keys, wallet or sunglasses, this handy key rack is the perfect project for you.
A half day
Beginner
$25
Introduction
If you're always misplacing your keys, wallet or sunglasses, this handy key rack is the perfect project for you.Tools Required
- Basic woodworking tools
- Clamps
- Drill/driver
- Hammer / pneumatic nailer
- Miter saw / circular saw
Materials Required
- 1/2" screws
- 1/2"x4 Board
- 1/4" x 3/4" Screen molding
- 18-ga Brad nails
- 1x6 Board
- 2 - Keyhole hardware
- 4 - Small double hooks
- Wood glue
Introduction
Build a handy key holder for all your everyday carry items. Mount it on the wall in your home’s entryway and you’ll never lose your keys again! This is an easy woodworking project that will only take a few hours.
Cutting List
| KEY | QTY. | DIMENSIONS | PART |
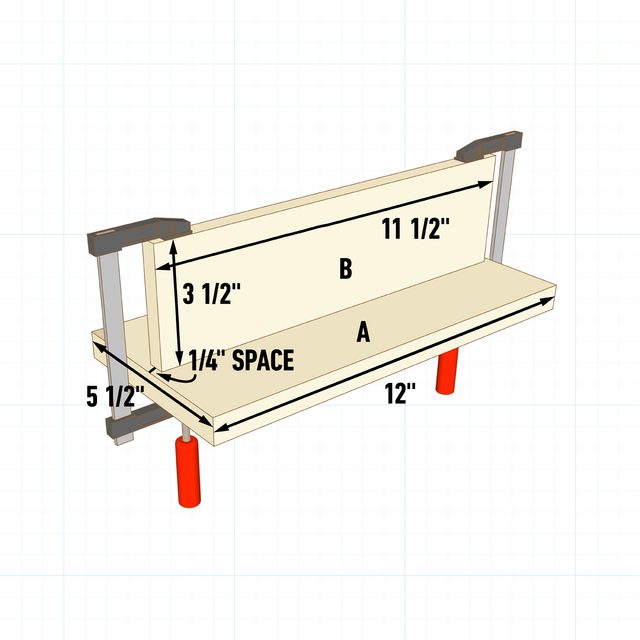
| A | 1 | 3/4″ x 5-1/2″ x 12″ | Mounting board |
| B | 1 | 1/2″ x 3-1/4″ x 11-1/2″ | Shelf |
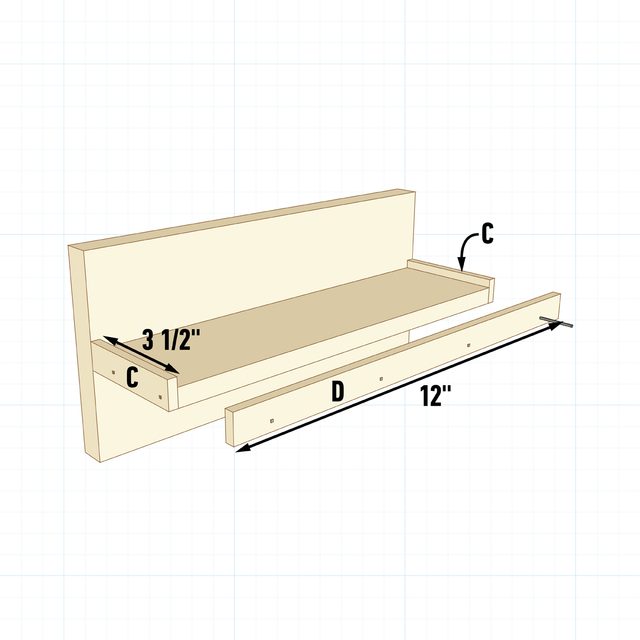
| C | 2 | 1/4″ x 3/4″ x 3-1/4″ | Side shelf trim |
| D | 1 | 1/4″ x 3/4″ x 12″ | Front shelf trim |
Project step-by-step (5)
Glue and Clamp the Shelf
Cut the mounting board and shelf parts to length, then glue and clamp the shelf to the mounting board. Leave a 1/4-in. space on either side of the shelf and set aside for the glue to cure.
Fasten Shelf Trim
Remove the clamps and cut two pieces of screen molding to fit the sides of the shelf. Apply wood glue and use 18-gauge brad nails to fasten the shelf side trim, then cut another piece to fit across the front. Glue and nail the shelf front trim in place.
Recess Keyhole Hardware
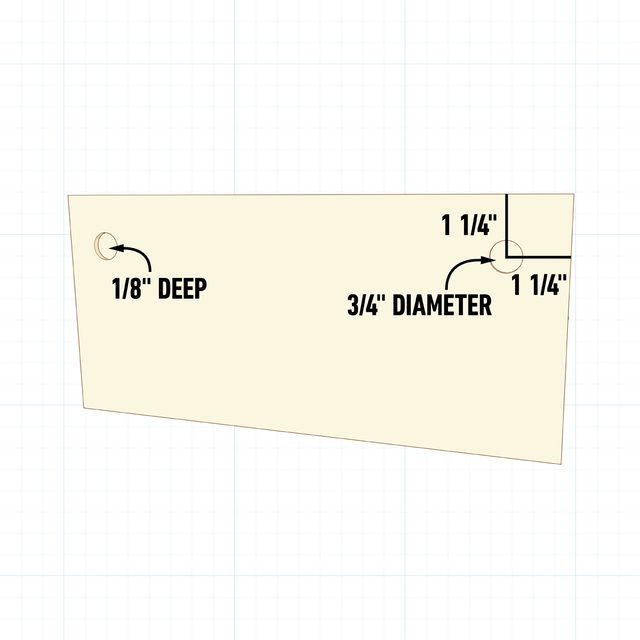
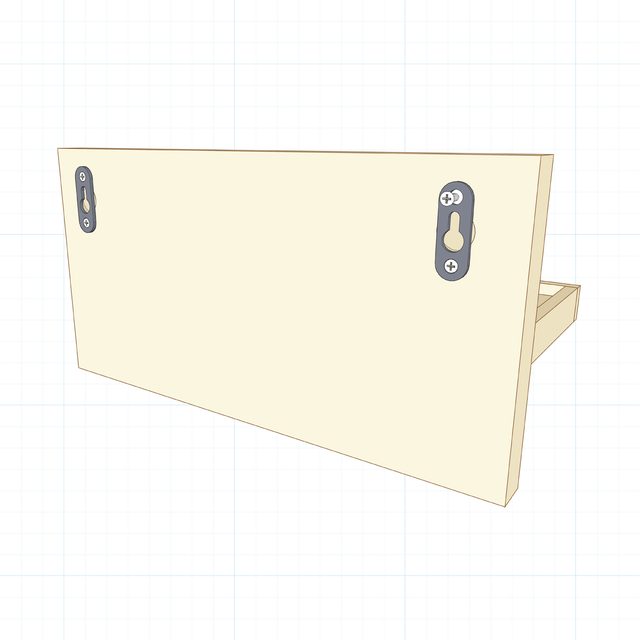
On the back of the mounting board drill two 3/4-in.-dia. by 1/8-in. deep holes, 1-1/4-in. from the top and both sides. These holes make room for the mounting screws to seat properly in the keyhole hardware.
Fasten the Wall Mounting Hardware
Position the keyhole hardware over the holes drilled in the previous step. Drill pilot holes and fasten the hardware with 1/2-in. screws.
Sand, Finish and Attach Hooks
Before fastening the key hooks, sand the surfaces smooth using 100-, 120- and 150-grit sandpaper. Then apply stain (if desired) and a protective topcoat. Space the key hooks evenly, drill pilot holes and fasten the hooks with 1/2-in. screws. Hang it on the wall and it’s ready to hold your keys and other everyday carry items.
