How to Customize Garage Cabinets for More Storage
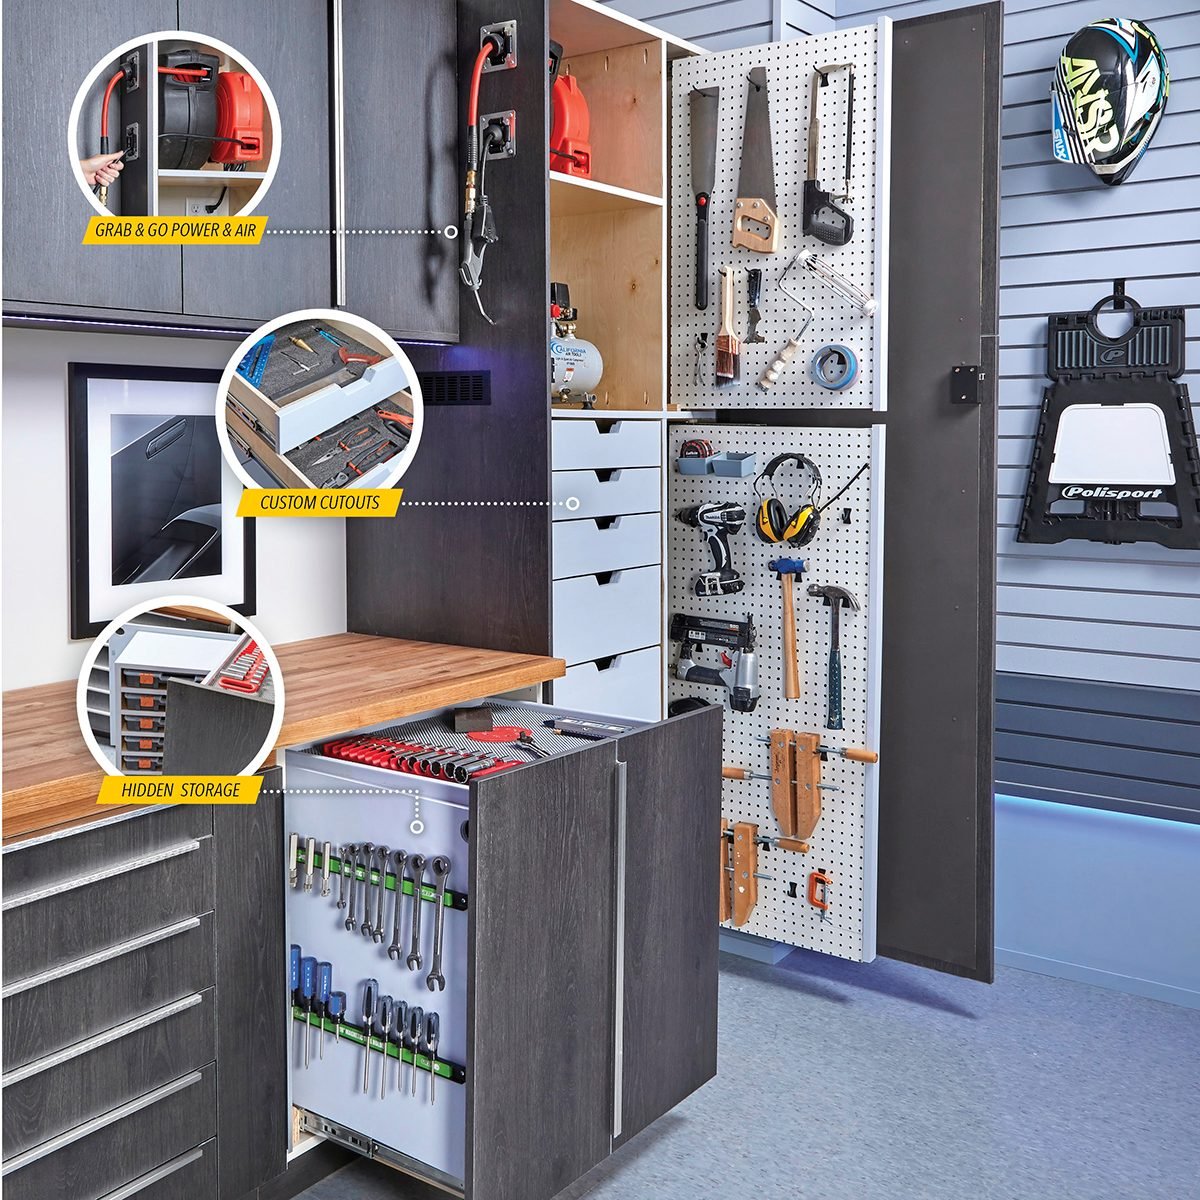
Our garages are multitaskers. Vehicle storage, workshop, tool organizer and hangout space for friends and family. For this garage to serve all those purposes, it must be highly organized. I customized two typical kitchen cabinets for maximum storage.
Our editors and experts handpick every product we feature. We may earn a commission from your purchases.
Multiple Days
Intermediate
$800.
Introduction
Our garages are multitaskers. Vehicle storage, workshop, tool organizer and hangout space for friends and family. For this garage to serve all those purposes, it must be highly organized. I customized two typical kitchen cabinets for maximum storage.Tools Required
- 1/4" crown stapler
- 18-gauge nail gun
- 4" hole saw
- Box cutter
- Caulk gun
- Combination square
- Drill/driver
- Framing square
- Hacksaw
- Long-nose pattern marker
- Miter saw
- Pocket hole jig
- Table saw
Materials Required
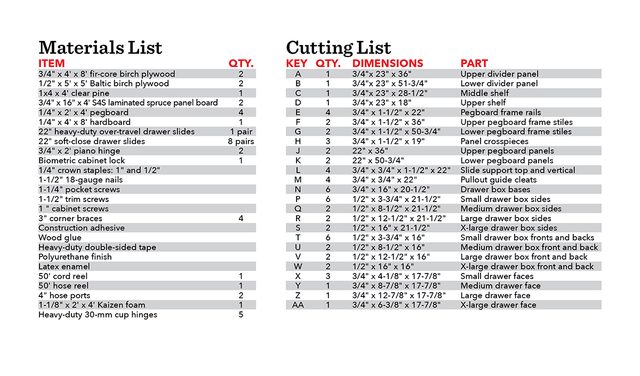
- 3/4" x 4' x 8' fir-core birch plywood
- 1/2" x 5' x 5' Baltic birch plywood
- 3/4" x 16" x 4' S4S laminated spruce panel board
- 1 x 4 x 4' clear pine
- 1/4" x 2' x 4' pegboard
- 1/4" x 4' x 8' hardboard
- 22" heavy-duty over-travel drawer slides
- 22" soft-close drawer slides
- 3/4" x 2' piano hinge
- Biometric cabinet lock
- 1"x 1/4" crown staples: 1"-1/4" and 1-1/2" 18-gauge nails
- 1-1/4" pocket screws
- 1-1/2" trim screws
- 1 " cabinet screws
- 3" corner braces
- Construction adhesive
- Wood glue
- Heavy-duty double-sided tape
- Polyurethane finish
- Latex enamel
- 50' cord reel
- 50' hose reel
- 4" hose ports
- 1-1/8" x 2' x 4' Kaizen foam
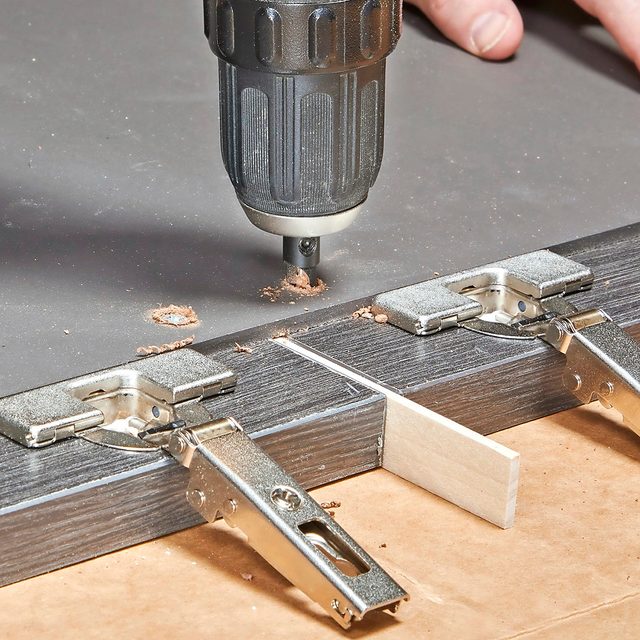
- Heavy-duty 30-mm cup hinges
Project step-by-step (15)
Install Shelves
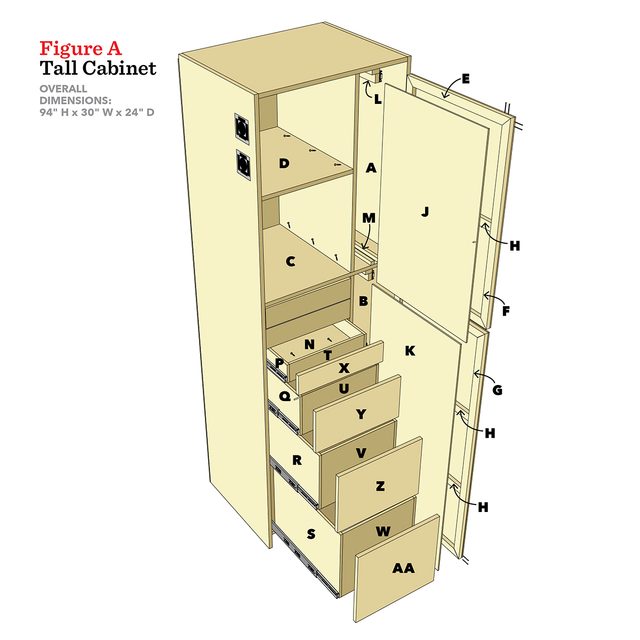
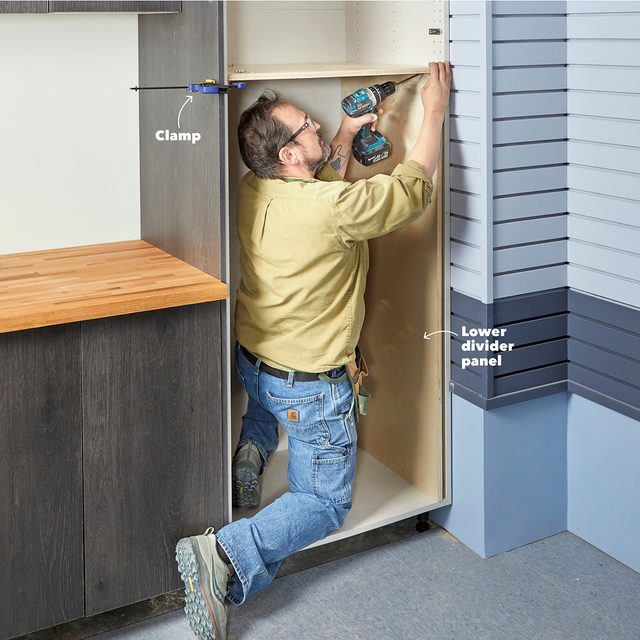
Use a clamp to temporarily support the middle shelf (C) in its approximate location, and use the lower divider panel (B) as a support and spacer. Attach the shelf with pocket screws. After attaching one side of the shelf, slide the divider to the other side, remove the clamp and attach that side. You’ll repeat this process for the upper shelf (D) once the upper divider panel (A) is in place.
Install the Divider Panels
Using the upper shelf (D) as a spacer, attach the top and bottom of the lower panel. Repeat the process for the upper divider panel (A), then install the upper shelf. Use pocket screws for all these connections.
Assemble Drawer Boxes
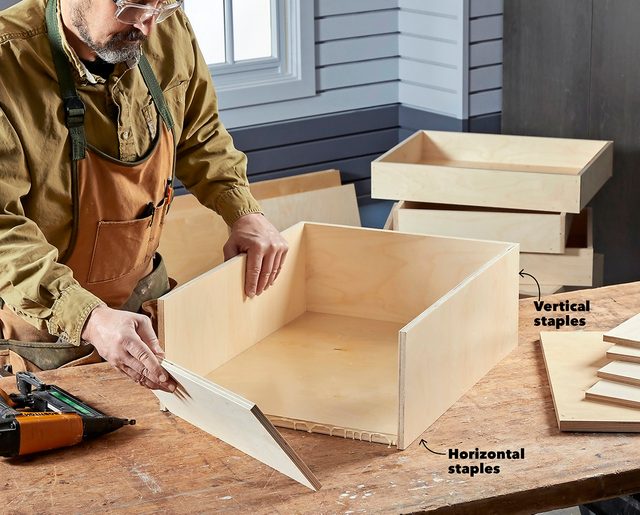
After completing the Cutting List, assemble the drawer boxes (N – W) using crown staples and wood glue. Do this on a flat table to ensure the parts stay flush on the bottom.
Pro tip: Staple horizontally to attach the sides, fronts and backs to the base. Staple vertically to connect the sides to the front and back. Keep the staples slightly away from the outer edge to avoid splintering the plywood’s veneer.
Build Pegboard Panels
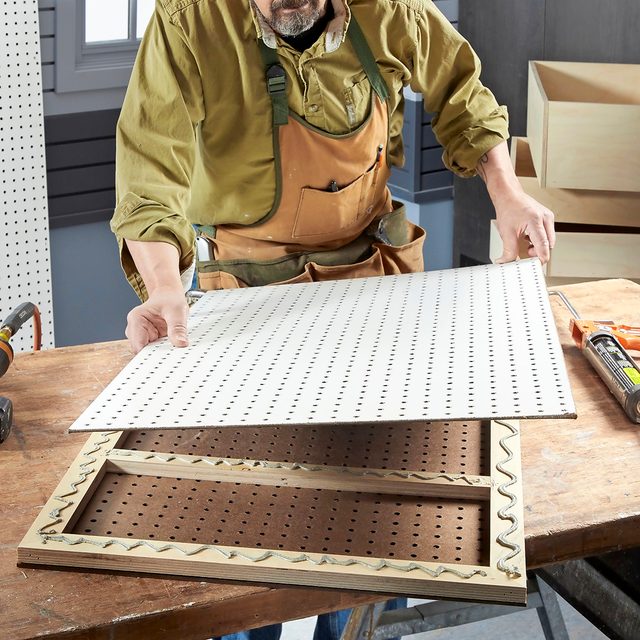
Make a pullout pegboard panel sandwich (J and K) using nails for the mitered corners of the frame (E – H), crown staples and construction adhesive for the panels.
Install the Pullout Panels
Attach the drawer slide inner rails to the panels and the slides to the supports (L). Install the supports and the guide cleats (M) with adhesive and brad nails, centering each panel in its space.
Layout and Install Drawer Slides
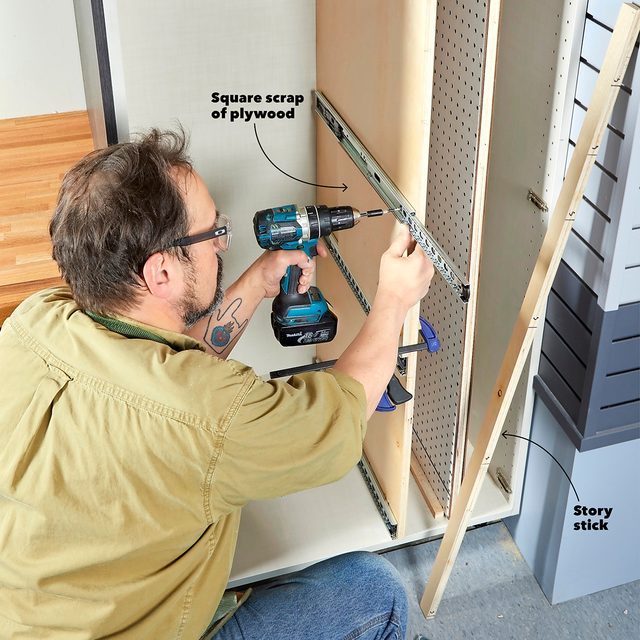
Rip a scrap of plywood to make a story stick, and mark the drawer spacing on it. Stand the stick in the cabinet and transfer those marks to the cabinet side and the lower divider. Install the first pair of slides on the bottom of the cabinet. Set the slides back the thickness of the drawer face plus 3/16-in.
Pro tip: Cut a scrap of plywood the same size as the distance between the bottom slide and the next slide up. Use that plywood to position the second set of slides. As you work your way up with the drawer slides, cut the plywood to match the layout and support each set of slides for installation.
Position and Install Drawer Fronts
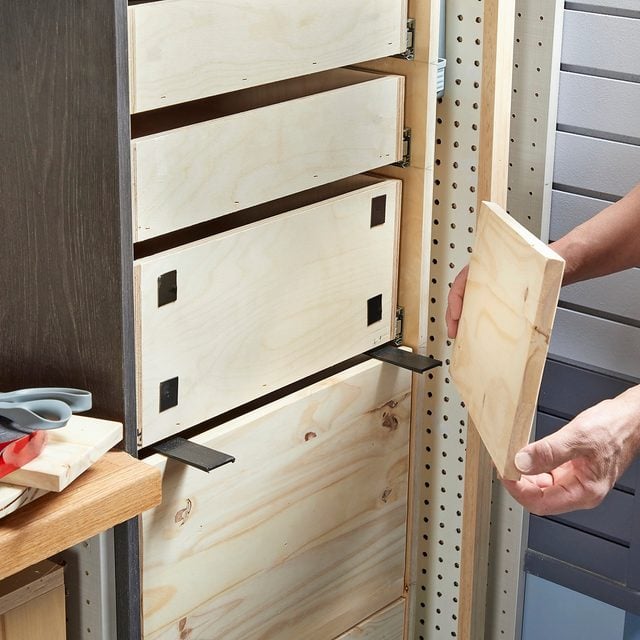
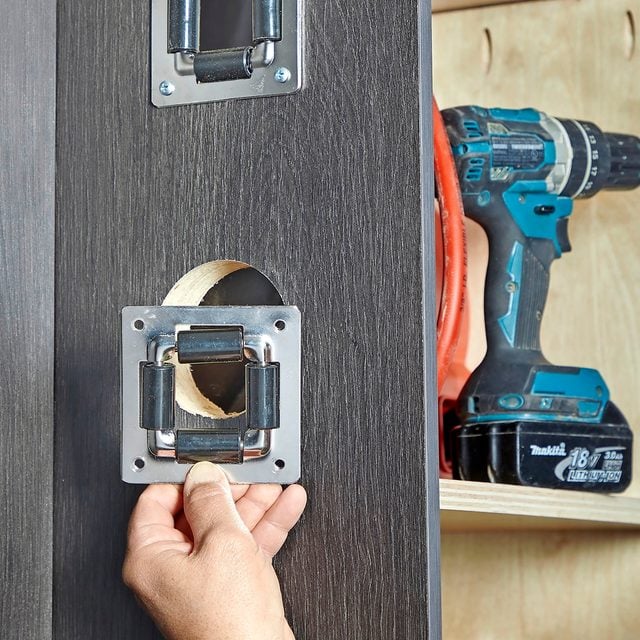
Using heavy-duty double-sided tape and shims, position the drawer faces (X – AA), keeping about a 1/8-in. gap around the perimeter. Attach each face from the inside of the drawer box using cabinet screws. The cabinet doors leave little space for drawer pulls. Drill 1-1/2-in. holes for finger pulls or make a hand-pull cutout as I did.
Install the Cord/Hose Ports
Drill two four-inch holes through the side of the cabinet, then attach the ports to the outside of the cabinet with pan head screws.
Pro tip: Start the hole-saw cut from the inside. Once the guide bit comes through the outer cabinet, finish the cut from the outside to avoid any tear-out or splintering. The port covers will help hide sloppy cuts, but better to avoid them in the first place.
Attach Cabinet Doors to Tall Cabinet
I joined the four doors of this cabinet with 1/4-in. hardboard, using an approach similar to Step 13 in editor Mike Berner’s charging center project. I also upgraded to heavy-duty cup hinges for this larger, heavier door.
Make Foam Tool Inserts
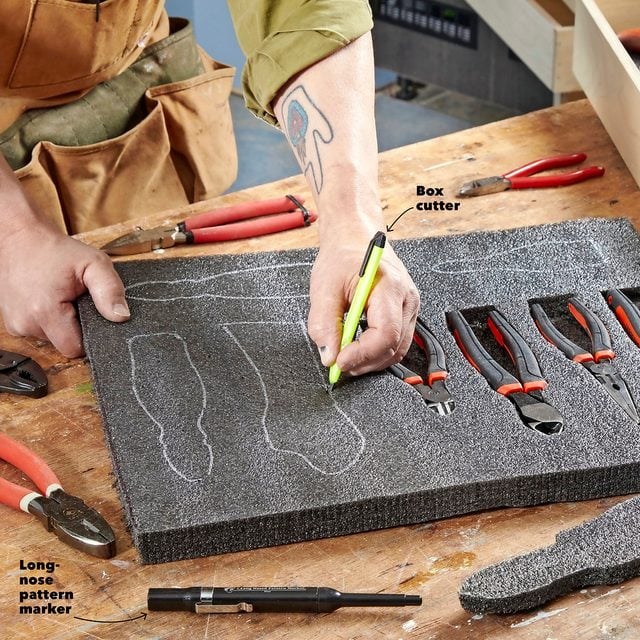
Use a box cutter and a straightedge to cut the foam drawer inserts. Place your tools on the foam where you want them, and trace them with a long-nose marker. Set the depth of a box cutter blade to match each tool and score the outlines. Kaizen foam is a stack of foam layers, so you can remove layers to the approximate depth of your cut.
Attach Drawer Slides to Large Pullout
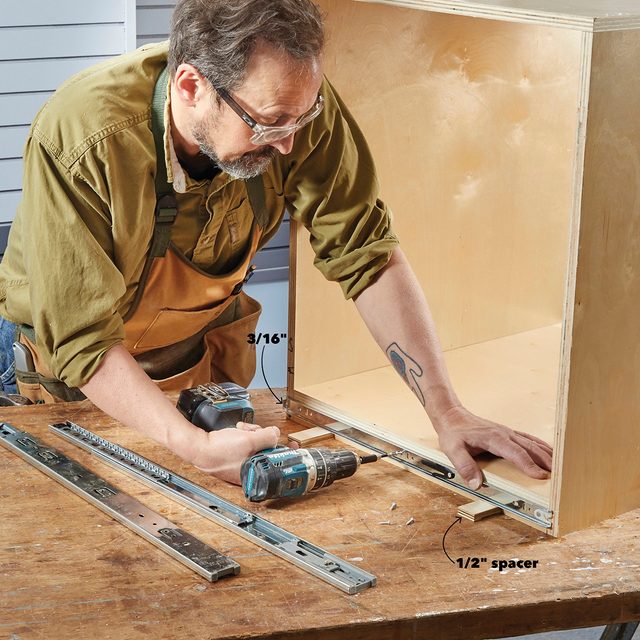
With the parts for the lower pullout (A — C) and storage boxes (D and E) assembled, use 1/2-in. spacers to attach the inner rail of the drawer slides to the base buildup (C) on the pullout box. Set the insert back about 3/16-in. from the front of the box. Attach the corner braces (E) — two on the top and two on the bottom — to square and stiffen the box.
Hang Storage Boxes on Lower Pullout
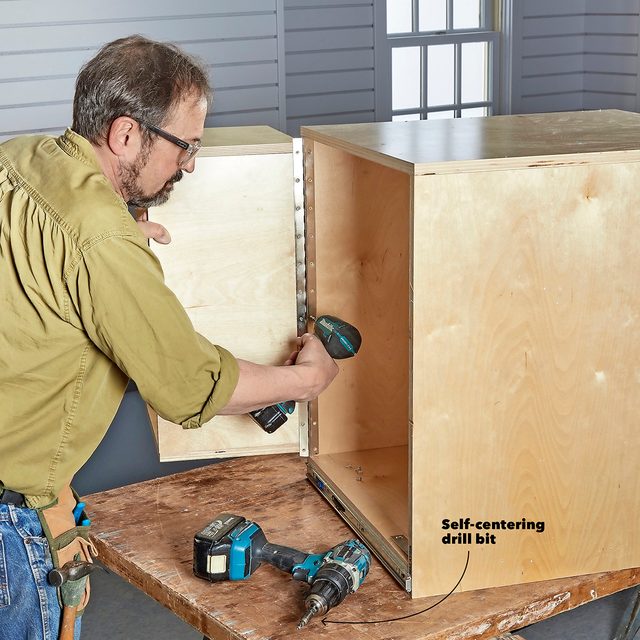
Cut the piano hinge to length. Install one side on the inner box, then attach the other to the lower pullout. A No. 4 self-centering bit gives quick and accurate screw placement for the hinges.
Install Storage Box Backs
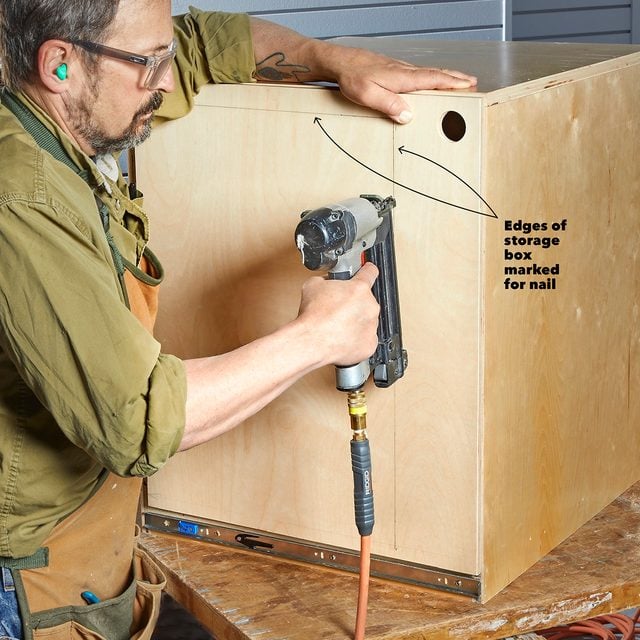
Mark the edges of the storage boxes on the backs (G) and fasten them using glue and brad nails. Using a 1-1/2-in. hole saw, cut a finger pull hole in the upper front corner of each back.
Install Lower Pullout Doors
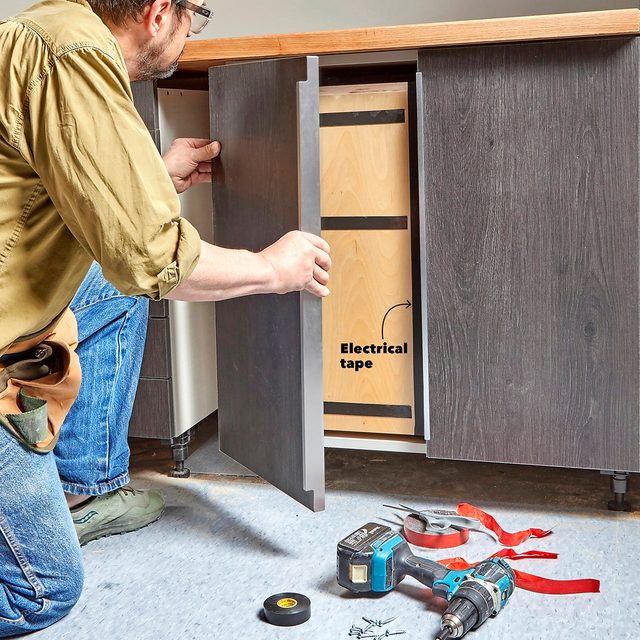
With the drawer slides installed on their supports (F), slide the lower pullout into place. I recommend drawer slides rated for at least 250 lbs. Loaded with tools and fasteners, this pullout pushed the limits of the 150-lb. slides I used. Place the original doors using double-sided tape, maintaining a consistent gap against the adjoining cabinets. Attach them from inside the pullout with wood screws.
Pro tip: Use black electrical tape to black out the light plywood and create a shadow line in the gap between the two doors.
Finishing Touches
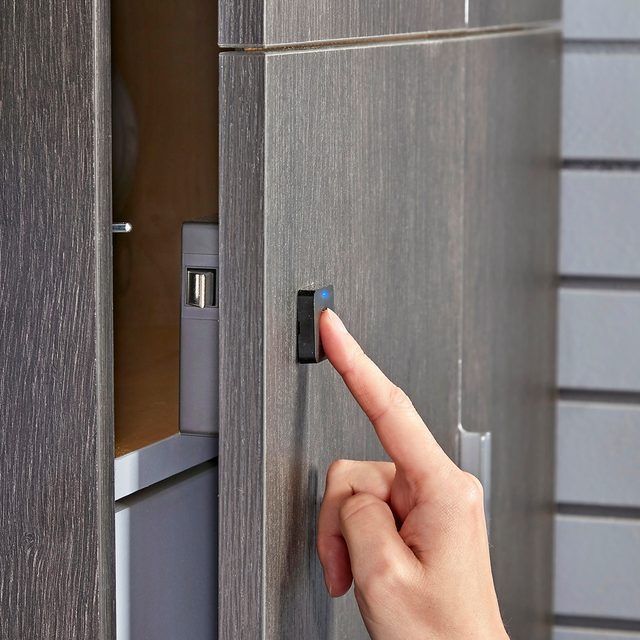
To safeguard valuable and heirloom tools in the tall cabinet, I installed a biometric lock. Installation was easy: I drilled a 3/4-in. hole in the door, mounted the lock and a strike plate, and then did a few simple steps to add my fingerprint.
Other final touches included adding peel-and-stick edge banding for the visible plywood edges, 1-1/2-in. nosing on the pegboard pullouts, magnetic catches on the lower storage boxes, and edging trim on the top of the lower pullout. I sealed the interior cabinet components with two coats of water-based polyurethane and painted others with latex enamel.
