How to Build a DIY Nightstand
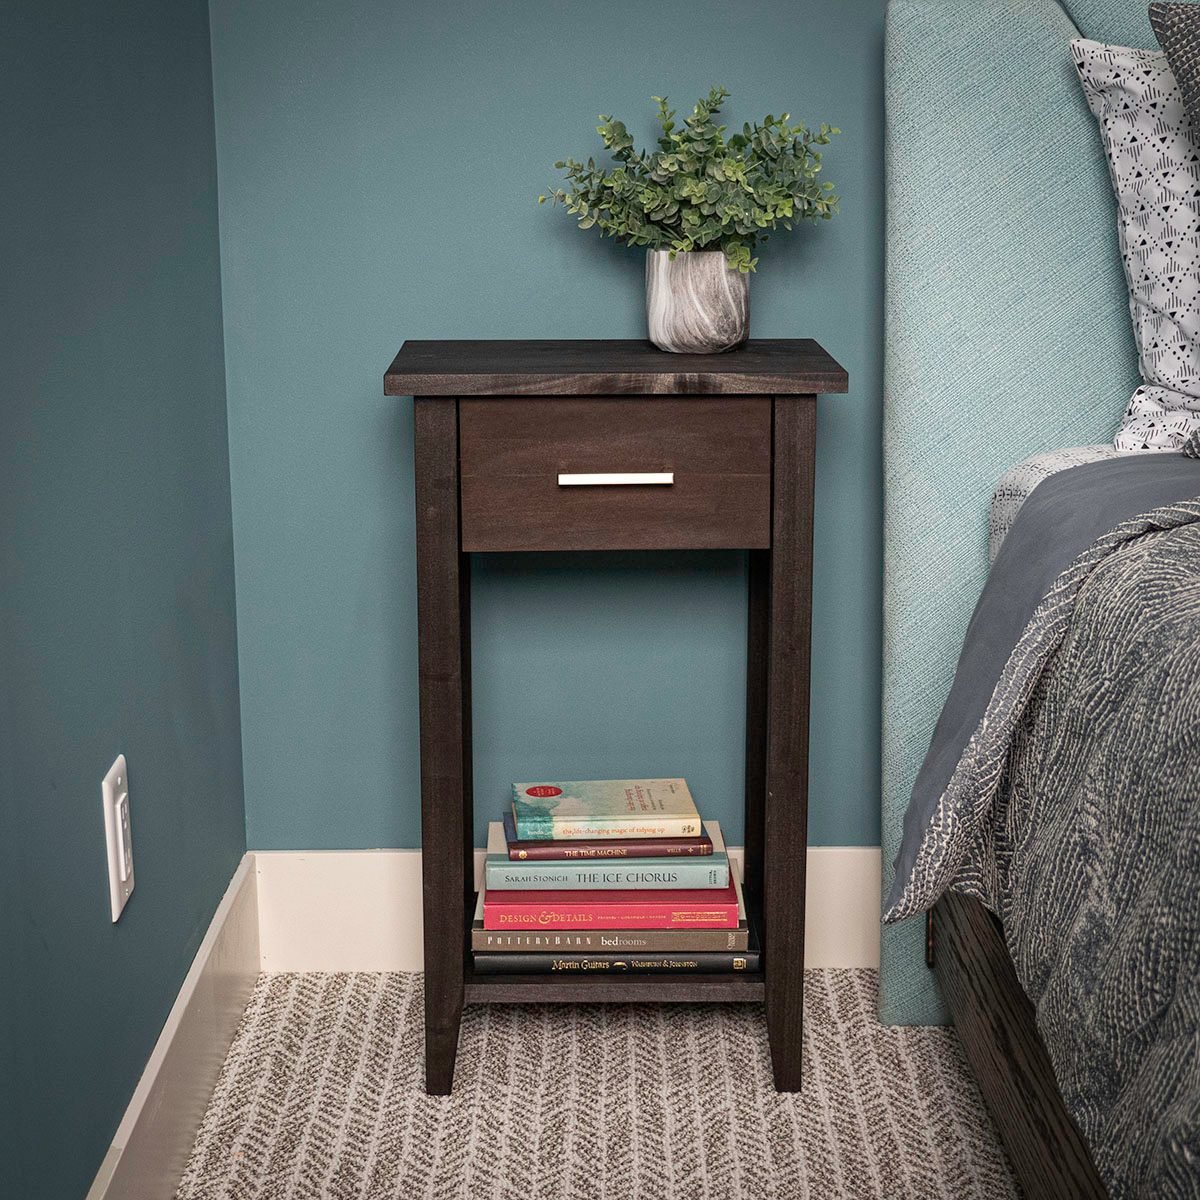
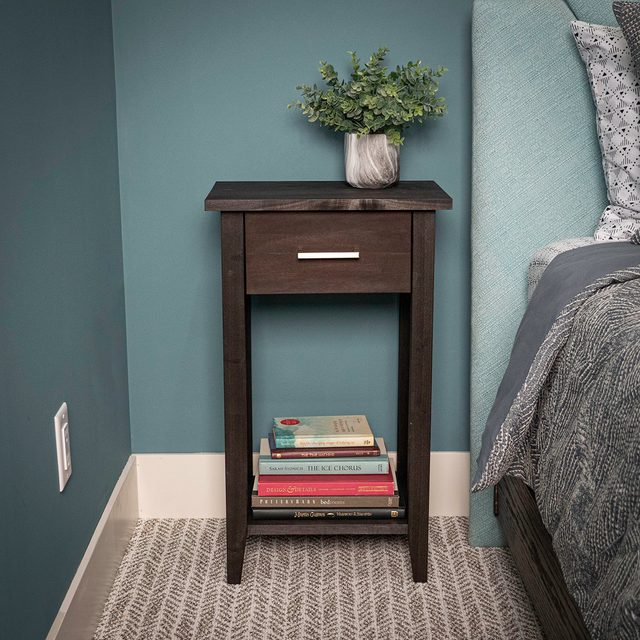
Learn how to build your own custom nightstand using minimal tools and moderate woodworking skills.
A full day
Intermediate
$50-75
Introduction
Here is an easy, inexpensive project anyone with moderate woodworking skills can build in a day, using minimal tools, dowels and glue.Tools Required
- 3/8-in. brad point drill bit
- Cordless drill
- Dowel jig
- Hearing and eye protection
- Measuring tape
- Miter saw
- Quick-Grip clamps
- Table saw
- 3/16-in. drill bit
- Phillips-head screwdriver
Materials Required
- 1-1/4" finish nails
- 12"x12"x1/4" baltic birch plywood
- 12"x24"x1/2" baltic birch plywood
- 150-grit sandpaper
- 2x2x30" poplar
- 3/4"x16"x48" poplar
- 3/8" dowels
- Drawer pull
- Paint or stain
- Polyurethane finish
- Wood glue
Project step-by-step (16)
Step 1
Cutting the Legs
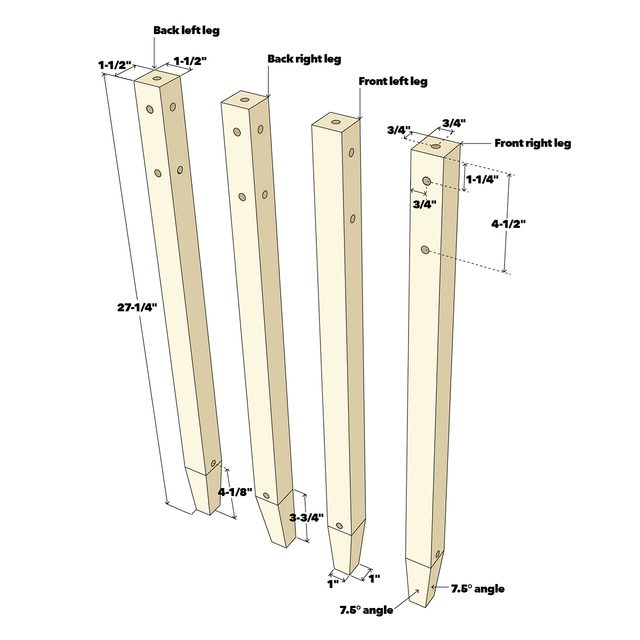
- Cut four 2x2s at 27-1/4 inches.
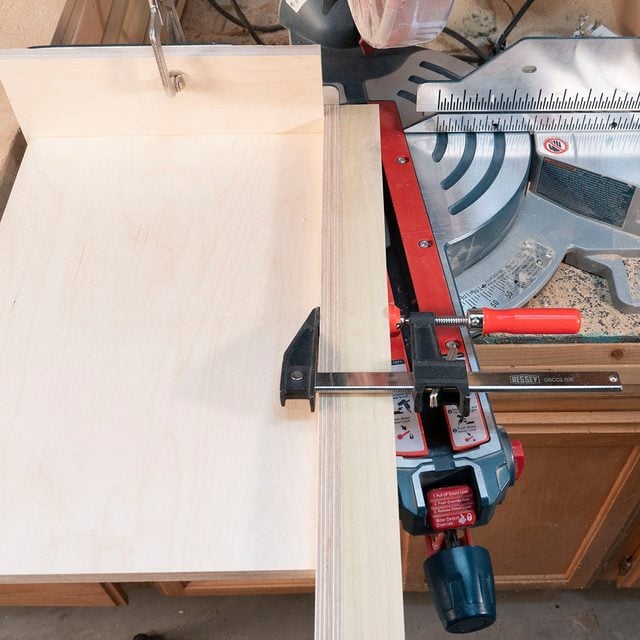
- Next, one inch in from the side and 3-3/4 inches up from the bottom, cut a 7-1/2-degree angle on two sides of each leg. You can build a jig to hold the leg while you cut it on a miter saw or a table saw. (See photo.)
Step 2
Cutting Parts
- Cut a top at 12 x 16-1/2 inches.
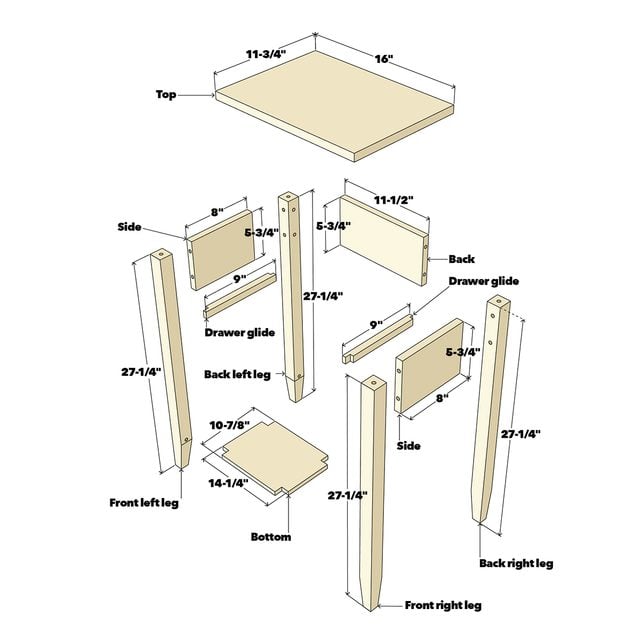
- Next, cut a shelf at 10-7/8 x 14-1/4 inches.
- From the remainder of the wood, make two rips at 5-3/4 inches. Now, cut two sides at 5-3/4 x 8 inches and the back at 5-3/4 x 11-1/2 inches.
Step 3
Mark for the Holes
- Set your adjustable square at 1-1/4 inches. From the top of each board, make pencil marks on both ends of the sides and back. Now make pencil marks on each of the four legs. (See drawings.)
- Next, set your adjustable square at 4-1/2 inches. Just as before, make pencil marks on the ends of both sides, the back and all four legs.
- Make another pencil mark 4-1/8 inches from the bottom of each leg. (See drawing.)
- Lastly, set your adjustable square at 3/4 inches. Mark the center of the boards at each of the lines you just made. Make another mark in the very center of the top of each leg.
- Pro tip: It’s important to pay close attention to the holes on each leg. They all differ from each other according to the orientation of the taper at the foot of the leg.
Step 4
Drilling Holes
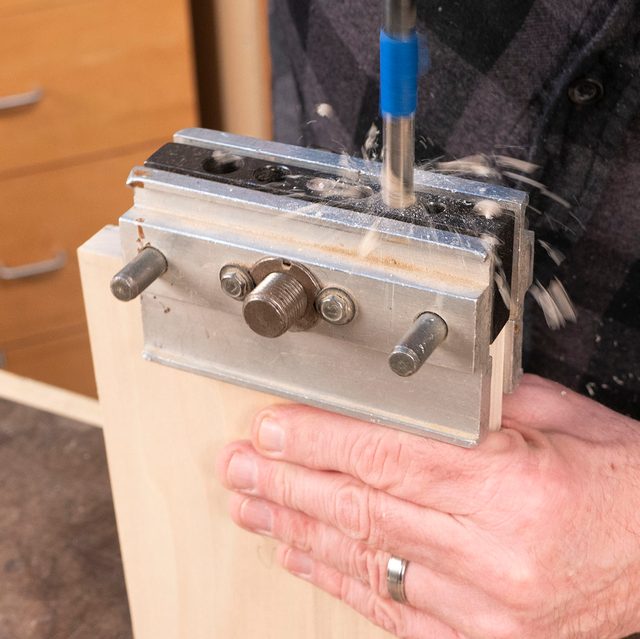
- Drill a 3/8 x 3/4-in. hole at the center of each mark you made on each of the sides, back and legs. A dowel jig works well for this procedure. (See photo.)
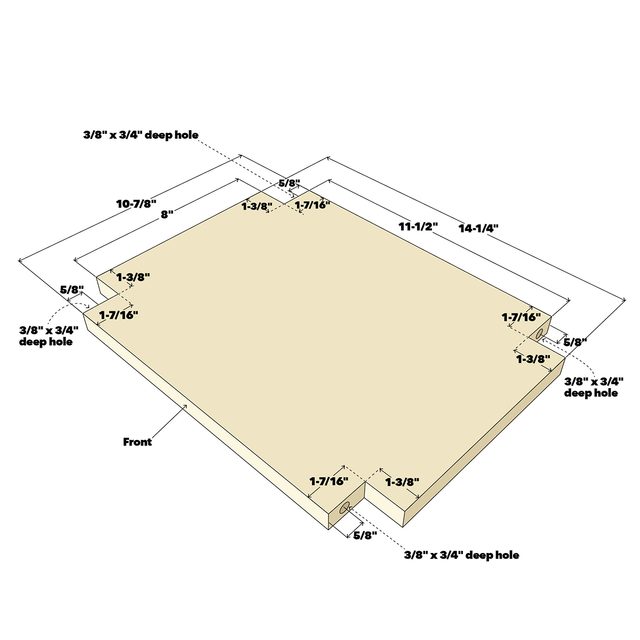
- Drill two holes 3/8 x 1-3/8 inches deep, 5/8 inch from the front and 5/8 inch from the back, on both ends of the shelf. (See drawing in Step 9.)
- Pro tip: Use a drill stop or a piece of tape to mark your drill bit. This will keep you from drilling too deep.
Step 5
Sanding
- Now is a good time to sand all the parts with 150-grit sandpaper, before you start to assemble the nightstand.
Step 6
Assemble the Sides and Legs
- Apply wood glue on one end of a side, letting some of the glue flow into the dowel hole. Insert a dowel into each hole.
- Lay the back-left leg flat so the side with the two holes is facing up. Add a few drops of wood glue into each hole.
- Align the dowels you inserted in the side with the holes on the back-left leg. Insert the dowels into the holes.
- Apply wood glue to the other end of the side, letting some of the glue flow into the dowel holes. Insert a dowel into each hole.
- Add a few drops of wood glue into each hole on the front-left leg. Align the holes on the front-left leg with the dowels on the side and insert the dowels into the holes.
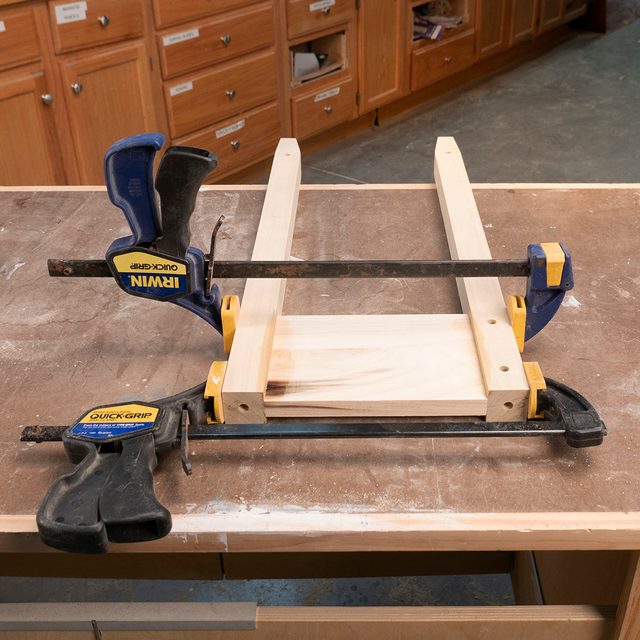
- Secure the legs and side together with two clamps. Wipe away any excess glue with a damp rag.
- Repeat the previous procedure gluing both back- and front-right legs to the other side. Don’t forget to wipe away any excess glue with a damp rag. Let both leg assemblies dry.
Step 7
Cut Drawer Glides
- Cut two drawer glides at 3/4 x 3/4 x 9 inches.
- Cut a 3/8 inch wide x 3/8 inch deep notch on one end of both drawer glides.
- Cut another notch 5/8 inch wide x 3/8 inch deep on the other end of both drawer glides. (Refer to the drawing in Step 3.)
Step 8
Install Drawer Glides
- Draw a line on the inside of each side board 2-9/16 inches from the top of the board.
- Attach a drawer glide on the inside of each side at the 2-9/16 inches line using glue and 1-1/4-in. nails.
Step 9
Notch Shelf
- Cut 1-3/8 x 1-7/16-in. notches in all four corners of the shelf using a hand saw, jigsaw or table saw. (See drawing.)
Step 10
Assemble Legs and Back
- Apply wood glue on one end of the back, letting some of the glue flow into the dowel hole. Insert a dowel into each hole.
- Lay the left leg assembly flat so the holes are facing up. Squirt a few drops of wood glue into each hole.
- Align the dowels you inserted in the back with the holes on the back-left leg. Insert the dowels into the holes.
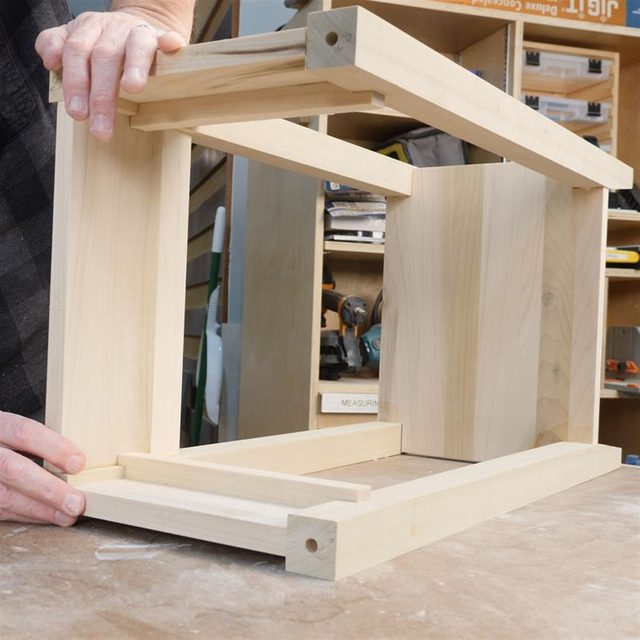
- Apply wood glue on both notches of one end of the shelf, letting some of the glue flow into the dowel hole. Insert a dowel into each hole.
- Align the dowels on the shelf with the holes on the legs and insert the dowels into the holes. Wipe away any excess glue.
- Apply wood glue to the other end of the back and shelf, letting some of the glue flow into the dowel holes. Insert a dowel into each hole.
- Add a few drops of wood glue into each hole on the right leg assembly. Align the holes with the dowels on the back and shelf, and insert the dowels into the holes. Wipe away any excess glue.
- Secure the back, shelf and leg assemblies together with clamps. Wipe away any excess glue with a damp rag and let the glue dry completely.
Step 11
Attach Top
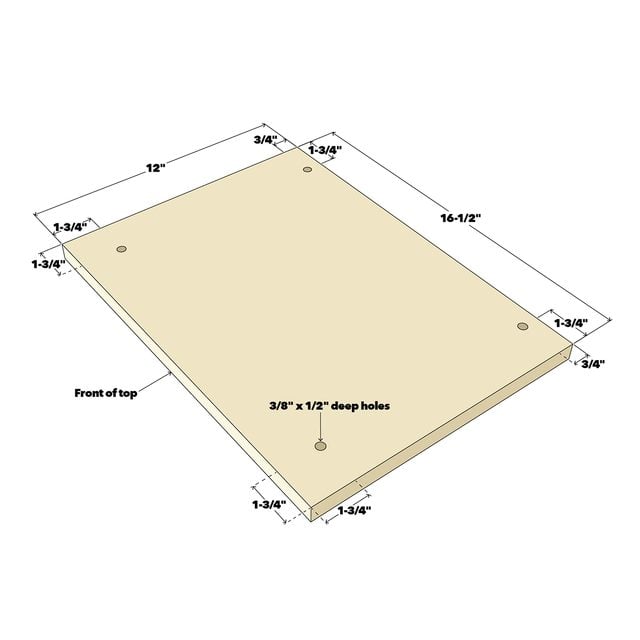
- Drill four 3/8 x 1/2 inch deep holes on the underside of the top, 1-3/4 inches in from the sides, 1-3/4 inches from the front and 3/4 inches from the back. (See drawing.)
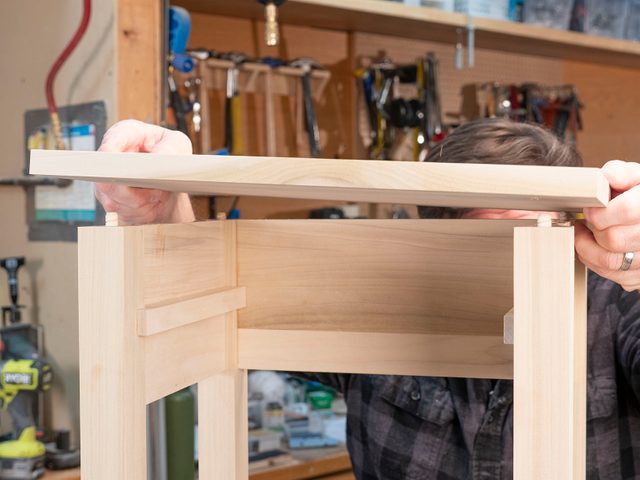
- Apply wood glue on the top of each leg and side, letting some of the glue flow into the dowel hole of the legs. Insert a dowel into each hole.
- Add a few drops of wood glue into each hole on the underside of the top.
- Align the holes on the top with the dowels on the legs and insert the dowels into the holes.
- Secure with four clamps and wipe away any excess glue. Let the glue dry completely.
Step 12
Drawer Front
- Glue and clamp together the remainder of the wood to create a drawer front. Let the glue dry for at least one hour.
- Cut a drawer front at 5-5/8 x 11-1/4 inches.
Step 13
Cut Drawer Box Parts
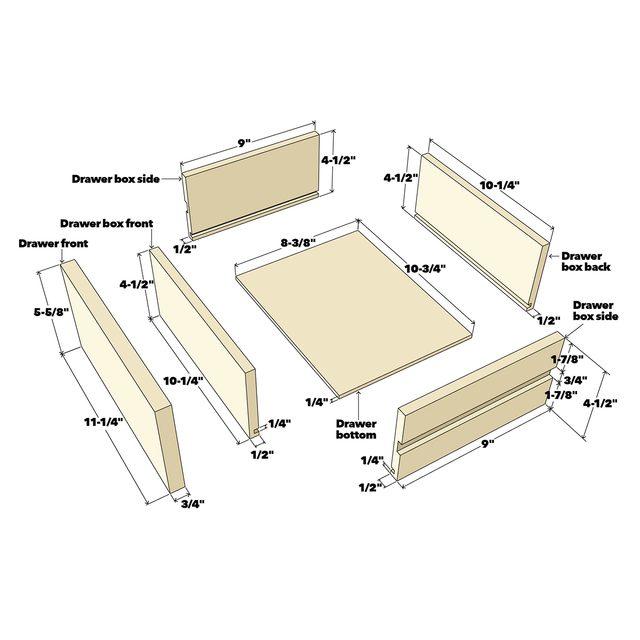
- From the 1/2-in. plywood, cut two sides at 4-1/2 x 9 inches. Cut a front and back at 4-1/2 x 10-1/4 inches. Cut a bottom at 8-3/8 x 10-3/4 inches from the 1/4-in. plywood.
- Cut a 1/4 x 1/4-in. groove in the sides, front and back, 1/4 inch from the bottom. See drawing.
- Now flip the sides over and cut a groove 3/4 inch wide x 1/4 inch deep in the center of each side, 1-7/8 inches from the bottom and 1-7/8 inches from the top. (See drawing.)
Step 14
Assemble the Drawer Box
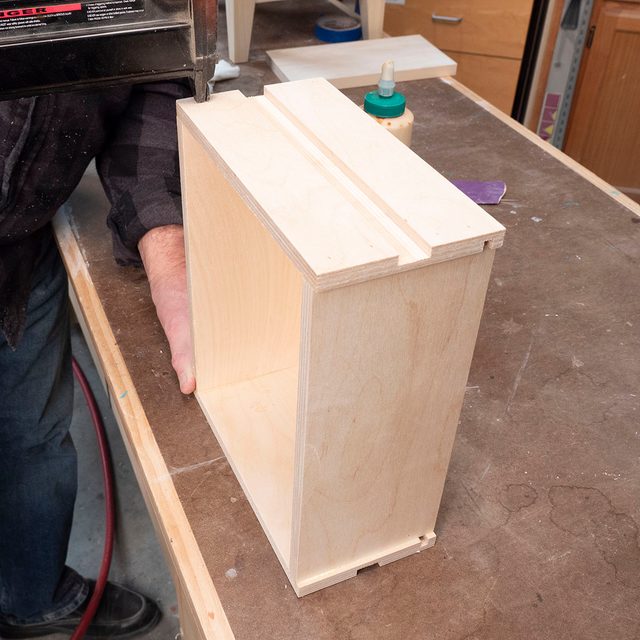
- Apply wood glue to one end of the drawer box front.
- Lay the drawer box front flat with the groove facing up. Now insert the drawer bottom into the 1/4-in. groove.
- Next, take one of the sides and insert the drawer bottom into the 1/4-in. groove.
- Align the end of the drawer side to the outside of the front and attach it with 1-1/4-in. nails.
- Attach the other drawer side in the same manner.
- Apply wood glue to both ends of the drawer back and attach it to both sides with 1-1/4-in. nails.
Step 15
Sand and Finish
- With the drawer out of the nightstand, do one more pass with the sandpaper touching up any scratches or blemishes that may have occurred while assembling.
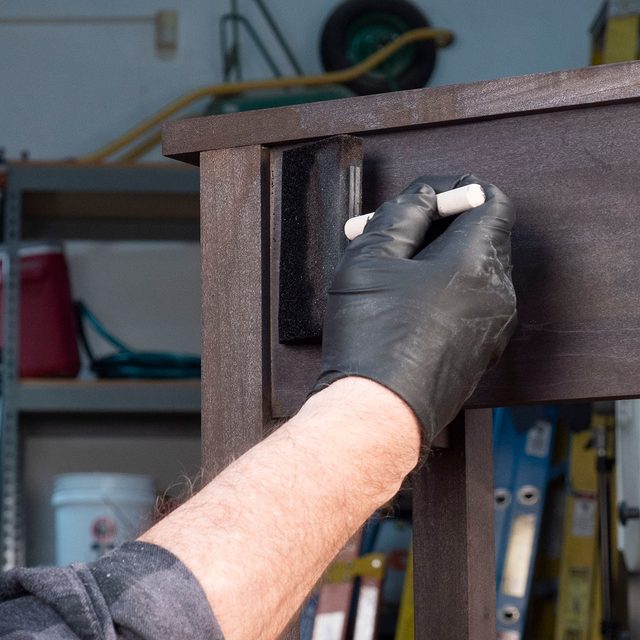
- At this point, you can choose to color your nightstand with wood stain or dye.
- Seal the entire nightstand and drawer with wood sealers like varnish or polyurethane.
Step 16
Attach the Drawer Front
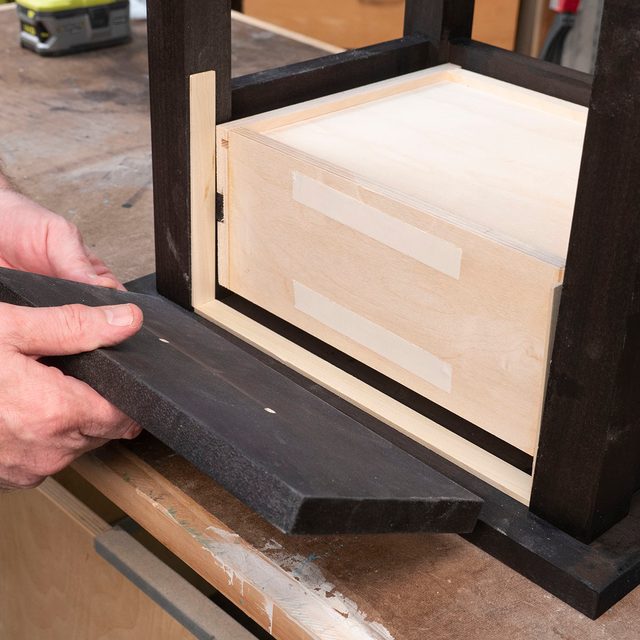
- Once all the glue is dry on the nightstand and drawer, flip the nightstand upside down on its top and slide the drawer box in on the drawer glides.
- Use 1/8-in. strips of wood to achieve a perfect 1/8-in. reveal around the drawer front.
- Peel and stick a few pieces of two-sided tape to the front of the drawer box.
- Carefully stick the drawer front to the drawer box.
- Next, remove the drawer for the nightstand. Drill the two 3/16-in. holes in the center of the drawer front, through the drawer front and drawer box. Attach the drawer pull from the inside of the drawer box.
Originally Published: March 11, 2021
