How To Deal With the Grooves When Painting Wood Paneling

Ready to paint that old wood paneling, but not sure what to do with the grooves? Get rid of them with joint compound.
Our editors and experts handpick every product we feature. We may earn a commission from your purchases.
I still remember the basement of our Midwestern home. My parents bought the house nearly new in the early 1970s, when wood paneling was all the rage — it covered all four walls of the basement. At the time, it was right in style. Four decades later, that paneling might be long gone.
But ripping out wood paneling isn’t the only option for that dark heavy wall covering. Wood paneling can be painted. It’s a less messy, less costly option than removing it and dealing with whatever material you find underneath.
Yet nothing’s that simple, right? To erase the dated look of paneling, you’ll need to deal with the telltale grooves that give away what’s lurking underneath. We called on an expert to help.
How To Cover the Grooves in Paneling
We asked Jeff Shipwash, who fixes and flips houses through his Knoxville, Tennessee-based business, Shipwash Properties, how his team deals with wood paneling during renovations.
“We actually encounter many homes that still boast wood paneling within,” says Shipwash. “In the past, we would rip it out, or modify it to make it appear more modern.” But if you want to keep the paneling and make it appear more like drywall, he says, “Prep work is critical in order to make sure you get a great finish.”
Step 1: Fill the grooves with joint compound
Shipwash says his team usually starts by filling in the groves with a quality joint compound, aka drywall mud or joint mud. He recommends USG joint compound. You’ll also need a putty knife.
“This step is only necessary if you desire the finished product to look more like [drywall] and less like paneling,” Shipwash says. “In my opinion, you need to fill in the grooves with at least two coats of drywall mud.” Also, sand between coats.
If you hire a contractor for the job, Shipwash says the cost will vary by the project size. “The average we spend per day on a drywall crew is around $1,000,” he says. “This is for a crew of two or three experienced contractors. I have seen a few solo contractors that bill around $400 to $500 per day.”
Step 2: Sand the entire wall
Once your two coats are complete, sand down the entire wall with fine grit sandpaper, ideally in the 180- to 220-grit range.
“This will do two things,” says Shipwash. “First, it will level the joint mud level with the rest of the wall. Second, it will scuff the paneling to allow paint and primer to better adhere and avoid chipping.”
After sanding, clean the walls with a damp sponge or rag.
Step 3: Add primer and paint
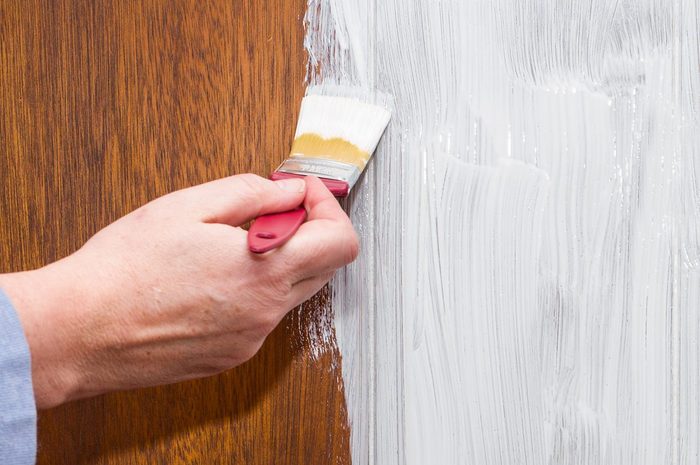
Next, apply a high-quality bonding primer. An oil-based primer works best. But if you don’t want to deal with the odor and the clean-up, opt for a stain-blocking latex primer instead.
Two coats of primer is ideal. You might get by with one coat if you’re painting with a darker color. Once the walls are primed to your satisfaction, Shipwash says, “you’re ready to paint the paneling to any color you desire.”
Note that in this article on painting wood paneling, our pro recommends an oil-based primer and paint, applied with a paint sprayer for the smoothest finish. That method calls for a lot of ventilation, equipment and clean-up. Water-based paints and primers will work, but applying them with a brush or roller won’t achieve the seamless look of a paint sprayer.
Is it Time to Rethink That Paneling?
Filling in paneling grooves with joint compound may be doable, but it’s labor-intensive for a DIYer.
“If you’re hiring a contractor to give your walls more of a [drywall] look, I honestly recommend just having them replace the paneling entirely,” Shipwash says. “This will result in about the same amount of labor time and the finished product will be better.”
Plus, maybe you shouldn’t be so quick to get rid of those grooves. “As a flipper,” says Shipwash, “I have noticed the trend of paneling to be coming back in style.” He says that many homeowners like to leave a wall of paneling as an accent to complement the surrounding, non-paneled walls.
“If you enjoy the look of the paneling but hate the color, skip the mudding step and go straight to cleaning, priming and painting.” he says. Or just clean the wood paneling and usher in a retro trend!


