Learn the Anatomy of a Central Home Air Conditioner
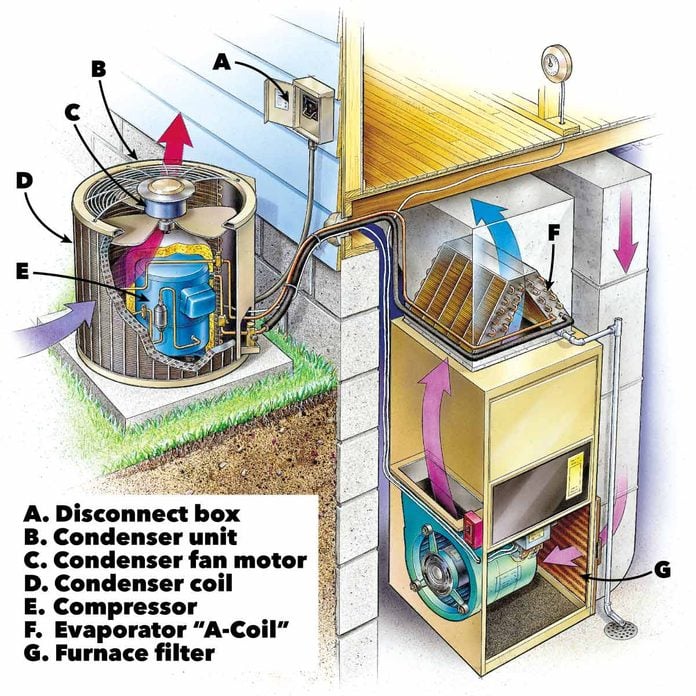
Central home air conditioner service systems consist of two major components: a condenser that sits outside your house and the evaporator coil (often referred to as an A-coil) that sits in the plenum of your furnace or air handler. The refrigerant in the A-coil picks up the heat from your home and moves it to the outdoor condensing unit. The condensing unit fan blows outside air through the condensing coil to remove the heat. The condensing unit houses the three parts replaceable by a DIYer: the AC contactor, the start/run capacitor(s) and the condenser fan motor. The condensing unit also houses the compressor, but only a pro can replace that. The A-coil has no parts that can be serviced by a DIYer.
Clean the Condenser Coils
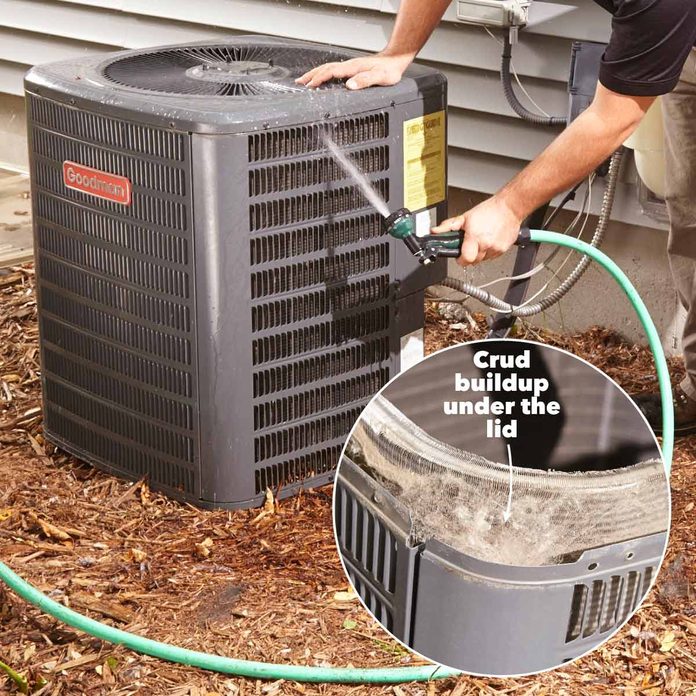
It’s really easy to clean an air conditioner condenser, and it’s one of the regular maintenance tasks that will extend the life of your unit.
- Aim your garden nozzle upward into the top of the condenser coil to remove the crud buildup under the lid.
- Work all the way around the coil. Then aim the nozzle down and flush the debris down the coil fins.
- Adjust the nozzle to a gentler stream and shoot water directly into the coils to flush out any remaining debris.
Test the Fuses
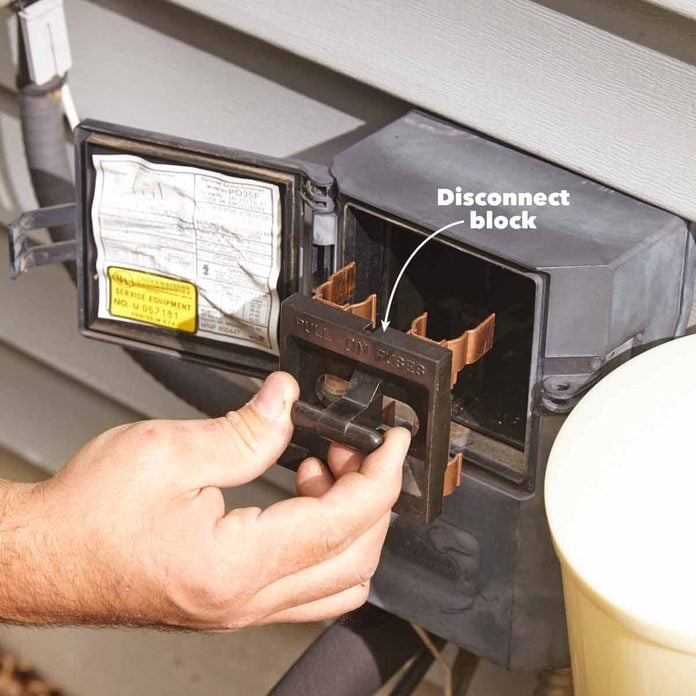
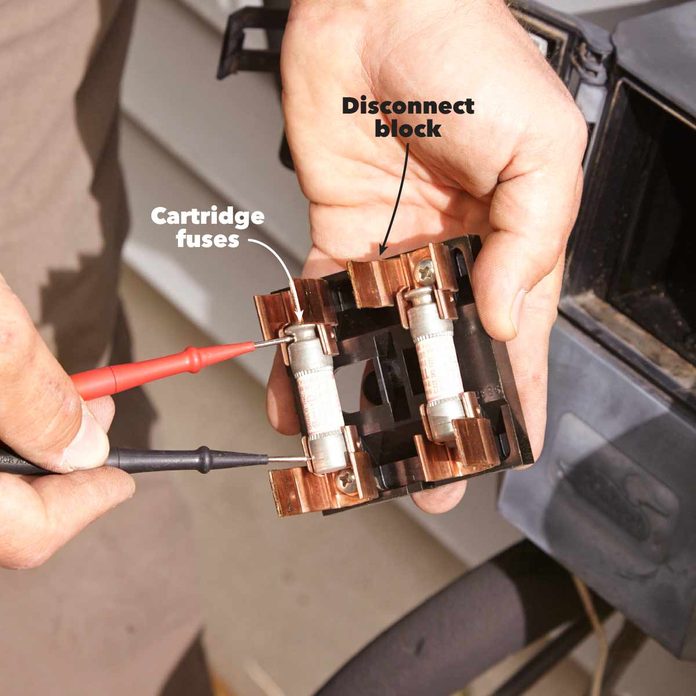
Many disconnect blocks contain two cartridge fuses. Check them before you proceed with repairs. A blown fuse is a sign of a failing part inside the condensing unit. So don’t just replace it and think you’ve solved the problem. Instead, replace the parts, install new fuses, and fire up the unit. If it blows again, call a pro—you’ve got more serious issues.
How to Check Fuses In the Disconnect Block
- Set your multimeter to the lowest Ohms scale and touch the red and black leads to opposite ends of each fuse.
- If you get a numerical reading, the fuse is good.
- A zero, a minus symbol, or an infinity symbol (∞) indicates a blown fuse.
Inspect the Inside of the Access Panel
Follow the electrical conduit from the house — that’s where you’ll find the access panel. With the power off, remove and store the access-panel retaining screws and remove the panel. Before you replace any parts, check for rodents’ nests or evidence of chewing on wires and electrical connectors.
If you find broken wires or chewed insulation and can safely handle electrical repairs, discharge the capacitor first. Then repair the wires and clean out the nest. Otherwise, call a pro.
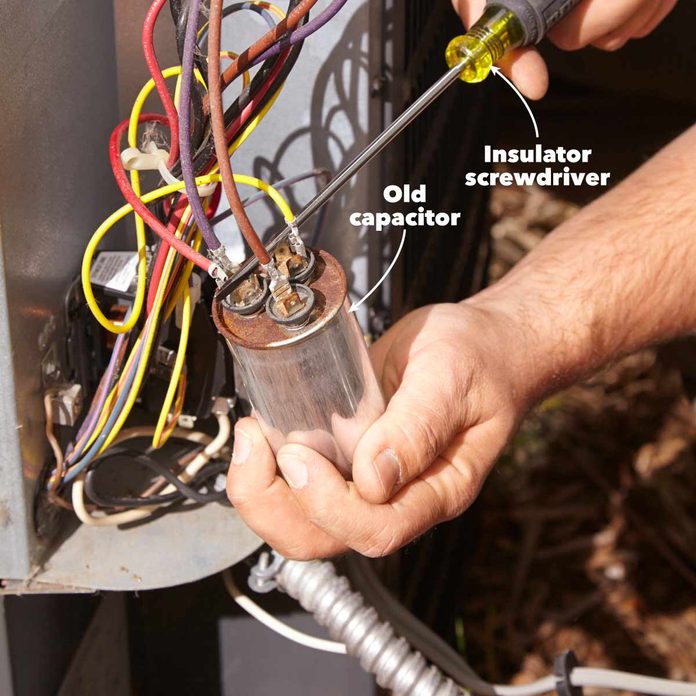
How to Discharge a Dual Start/Run Capacitor
- Remove the capacitor from the retaining bracket.
- Then touch an insulated screwdriver between the HERM (or “H”) terminal and the COMMON (or “C”) terminal.
- Do the same between the FAN (or “F”) terminal and the “C” terminal.
- On single-mode capacitors, just make a short between the two terminals.
Replace the Start/Run Capacitor(s)
All air conditioning service units have at least one capacitor. The capacitor stores electricity and releases it during compressor and condenser fan startup to give both motors an extra jolt of power. And it smooths out voltage fluctuations to protect the compressor and condenser fan motor from damage.
Capacitors can degrade slowly, providing less startup power over time. Or they can fail in an instant. Gradual capacitor failure can go unnoticed for a long time, stressing the compressor and condenser fan motor windings, resulting in their early failure. Since capacitors are cheap, it pays to proactively replace yours about every five years.
How to Replace a Capacitator
- Take a photo of the wires before disconnecting anything (you may need a reference later on).
- Discharge the stored energy in the old capacitor.
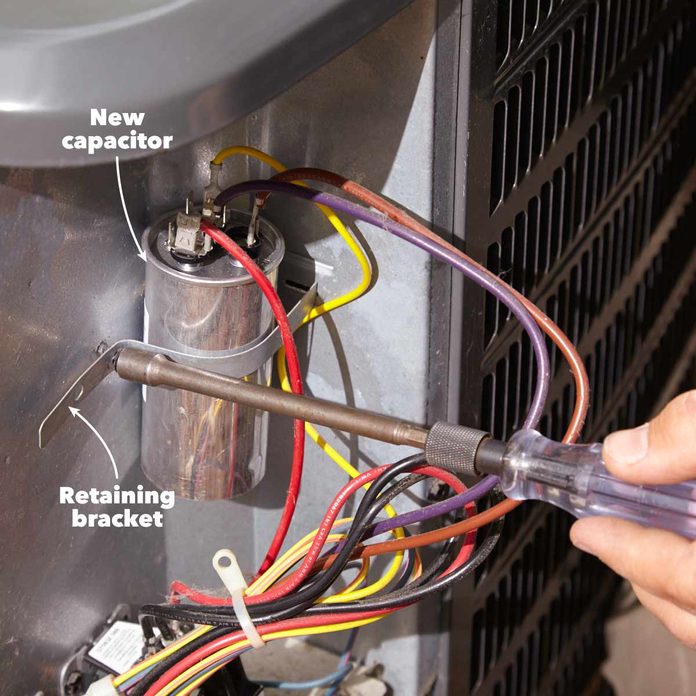
- Use needle-nose pliers to pluck one wire at a time from the old capacitor and snap it onto the corresponding tab of the new capacitor. The female crimp connectors should snap tightly onto the capacitor tabs.
- Wiggle each connector to see if it’s tight. If it’s not, remove the connector and bend the rounded edges of it so it makes a tighter fit on the tab.
- When you’ve swapped all the wires, secure the new capacitor.
WARNING: Discharge the capacitor before disconnecting wires or removing it from its bracket.
Replace the AC Contactor
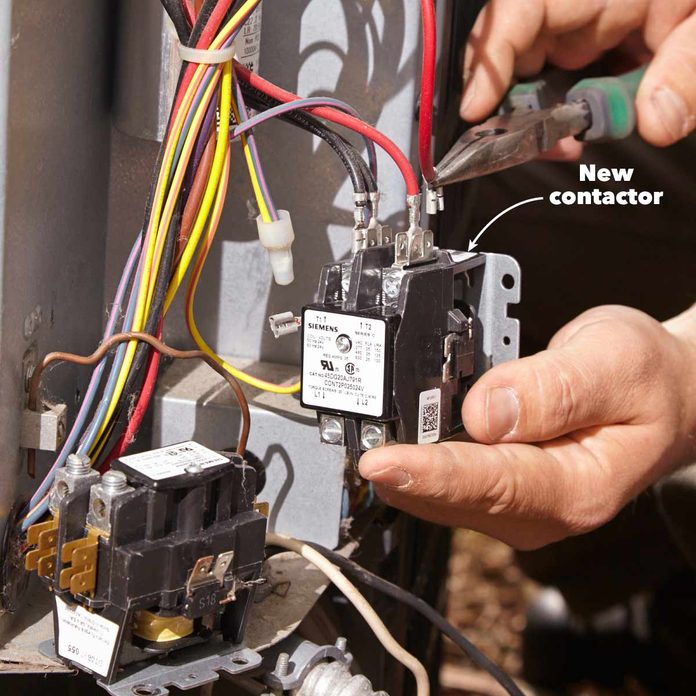
An AC contactor is a $25 mechanical relay that uses low-voltage power from the thermostat to switch 220-volt high-amperage current to the compressor and condenser fan. AC contactors can wear out and are at the top of the list of common air conditioning service failures. Even if your AC contactor is working, it pays to replace it every five years or so. Unscrew the old AC contactor before removing the wires. Then move the wires to the new unit.
- Yank a connector off the old contactor and move it to the same location on the new part.
- Tighten the connectors where needed.
- Secure the new contactor in the condensing unit.
How to Test Your Repairs
- Reinstall the access panel and disconnect block.
- Turn on the circuit breaker and furnace switch, then set the thermostat to a lower temperature and wait for the AC to start.
- The compressor should run and the condenser fan should spin.
- If the compressor starts but the fan doesn’t, the fan motor is most likely shot.
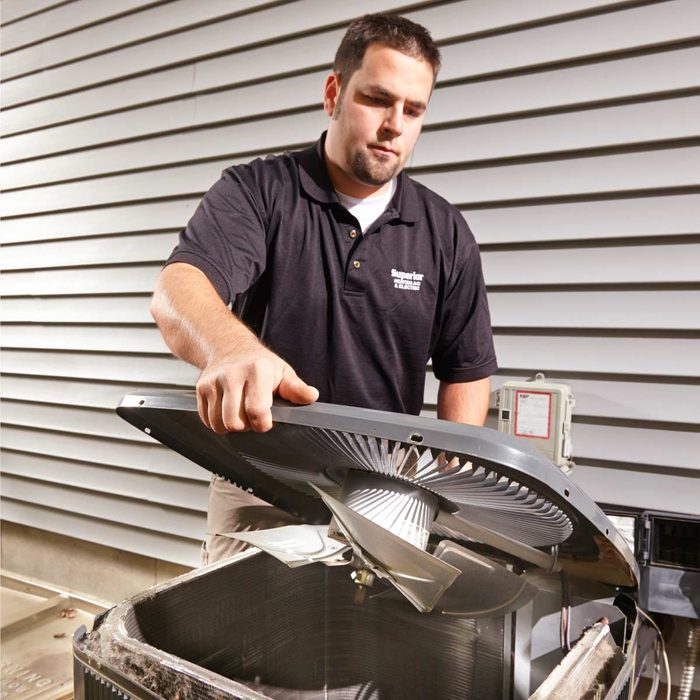
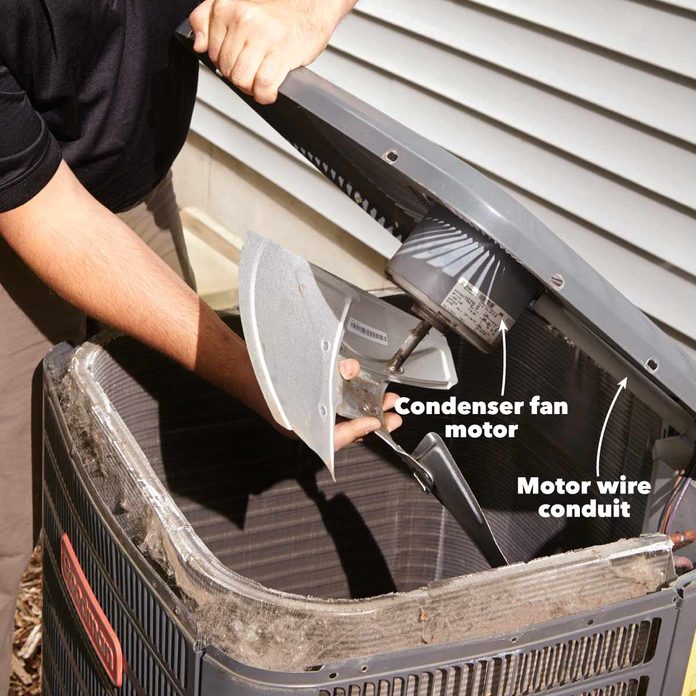
- Shut off the power and remove the screws around the condenser cover.
- Lift the cover and remove the fan blade and motor.
- Reinstall the blade and secure the cover.
- Then repower the unit and see if the fan starts.
- If it doesn’t, you’ve given it your best shot—it’s time to call a pro.
Be Patient at Startup
AC units and thermostats have built-in delay features when they’re shut down and then repowered. The delay can be as long as 10 minutes. And, if you’ve subscribed to an energy-saving device from your local power utility, the unit can take even longer to reset. If you’ve installed the parts shown and reinstalled the disconnect block, repowered the circuit breaker, turned on the switch at the furnace, moved the thermostat to AC mode and lowered the temperature below the indoor temperature, and the unit doesn’t fire up after 30 minutes, it’s time to call a pro.
