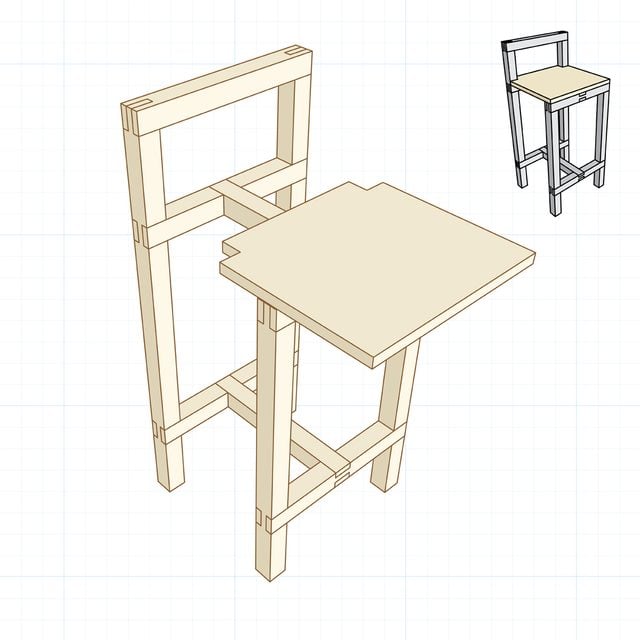
How to Build a DIY Barstool
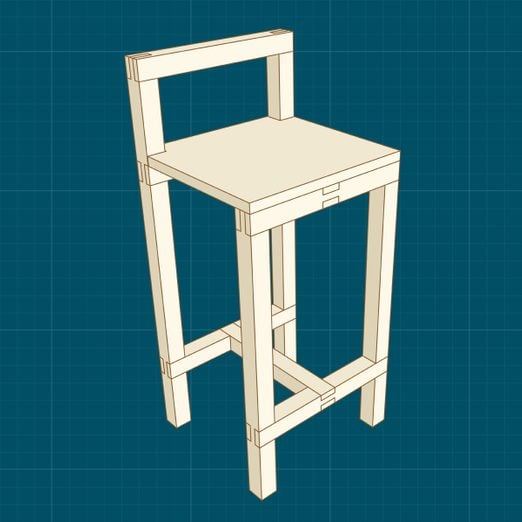
If you know your way around a table saw, you can make this barstool. Read on to learn how.
Two days
Intermediate
$100 - $200
Introduction
This barstool is a perfect way to practice your bridle joint skills. A bridle joint has the strength of a mortise and tenon joint. But unlike a mortise and tenon, all the joint cutting can be done on a table saw. No fussy handwork is needed. When glued together, this is a virtually indestructible stool. If you really want to beef it up, peg the joints with draw-bored dowels. Don’t want the back rest? Leave it off and make the front and back assemblies identical.Tools Required
- Miter saw
- Table saw
- tenon cutting jig
Materials Required
- Hardwood lumber
- Wood glue
Cutting List
Overall dimensions: 31-1/2-in. H x 13-in. W x 14-in. D
| KEY | QTY. | PART | DIMENSION |
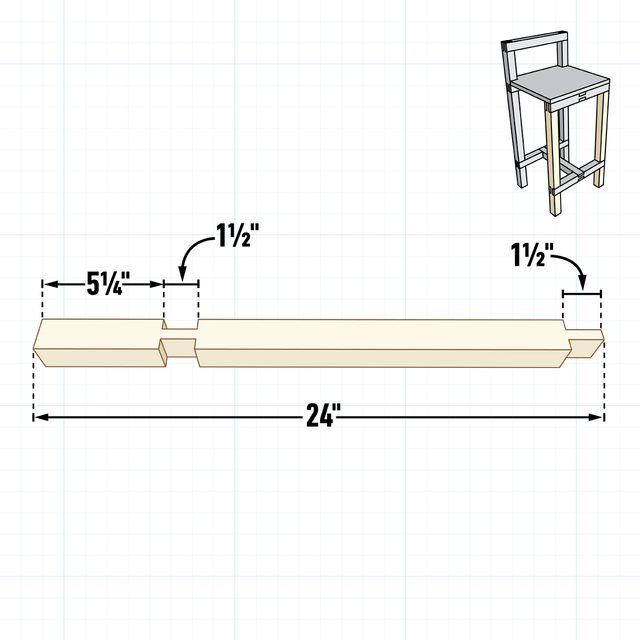
| A | 2 | Front leg | 1-1/2″ x 1-1/2″” x 24″ |
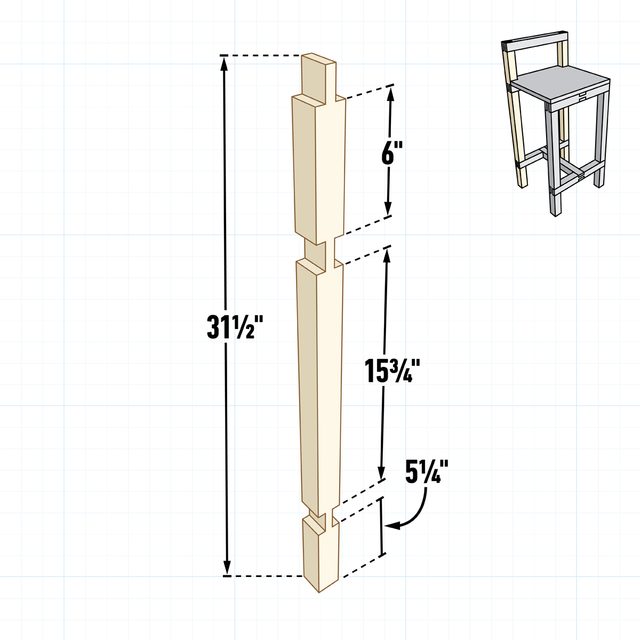
| B | 2 | Back Leg | 1-1/2″ x 1-1/2″” x 31-1/2″ |
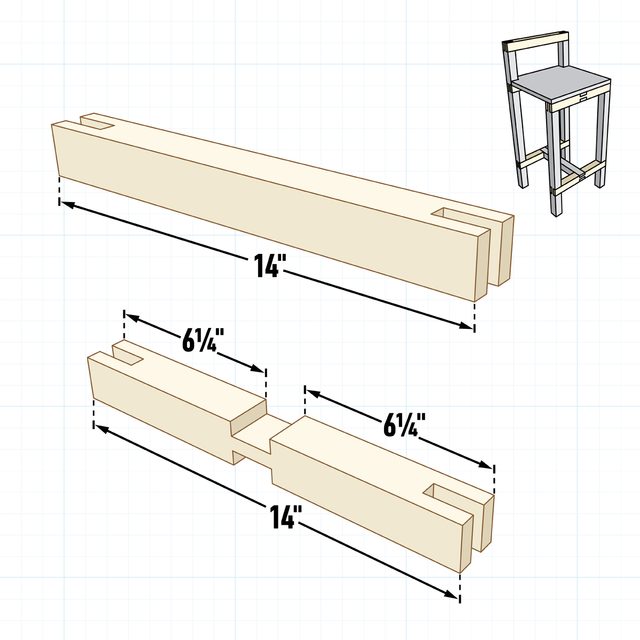
| C | 5 | Long stretcher | 1-1/2″ x 1-1/2″” x 14″ |
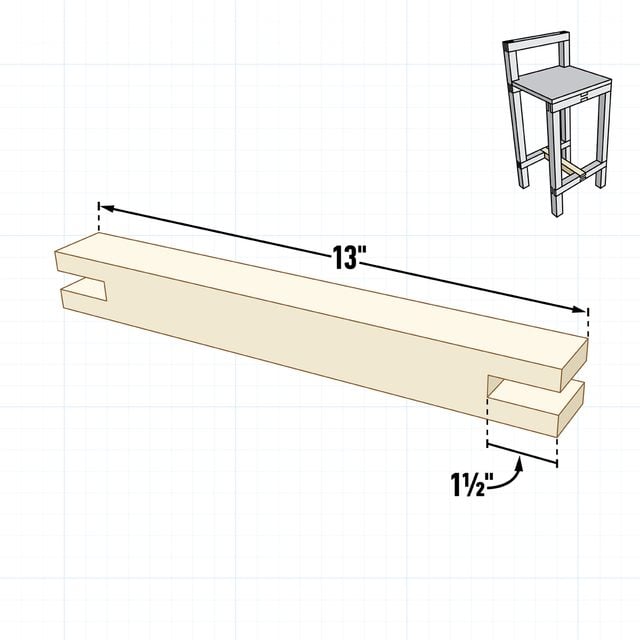
| D | 2 | Short stretcher | 1-1/2″ x 1-1/2″” x 13″ |
| E | 1 | Seat | 3/4″ x 13″ x 14″ |
Project step-by-step (9)
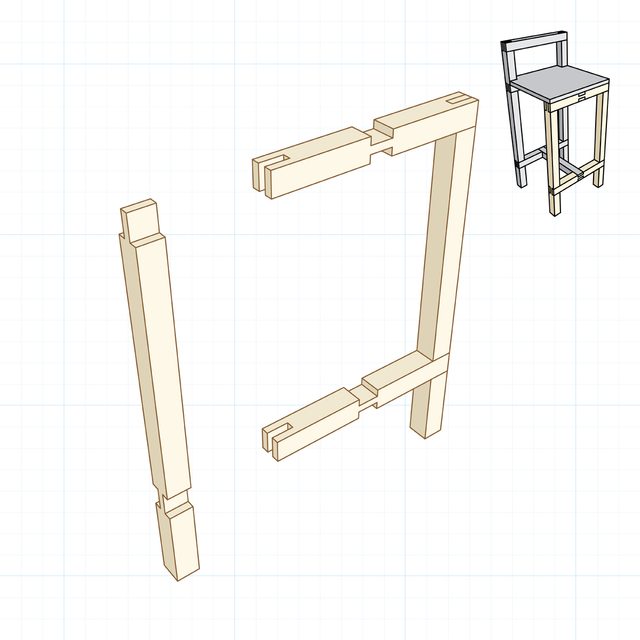
Cut the Front Legs
After milling all the lumber down to 1-1/2-in. x 1-1/2-in., cut the front legs to length. Lay out the bridle joints. Install a dado set in your table saw and cut each joint.
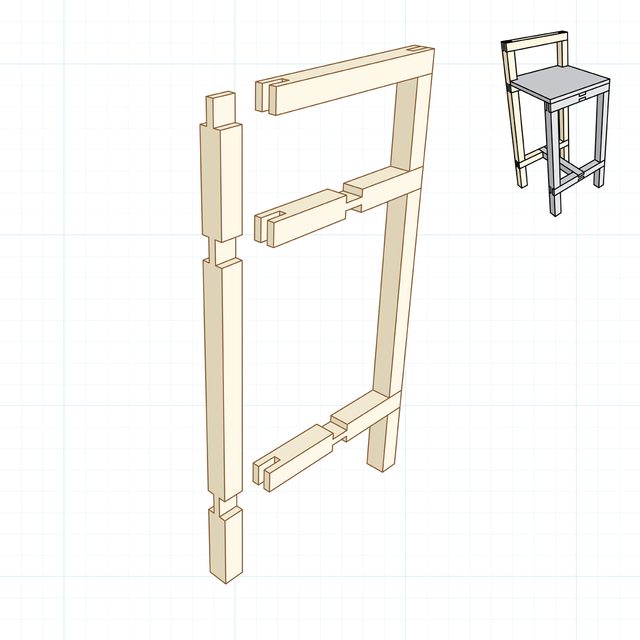
Make the Back Legs
Lay out the bridle joints on the back legs, then cut them using a dado set in your table saw.
Make the Long Stretchers
Cut all five long stretchers to length. Using a tenon cutting jig on your table saw, cut the end joints in each long stretcher. Cut the center joint on four of the five long stretchers with a dado set in your table saw.
Make the Short Stretchers
Cut the short stretchers to length. Cut the end joints, again using a tenon cutting jig on your table saw.
Make the Seat
Glue up boards to make the seat. After the glue dries, sand the seat. Cut out the corners to fit between the back legs.
Assemble the Front
Apply glue to all the mating surfaces on the front legs and stretchers. Assemble the joints, let the glue dry, then sand the assembly.
Assemble the Back
Apply glue to all the mating surfaces on the back legs and stretchers. Assemble the joints, let the glue dry, then sand the assembly.
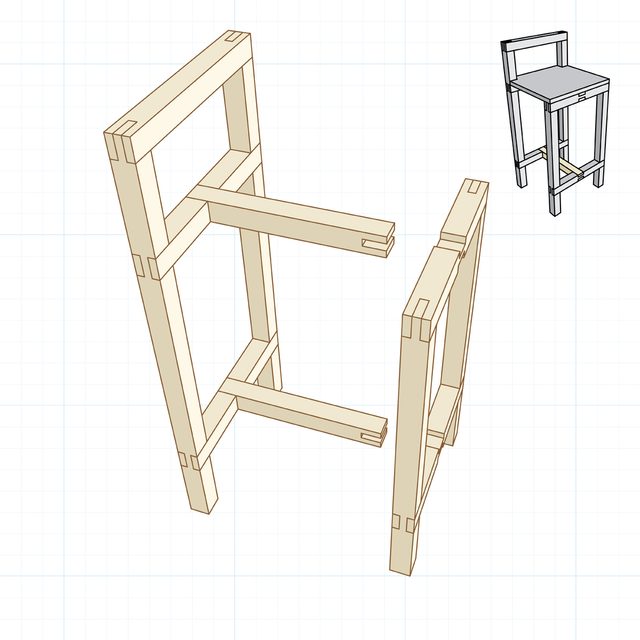
Connect the Front and Back
Apply glue to all the mating surfaces connecting the front and back assemblies. Press the joints together, let the glue dry, then sand the assembly.
Add the Seat
Apply glue to all the stretchers that support the seat, then set the seat in place. Use clamps if needed. After the glue dries, sand everything again and apply a finish of your choice.
