How to Build a Bamboo Water Feature
Multiple Days
Beginner
$101–250
Introduction
Here's a simple and elegant way to add a soothing waterfall to your backyard. Make this easy-to-build Japanese bamboo water feature. We'll show you how to build the bamboo sluice in a single day and we'll also show you how to build a small pond to catch the water complete with a pump and water plants, if you want to turn this into a weekend project.Tools Required
- 4 ft. level
- Drill/driver - cordless
- Hacksaw
- Hammer
- Hand maul
- Jigsaw
- Utility knife
Materials Required
- #8 copper wire
- 2-in. PVC pipe
- Drywall screws
- Pinch valve
- Plastic water line
- Pond liner (optional)
- Pond pump
- Sand
- Split bamboo sections and 1-in. supports
If you don’t want to build a pond, you can use another catch basin such as a whiskey barrel or other container. Bamboo is available from online retailers. You can have them split the sluice lengths for a small additional fee.
Project Overview
If it seems like your storybook garden is still lacking something, the soothing sound of running water could be it, especially one with a Japanese water fountain vibe like this one. But you don’t have to settle for some kitschy plastic-resin waterfall for the missing ambiance. The answer may be your own version of this Japanese sluice made from real bamboo. This simple weekend project doesn’t involve much skill or time. In fact, I built this version the same day we took these photos. You too can finish this project in a single day. Add another day for installing a small pond, pump and water plants to make this a weekend project.
Find more versions of backyard ponds here.
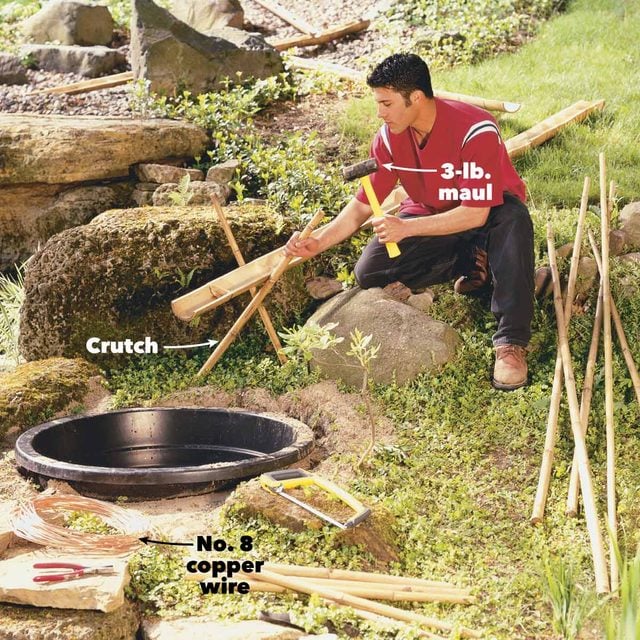
You don’t have to be particularly handy or have a shop full of tools either. About the only tools you’ll need are a jigsaw for cutting in the spout hole (Photo 10), a 3-lb. maul for pounding in the support stakes (Photo 5) and a hacksaw for cutting the bamboo to length (Photo 3).
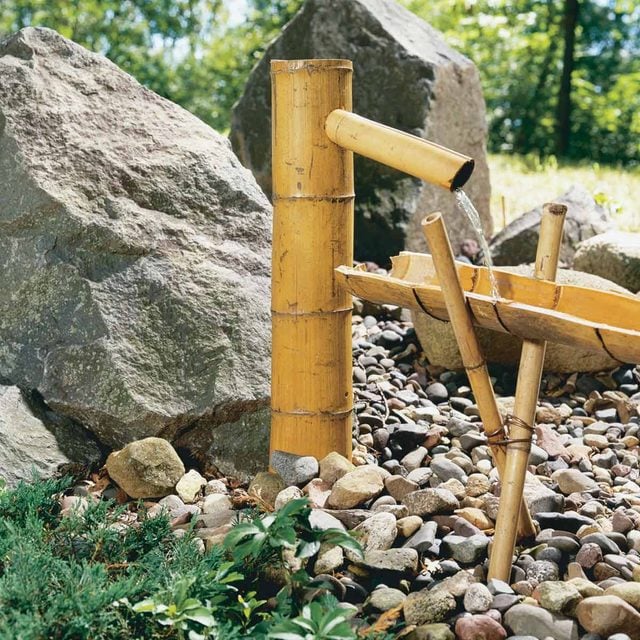
Bamboo Spout
Your bamboo water feature will start with water emerging from a spout.
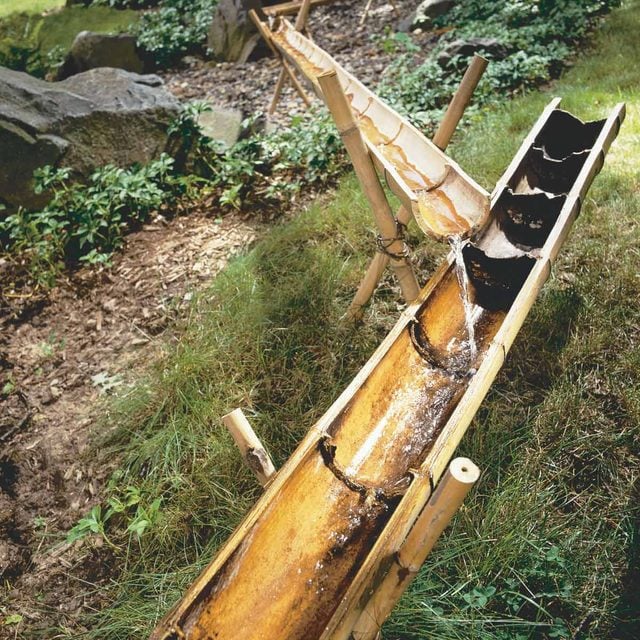
Sluices
The water will flow through bamboo sluices.
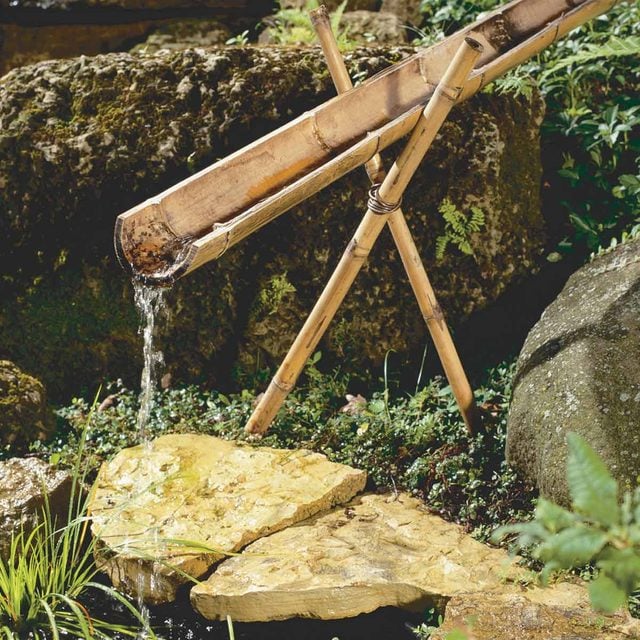
Pond and Recirculating Pump
You can use an existing pong as the catch basin for the sluice. If you don’t have one, you’ll need to either install a small pond or use an above-ground basin like a whiskey barrel or even a livestock trough.
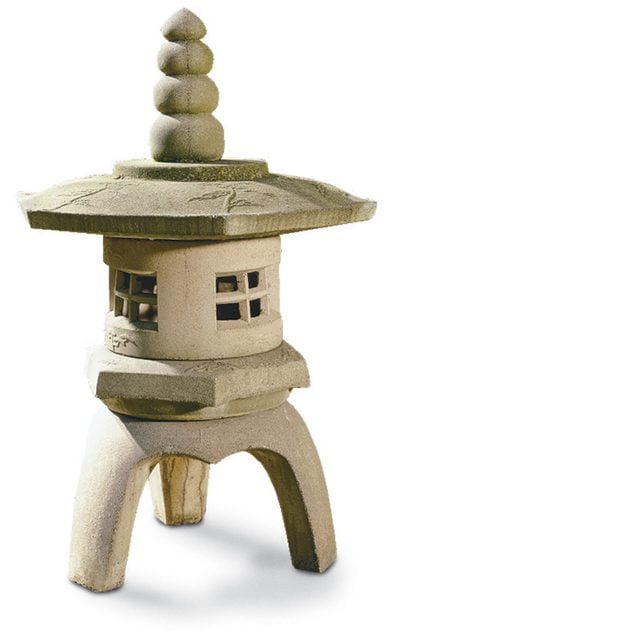
Decorative Japanese Elements
You can add decorative Japanese touches to create an elegant backyard oasis.
Where to Start and End it
If you already have a pond in your yard, you can use it as the catch basin for the sluice. If not, you’ll need to either install a small pond liner (about $30 at garden or home centers) or use an above-ground basin like a whiskey barrel or even a livestock trough.
The best way to design and plan is to begin at the bottom and work your way away from the pond. Figure about a 6-in. slope on each 10- to 12-ft. bamboo sluice section. Gardens on gently sloping hills are best. If your hill has a steep slope, you’ll have to incorporate more of a zigzag design to mitigate the slope; otherwise, the water will flow too fast. The sluices on steep hills work the same way as switchback roads on a steep mountainside. Flat gardens will work too, but you’ll have to use ever-higher supports to create an artificial slope. However, every time you add a support, the next sluice will be about 6 in. higher, so after just five sections, the sluice rises 2-1/2 ft., plus the starting height.
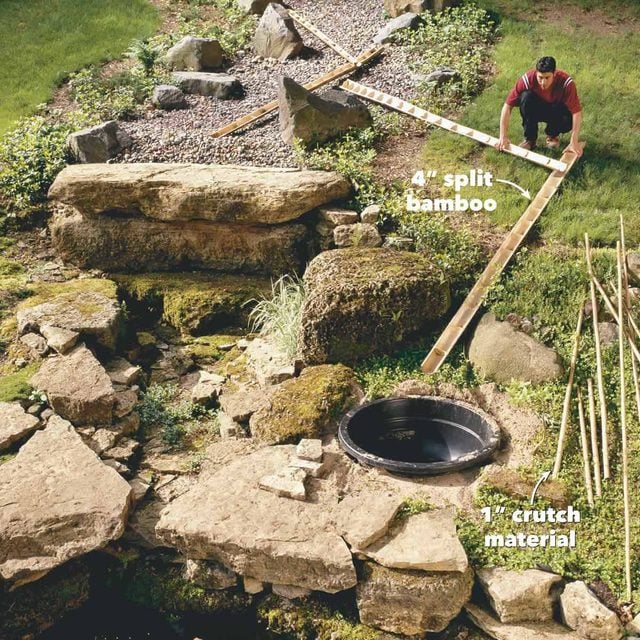
Choose sluice section lengths to suit your yard. It’s strictly a what-looks-best, seat-of-the-pants design method that develops as you build the system. Get an idea of routing and sluice lengths by laying out sections of bamboo on the ground first (Photo 2). You may only need sections a couple of feet long to route around rocks or make hairpin turns, and then use half or full lengths for longer, straighter runs.
Assemble the Sluices
As you assemble the sluices, work your way away from the pond; run water from the garden hose to check water flow (Photo 7). That’ll help you decide if the slopes are too steep or shallow and if you like the direction. Don’t worry if you don’t have the whole thing figured out ahead of time—nothing is permanent. Mistakes are easily remedied by simply pulling the crutches (Photo 5) out of the ground and repositioning things.
We ordered our bamboo from a company we found on the Internet called Bamboo Hardwoods. I made one call, used my credit card and the bamboo was at the front door a week later. The company you order from will “split” (rip down the middle) the sluice pieces for you for a few bucks extra. For each sluice section, you’ll need a “split” 4-in. diameter piece and four 1-in. supports for the crutches. Although you can order shorter lengths, all the pieces typically come about 10 to 12 ft. long. If you’re following a hill, you’ll get three crutch pieces out of one 10-ft. long, 1-in. diameter piece. But order more if you’re creating your own hill with higher and higher crutches. For the fountain at the top of the hill, order a 4-ft. length of fully round 4-in. bamboo for the base and another 4-ft. long, 2-in. diameter piece for the spout. That’ll give you extra material in case you make a mistake. To get a rough idea of how many pieces and what diameter are needed, lay out the sluice path with a garden hose and measure each length.
This sluice cost about $320 (including shipping) for all the bamboo materials in this project, with several extra pieces left over. Order a few extra to cover for miscalculations or mistakes. Also buy No. 8 bare copper grounding wire for wrapping each crutch (about 10¢ per foot at home centers). Figure on about 2 ft. of wire per crutch.
Tricks for Working with Bamboo
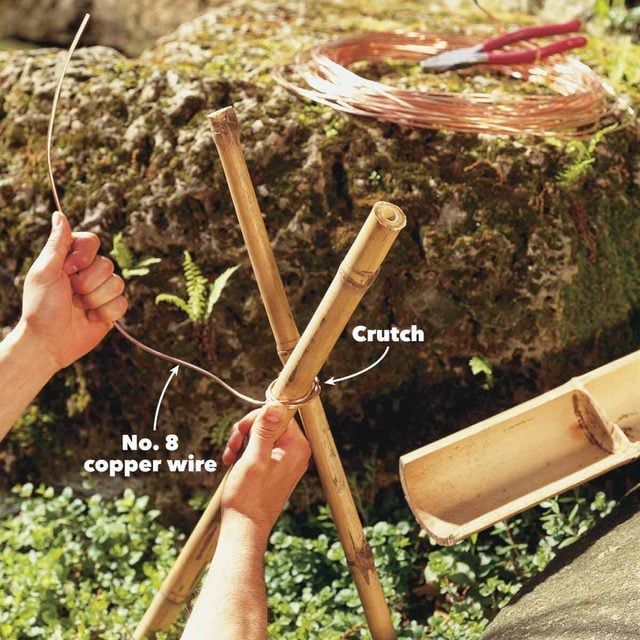
Bamboo is as hard as a rock and it’ll dull the teeth of saw blades designed for wood. But hacksaws are built to cut metal and they’ll make short work of bamboo cuts. When bamboo is fully round, it’s susceptible to splitting as it dries. Because the sluices are already split, they should stand up for years. But fully round, larger diameter parts like the spout are likely to split fairly soon. You can prevent it by wrapping several coils of copper wire tightly around the pieces. The wire will also hold split pieces together. Use the same wire to hold the crutches together after the supports are pounded into the ground. If you need to move a crutch after it’s been wrapped, you can pull the whole assembly out of the ground and pound it in by slightly scissoring it closed and pounding both sides into the ground. The crutch will reopen as it sets.
Bamboo is naturally durable but here are two tips to help it last even longer. After the project’s completed and tested, let it dry and coat all the surfaces with a clear, exterior oil-based sealer. (Run the fountain a few days and change the water before placing any water plants.) And if you live in a cold climate, store the sluice sections out of the weather during the winter.
Sizing the Pump
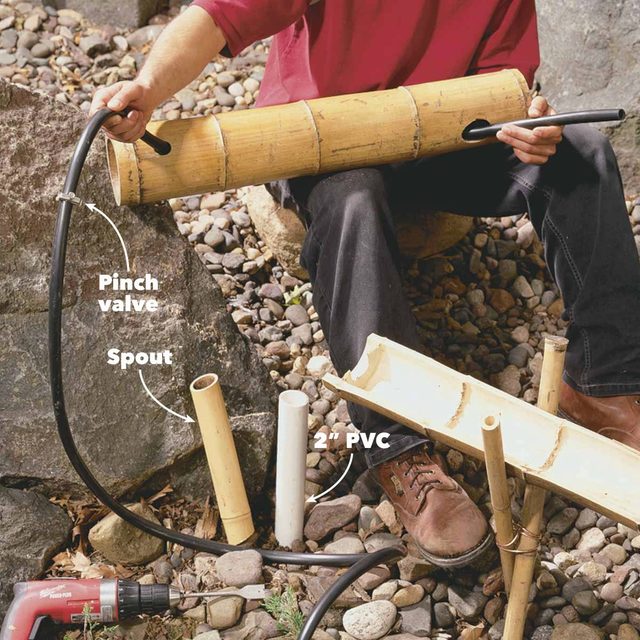
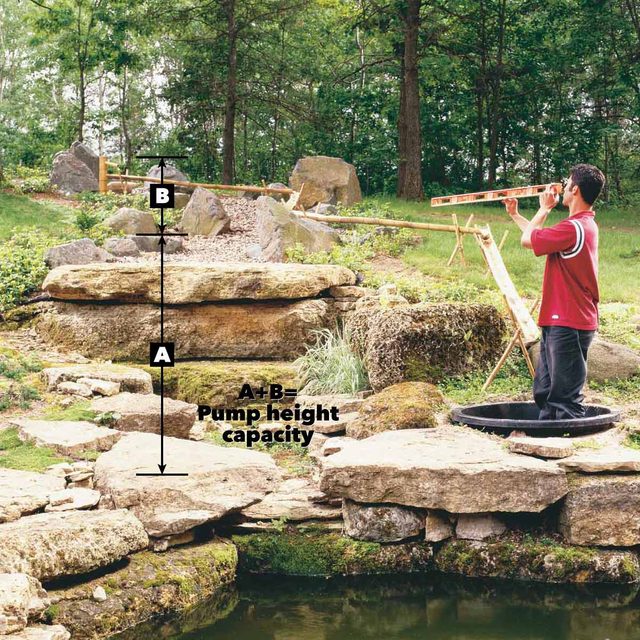
The determining factor in getting the right pump isn’t how big it is or how much water it will pump, but rather how high it will lift the water. Once the sluice is in and the fountain’s built at the top of the sluice, you’ll need to measure the overall elevation rise from the pump’s position in the pond to the top of the fountain (Photo 13). That’s how high the pump has to lift the water. When you go to a nursery or home center to buy a pond pump, look at the label on the box. It’ll tell you the maximum height the pump will lift. Select the first size that lifts higher than your measurements. Buy enough water line to comfortably reach from the pump to the spout. A small pinch valve (Photo 12) on the hose before it enters the spout will let you adjust the water flow for the perfect garden ambiance.
To install the pump, elevate it by using the pond ledges or a couple of bricks to keep it up out of the sand and sludge. Plug the pump into a GFCI-protected outlet. Use stronger corrugated water lines if you’re burying the line underground or are concealing it under heavy stones.
Project step-by-step (13)
Dig the Pond Hole
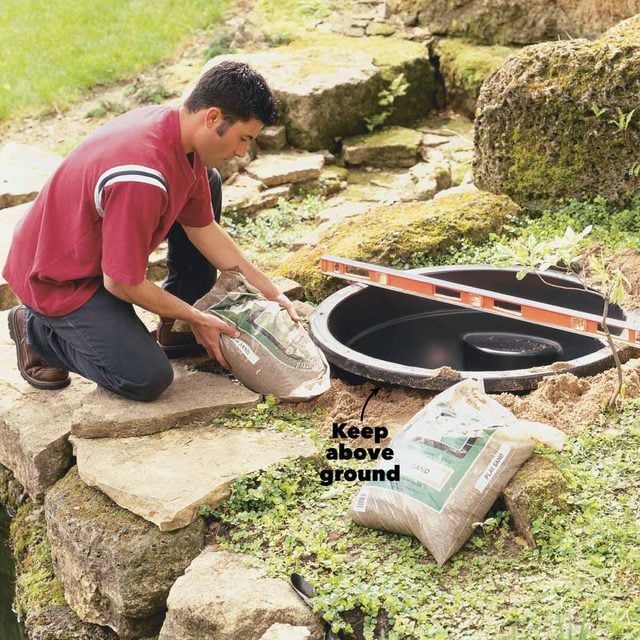
Dig the pond hole slightly oversized and set the pond liner on a 2-in. bed of sand in the hole. Keep the lip of the liner slightly above the surrounding soil to keep dirt from washing into the water. Fill around the liner with sand to support the sides.
Lay Out the Path of the Sluice
Lay out the path of the sluice with lengths of split bamboo so the approximate slope of each is 6 to 12 in. every 10 ft. Vary lengths and angles to best fit your garden or yard. Overlap the bamboo as necessary to work out the best bamboo lengths.
Cut the Sluice Ends
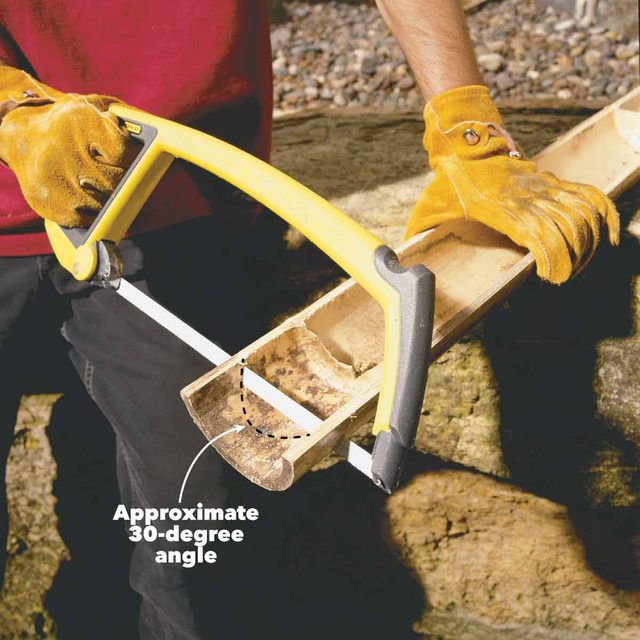
Cut the discharge end of each sluice at about a 30-degree angle with a hacksaw. Lop off the uphill end a foot or so longer than where the next sluice will drain into it.
Knock Out the Nodes
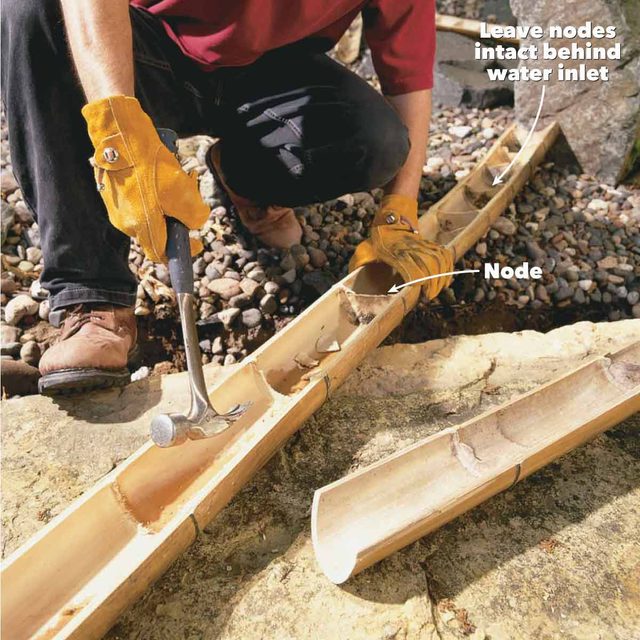
Knock out the nodes with the claw end of a hammer up to the point where the water will pour into the sluice. Leave the nodes intact above that point to keep water from draining out the back end— especially important for low slopes (see Photo 7).
Build the Support Crutches
Cut the end off a 3-ft. length of 1-in. bamboo at an angle and drive it into the ground at a 45- to 60-degree angle. (You’ll get the idea after the first one.) Lift the sluice to its approximate level to determine the correct crossing point for the second stake. Drive in the second pair of stakes at the top of the sluice using the same technique.
Bind the Crutch Legs
Cut off 2 ft. of No. 8 copper wire and wrap the crutch legs tightly together with five or six tight windings.
Check Water Flow
Drive the downhill crutch of the next sluice into the ground. Use a garden hose to check the water flow for positioning the uphill crutch. Continue working your way up the hill with the rest of the sluices and crutches.
Cut the Spout Base
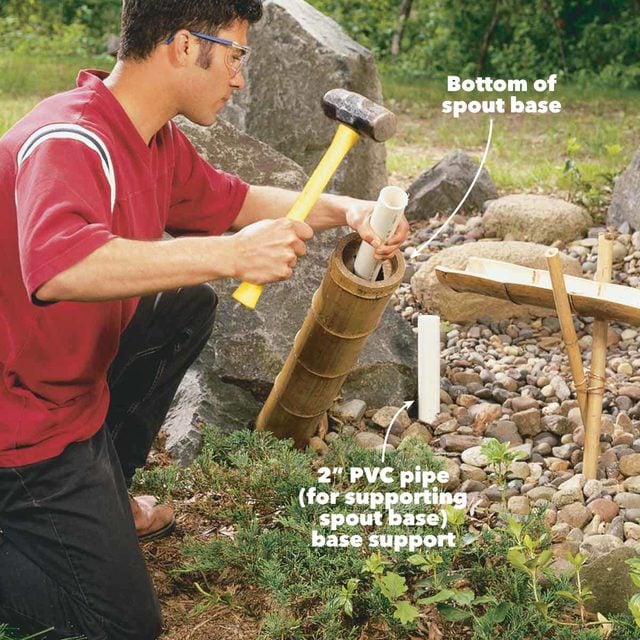
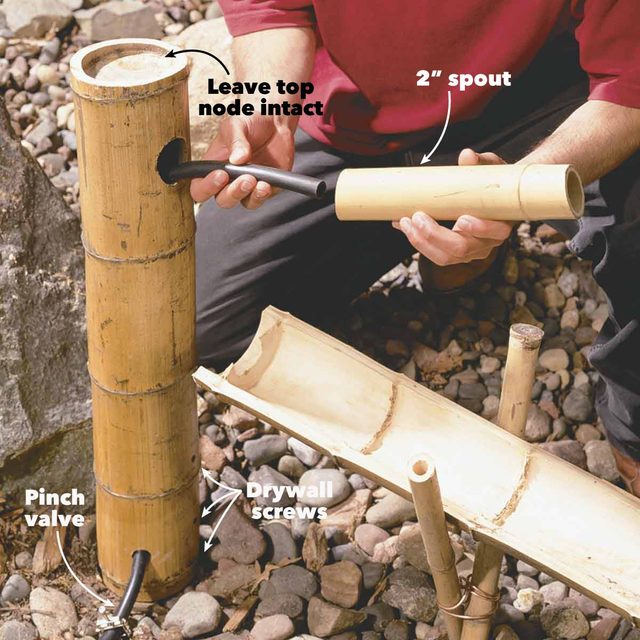
Cut the top off a 4-in. full diameter length of bamboo just above a node (so water won’t collect in the top; Photo 12). Then measure and cut off a length for the spout base that’s 12 in. longer than the height of the last sluice. Knock out all the lower nodes with a piece of 2-in. PVC pipe.
Add the Spout
Cut a 45-degree angle on the bottom of the PVC and drive it about 8 in. into the ground just behind the last sluice (Photo 8). Slip the spout base over the PVC pipe and trace around a 12-in. length of 2-in. bamboo to mark the hole for the spout.
Drill the Spout Hole
Drill a 3/8-in. pilot hole and cut out the spout hole with a jigsaw fitted with a fine-tooth blade. Shave the hole edges with a sharp utility knife until the spout fits snugly into the hole.
Feed the Water Line
Drill a 1-in. hole near the bottom and thread the water line up through the bottom hole and out through the spout hole.
Assemble the Spout
Slip the spout base over the PVC pipe and screw it to the PVC with a couple of 2-in. drywall screws. Slide the spout into the base.
Determine the Overall Rise
Estimate the overall rise of the bamboo fountain by sighting along the top of a 4-ft. level to get an “eyeball” benchmark up the hill. The benchmark can be a stone or a stick or whatever. Then go up the hill and repeat the sighting from that benchmark until you reach the fountain height. The distance from your eye to your feet is what you’ll be adding to the benchmark-to-spout distances to get the overall rise.

