How to Build a Stone Fire Ring
Updated: May 31, 2022Build this backyard fire pit with retaining wall blocks.
- Time
- Complexity
- Cost
- Multiple Days
- Beginner
- $501-1000
Outdoor Stone Fire Pit Site planning
Begin your planning with a call to your local building department to learn about local fire restrictions. Many regions require burning permits and restrict the size of a fire ring.
Choose an area that’s about 18 ft. in diameter and relatively flat. Be sure to locate the fire ring away from trees, bushes and buildings. Remember that burning wood snaps and pops, sending sparks into the air.
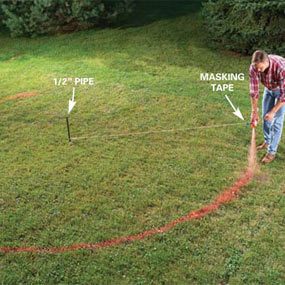
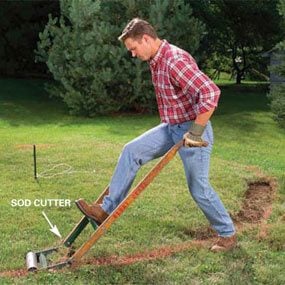
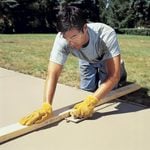
Drive a pipe at the center and mark out a 9-ft. radius circle (Photo 1). Remove the sod or plant material and enough dirt so the paving stones you’ve chosen are flush with the surrounding grass when set in 1 in. of sand (Photos 2 and 3). The sod cutter we show operates with a firm stomp on the crossbar. It takes a little practice and strength to cut the sod smoothly. Wear heavy boots and gloves when using it. A good shovel is easier to use but quite a bit slower.
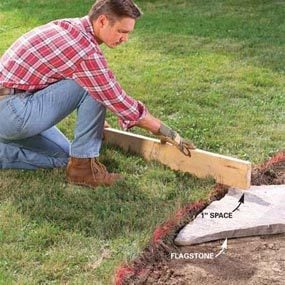
While you want your fire ring to sit level, the surrounding flagstone sitting area can follow the contours of the yard, its edges blending with the sod (Photo 3). However, if you have from 1 to 3 ft. of rise over the 18-ft. diameter of the sitting area, consider excavating the high side to keep the sitting area reasonably level. Then build a small retaining wall to hold back the soil. This actually makes for a nice design. The retaining wall becomes a sitting area as well as a shelf and serving counter.
The Beauty of a Fire Ring
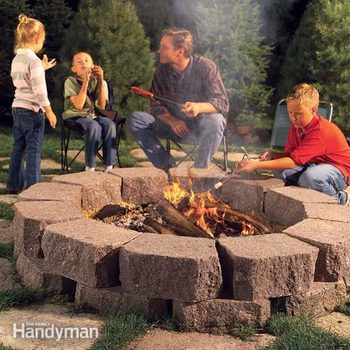
An outdoor fire is a natural gathering spot for family and friends, whether for a cookout or casual conversation on a cool evening.
You can make those gatherings more comfortable and safe by building a simple fire ring with retaining wall stone. To complete the setting, we’ll show you how to surround the ring with flagstone. It more comfortably accommodates chairs and benches and eliminates the inevitable mud pit that comes with wet weather. This project requires no special tools or skills. In fact, the primary tool for this project is a strong back! You’ll be lifting and moving heavy stone, both for the fire ring and for the surround. Rent or borrow a two-wheel dolly to ease the load if you have to move the stone far. A manual sod cutter ($15 per day rental; Photo 2) simplifies the digging, but it also takes some strength to operate. A good shovel is easier to use but quite a bit slower.
Assemble the ring
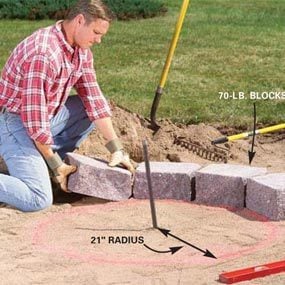
Lay the stones in a circle to determine how large to make the ring. There’s no exact rule here. A 42-in. inner diameter works well, but you can adjust the size according to preference and code. Measure the radius of the circle and then mark this circle at the center of your fire ring (Photo 5).
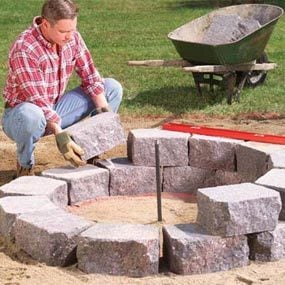
To avoid pinched toes or fingers, limit the height of the ring to about 12 in., or two rows of stone. If you go higher, keep in mind that the stones can slip off and fall, especially if you use smaller, less stable stones.
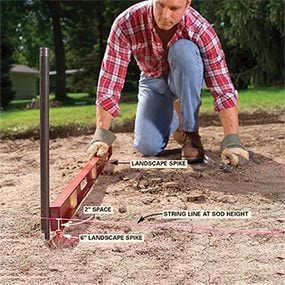
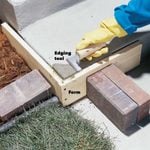
It’s important to set the stones on a level bed of sand to keep the base stones stable and the joints tight. Stretch a string tightly across the circle to establish the height of the sod, and follow Photo 4 to create the sand bed. Use a carpenter’s level to accurately align the tops of the first row of stones (Photo 4). Minimize the gaps between stones. The second row goes up fast—you simply set it on top of the first.
Lay the sitting area
Many types of materials will make a nice sitting area: various gravels; stone, brick or concrete pavers; flagstones; or even poured concrete. Irregular flagstones with grass planted between them gave us an attractive, informal look. A flagstone sitting area is easy to lay and easy to maintain. Just run the lawn mower over the stones to trim the grass.
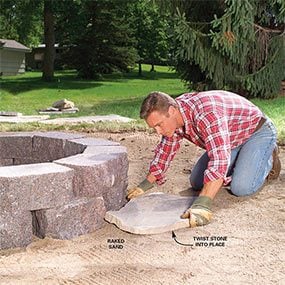
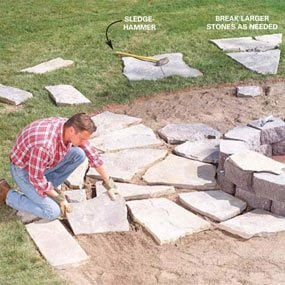
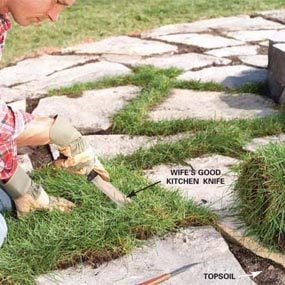
Set the flagstones in a bed of sand, letting them follow the contour of the ground (Photos 7 and 8). To minimize tripping, make a special effort to keep the edges flush.
Because we wanted a finished look right away, we meticulously cut and fitted sod between the stones. In truth, it’s a whole lot easier to completely fill the gaps with topsoil and sow grass seed. Or, instead of grass, you might consider ground covers suitable for your climate.
Finally, add about 4 in. of sand or gravel to the inside of the fire ring to raise the level of the fire. This will make it easier to tend. Then build a fire on the next cool evening and see how many neighbors it attracts.
Required Tools for this Outdoor Stone Fire Pit Project
Have the necessary tools for this DIY project lined up before you start—you’ll save time and frustration.
- Garden rake
- Level
- Safety glasses
- Sledgehammer
- Spade
- Tape measure
- Wheelbarrow
Sod cutter
Required Materials for this Outdoor Stone Fire Pit Project
Avoid last-minute shopping trips by having all your materials ready ahead of time. Here’s a list.
- 1-1/2 yards of sand
- 200 sq.ft. of flagstone
- 24 granite retaining wall stones (6-1/2 x 8 x 14 in.)
- Marking spray paint
