How to Build a Table with a Concrete Top
Buy PDF & Cut List The look and durability of natural stone—the cost and simplicity of concrete.
Multiple Days
Beginner
$51–100
Introduction
Create a polished concrete table with a solid wood base, with inlays of glass, leaves, tile or other materials. This project is simple enough for even beginning woodworkers to tackle.Tools Required
- Air compressor
- Air hose
- Brad nail gun
- Bucket
- Circular saw
- Cold chisel
- Corded drill
- Hammer
- Miter saw
- Paintbrush
- Pry bar
- Safety glasses
- Tape measure
Materials Required
- 1-1/4-in. screws
- 2' x 4' sheet of 3/4"-thick melamine
- 2x4 x 8' (rot-resistant wood)
- 4x4 x 8' (rot-resistant wood)
- Acrylic grout and tile sealer
- Brackets
- Cement colorant
- Countertop mix
- Painter's tape
- Plastic furniture feet
- Silicone caulk
- Spray adhesive
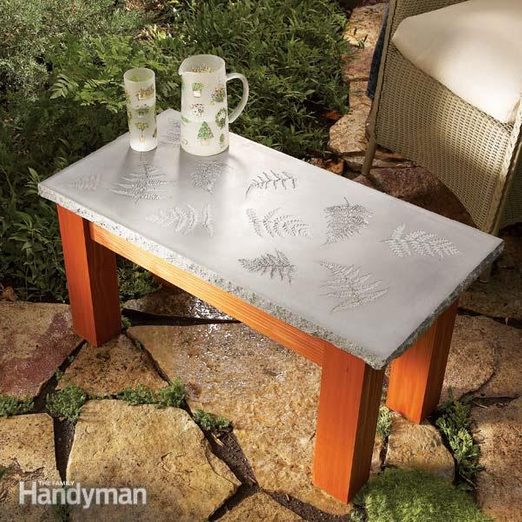
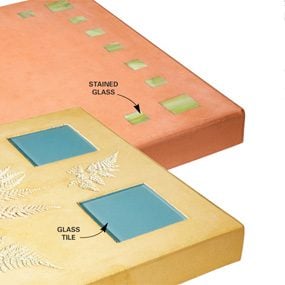
Most of us think of concrete as a practical material, but it’s also one of the most versatile decorative materials around. It can take on just about any color or shape. And surface treatment options are endless. You can cast “fossil” imprints using leaves, ferns or seashells. For a completely different look, you can cast inlays like glass or tile permanently in the surface.
If you want a tabletop that’s elegant enough for any indoor setting and tough enough to withstand outdoor weather, you’ve found it. Tables similar to this one sell for hundreds at garden centers and outdoor furniture stores. But you can make one yourself for $50 to $100. Read on to learn how to build a table with a concrete top.
Your cost will depend mostly on the wood you choose for the base and the concrete mix you use. You don’t need any special skills or tools, though a table saw and an air-powered brad nailer will speed up building the form. Give yourself half a day to build the form and pour the concrete and an hour to build the table base. A few days after casting the top, you’ll spend a couple of hours removing the form, chipping the edges and applying a sealer.
Project step-by-step (9)
Build the Melamine Form
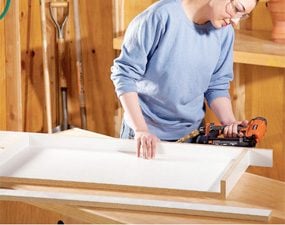
- Cut the form parts as shown in Figure A.
- Note: The two long sides overhang the form for easier removal later.
- Assemble the frame with a brad nailer.
- Note: If you use screws or drive nails by hand, be sure to drill pilot holes to avoid splitting the particleboard. Whatever fastening method you use, space fasteners about 6 in. apart and make sure they don’t create humps inside the form.
Tape and Caulk Corners
- Caulk the inside corners to seal the form and create rounded edges on the tabletop.
- Pro tip: Use colored silicone caulk, which will show up well against the white Melamine. That way, you can easily spot and clean off smudges.
- Note: Any imperfections in the caulk will show up on the tabletop. So use masking tape to create neat, even edges.
Attach Inlays
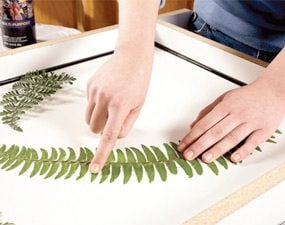
- To cast leaf or fern “fossils” in the top, first press them for a day or two in a book or between scraps of cardboard.
- Lay them out on newspaper and coat them with spray adhesive.
- Press them onto the form perfectly flat so concrete can’t seep under them.
- Note: Thick stems may not lie flat and can leave imprints that are too deep. To avoid this, we shaved some of our fern stems down with a razor blade.
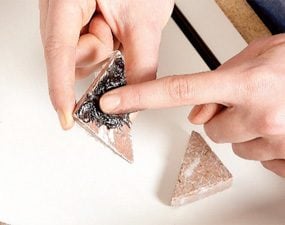
- To embed small decorative objects, spread a thin coat of silicone caulk over the face you want exposed and press it down on the Melamine base.
- After the concrete mix hardens, carefully scrape away the silicone film left on the inlay with a razor blade.
- Glue inlays face down to the form with silicone caulk.
- Be sure to remove excess caulk that squeezes out around the inlay.
Fill the Form
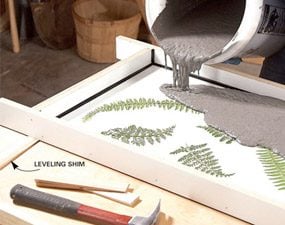
- Pour the cement mix evenly around the perimeter of the form until the form fills.
- Note: The form must be level—set a level across it and slip shims under the low end.
Settle the Mix
- Work the mix into corners and around objects cast into the tabletop.
- Lightly tap the sides of the form with a hammer to drive out air bubbles.
- Cover the top with plastic and let the concrete harden and cure anywhere from four hours to two days, depending on the brand.
Build a Table Base
- Cut the parts to the dimensions and join them with 8 metal brackets (we used gusset angle brackets, which measure 1-1/4″ x 3-1/4″ for this concrete wood table).
- Fasten the top to the base with a few dabs of hot-melt glue.
Pull the Form
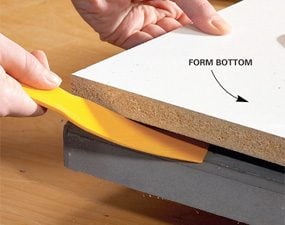
- Remove the form, starting with the sides.
- Then flip the tabletop over and pry off the bottom panel with a plastic putty knife.
Clean the Top
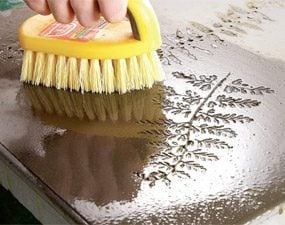
- Scrub the leaves out of their imprints with a stiff plastic brush.
- Scour the whole surface to remove excess colorant and Melamine residue.
Texture the Edges
- Create a natural stone look by chipping the edges with a cold chisel.
- Chip around all four edges, then flip the top over and chip from the other side.
- To prevent stains and bring out more color, seal the table top with an acrylic sealer (sold in the tile aisle at home centers).
- Note: The first coat will sink in and the surface will remain dull. After it dries, apply a second coat, and perhaps a third, until the surface retains a shine.
