How to Build a Portable Sauna
DIY a portable sauna? No sweat.
Our editors and experts handpick every product we feature. We may earn a commission from your purchases.
Multiple Days
Intermediate
More than $1000
Introduction
Taking a sauna has many proven health benefits. It not only helps you detoxify and relieve tension and stress, it can also help you burn calories and maintain clear healthy skin.
You can build this affordable four-person outdoor year-round sauna in your garage and take it to your cabin. All you need are reliable carpentry skills, a few power tools and a place to build it. Read on and follow this step-by-step building plan.
Tools Required
- 18-gauge finish nailer
- Bar clamps
- Circular saw
- Drill/driver - cordless
- Flush-trim router bit
- Hammer
- Hearing and eye protection
- Measuring tape
- Miter saw
- Router
- Speed square
- Staple gun
- Table saw
- Tin snips
Materials Required
- #11-1/2 x 2 in. galvanized siding nails
- #13 x 2 in. galvanized finish nails
- #8 x 2 in. finish screw
- #8 x 2" exterior screws
- #9 3" deck screws
- 1 x 4 x 8' cedar trim (14)
- 1/4" x 3-1/2" cedar shiplap (123 Sq ft)
- 26x8' corrugated metal roof panels (3)
- 2x4 x 8' cedar (7)
- 3-1/2" hinges
- 3/8-in staples
- 4 x 8 x 1-1/2" foam insulation (4)
- 4' x 8' T1-11 plywood (wall sheathing) (5)
- 4' x 8' x 3/4" plywood (3)
- 5/16 x 4-in. structural screws
- 5/4 x 6 x 8-ft. cedar deck boards (4)
- 8' 2x2s (24)
- 8' 2x4s (14)
- 8' 2x4s Pressure treated (3)
- Aluminum foil tape
- Butyl sealant tape
- Door handle
- Drive in door ball catch
- Foil vapor barrier
- Horizontal plastic closure strips
- Ice and water roof shield
- Rubber Gasket Roofing Screws
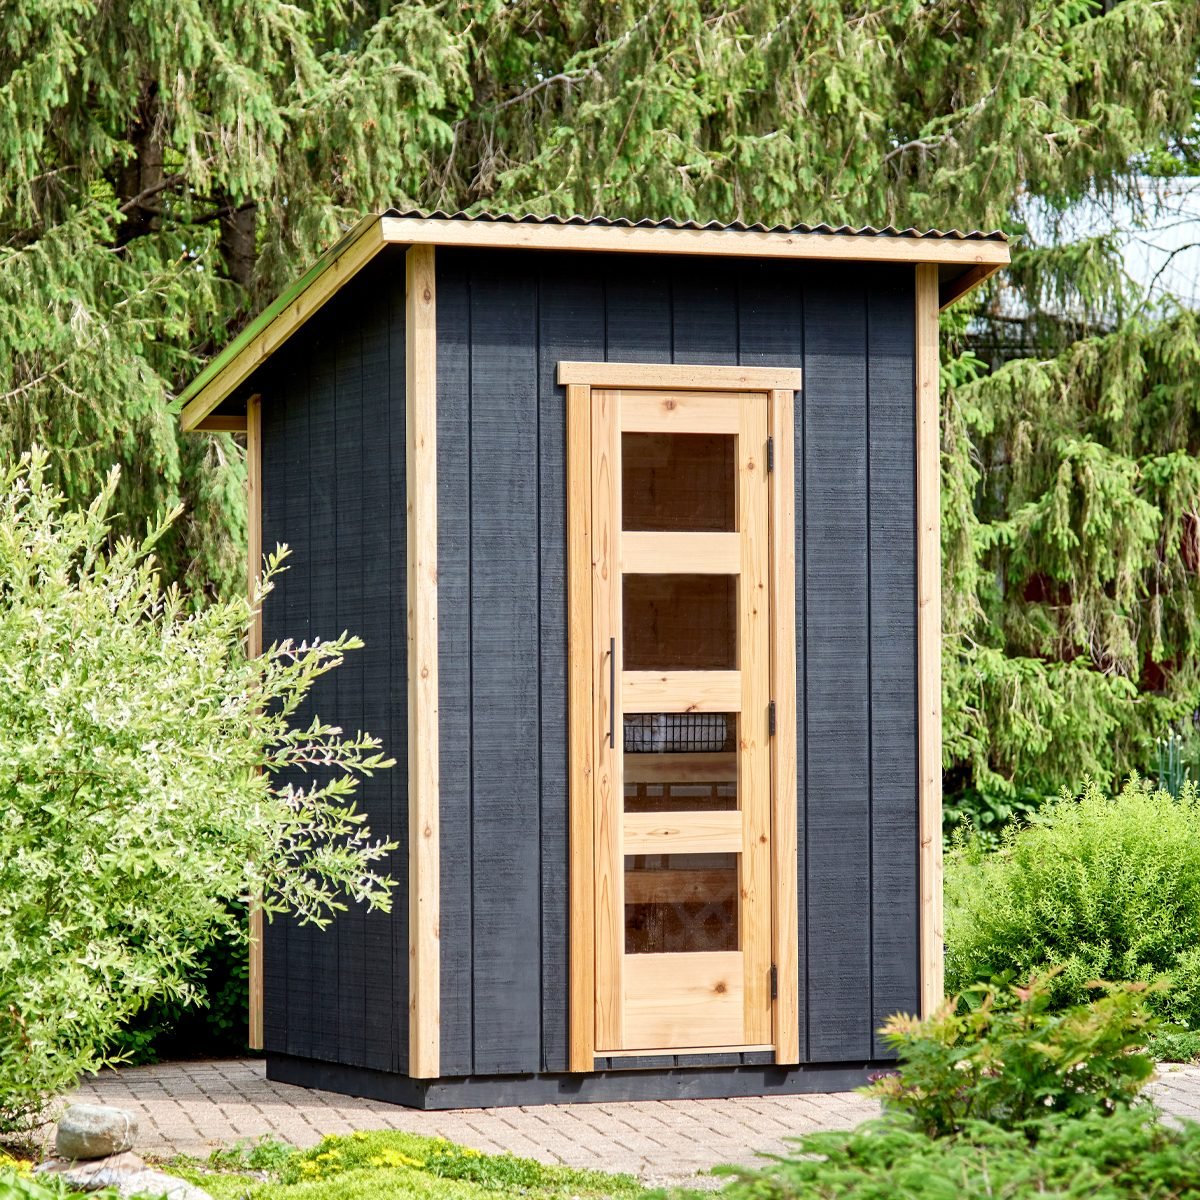
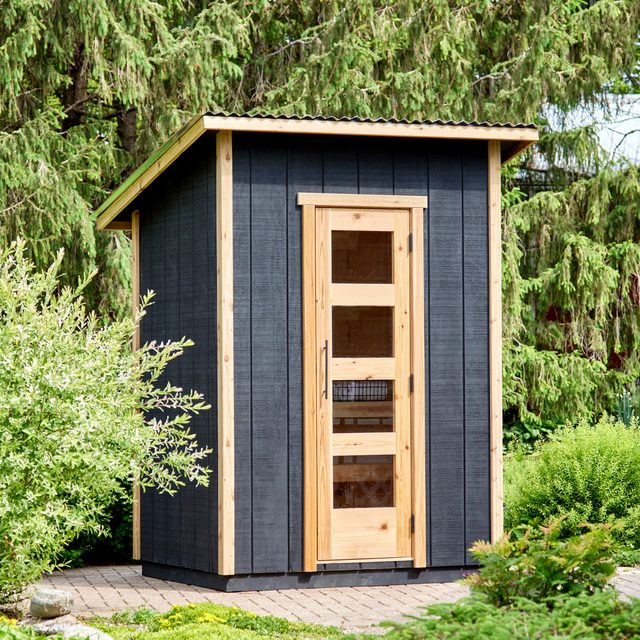
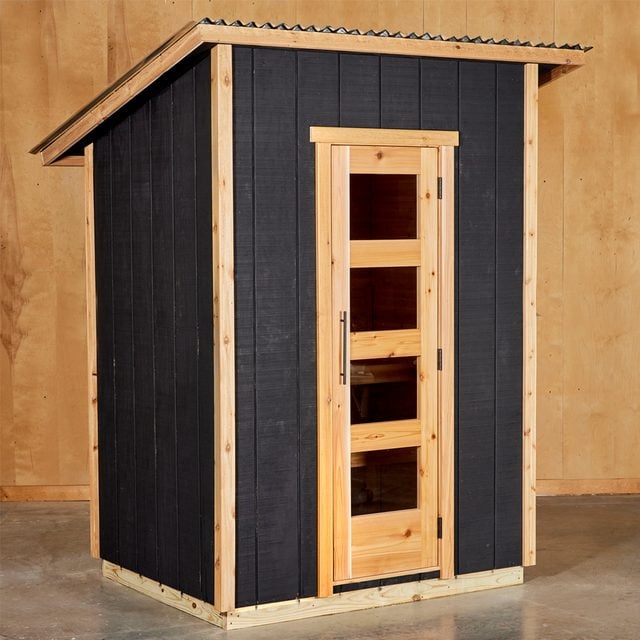
I built this sauna with accessible and affordable materials you can find at your local building center. The simple design enables you to easily construct the four walls, floor, roof and benches on-site or in your garage, then transport it to a remote location.
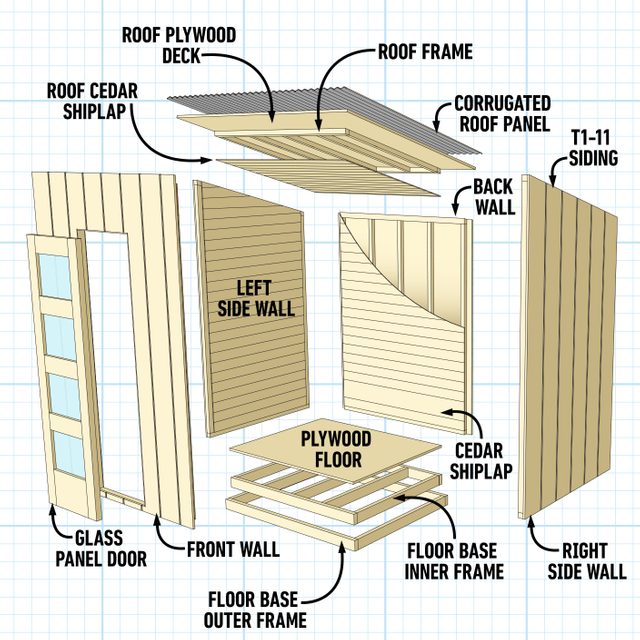
The sauna is five feet wide x four feet deep x 7-ft. 8-in. tall. Build your sauna to the size that meets your needs. See Figure 1 for a look at how it all goes together.
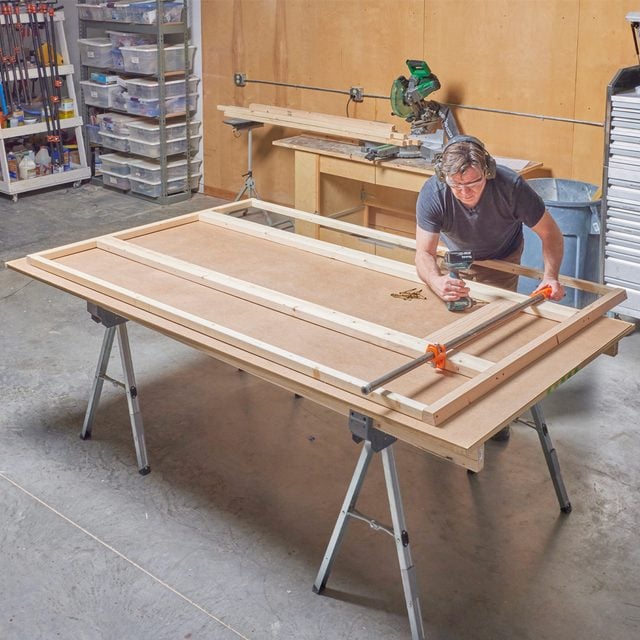
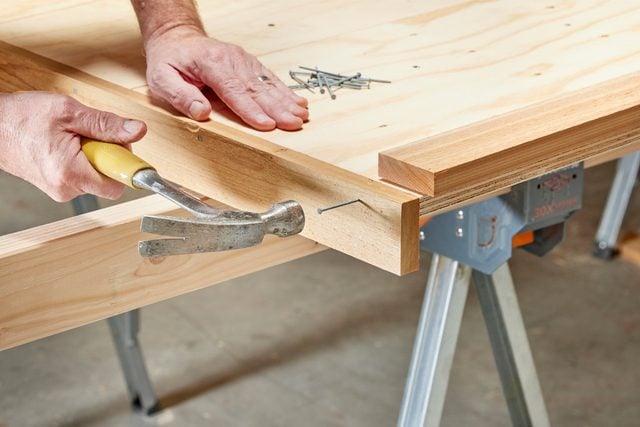
Before you start cutting boards and pounding nails, put together a flat work surface such as a 4×8 sheet of plywood on sawhorses. This will make assembling and maneuvering the components of the project much easier. Enlist a helper to assist in lifting walls and roof components.
When purchasing materials, always buy a few extra 2x2s and 2x4s for your project. You can often return what you don’t use.
Figure 1
Overall dimensions: 95-in. H x 6-in. W x 48-in. D.
Cutting List
| KEY | QTY. | PART | DIMENSIONS |
| A | 2 | Floor Base Outer Frame Front & Back (Green Treated) | 1-1/2″ x 3-1/2″ x 60″ |
| B | 2 | Floor Base Outer Frame Sides (Green Treated) | 1-1/2″ x 3-1/2″ x 45″ |
| C | 2 | Floor Base Inner Frame Front & Back | 1-1/2″ x 3-1/2″ x 57″ |
| D | 5 | Floor Base Inner Frame Stringers | 1-1/2″ x 3-1/2″ x 42″ |
| E | 1 | Floor Base Plywood Floor | 3/4″ x 45″ x 57″ |
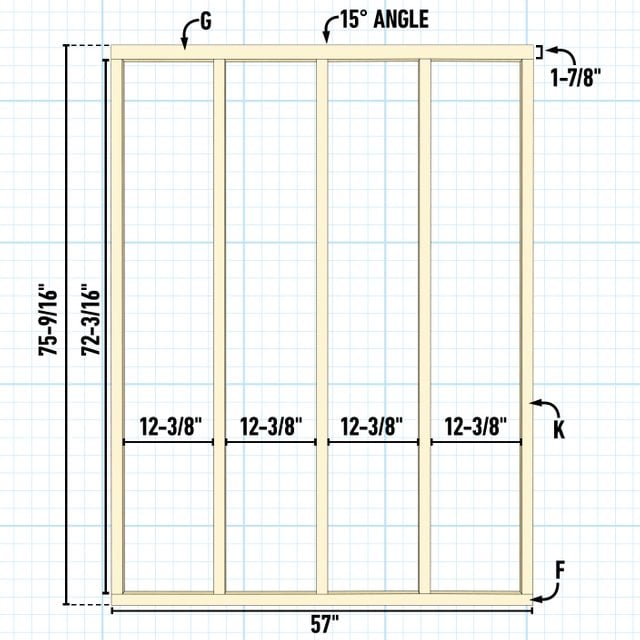
| F | 2 | Front & Back Walls Bottom Plate | 1-1/2″ x 1-1/2″ x 57″ |
| G | 2 | Front & Back Walls Top Plate/w 15-Degree Angle | 1-1/2″ x 1-7/8″ x 57″ |
| H | 2 | Front Wall 2×2 Stud | 1-1/2″ x 1-1/2″ x 84-9/16″ |
| I | 2 | Front Wall 2×4 Stud | 1-1/2″ x 3-1/2″ x 84-9/16″ |
| J | 1 | Doorway Header | 1-1/2″ x 3-1/2″ x 22-1/4″ |
| K | 5 | Back Wall Studs | 1-1/2″ x 1-1/2″ x 72-3/16″ |
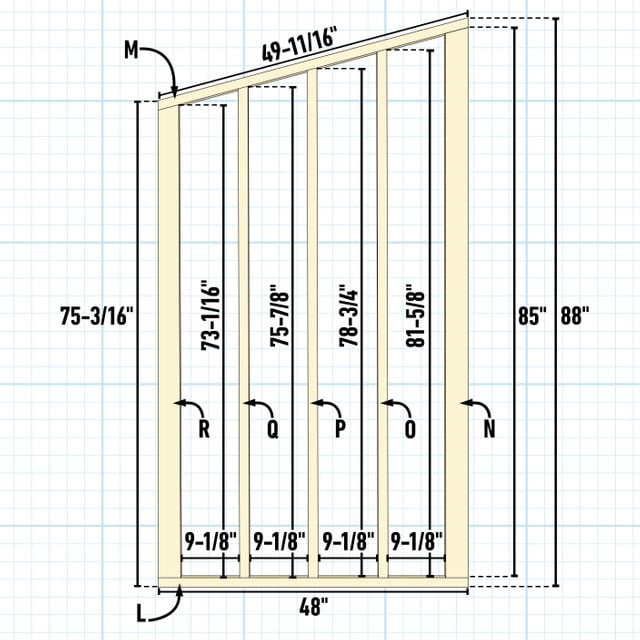
| L | 2 | Side Wall Bottom Plate | 1-1/2″ x 1-1/2″ x 48″ |
| M | 2 | Side Walls Top Plate/w 15-Degree Angles | 1-1/2″ x 1-1/2″ x 49-11/16″ |
| N | 2 | Side Walls Front Stud/w 15-Degree Angles | 1-1/2″ x 3-1/2″ x 85″ |
| O | 2 | Side Walls Stud/w 15-Degree Angles | 1-1/2″ x 1-1/2″ x 81-5/8″ |
| P | 2 | Side Walls Stud/w 15-Degree Angles | 1-1/2″ x 1-1/2″ x 78-3/4″ |
| Q | 2 | Side Walls Stud/w 15-Degree Angles | 1-1/2″ x 1-1/2″ x 75-7/8″ |
| R | 2 | Side Walls Back Stud/w 15-Degree Angles | 1-1/2″ x 3-1/2″ x 73-1/16″ |
| S | 2 | Roof Frame Front & Back /w 15-Degree Angle | 1-1/2″ x 1-7/8″ x 53-3/4″ |
| T | 5 | Roof Frame Studs | 1-1/2″ x 1-1/2″ x 41-7/8″ |
| U | 1 | Roof Deck | 3/4″ x 73″ x 63″ |
| V | 13 | Roof Cedar Shiplap | 1/4″ x 3-1/2″ x 55-3/4″ |
| W | 46 | Front & Back Walls Cedar Shiplap | 1/4″ x 3-1/2″ x 56″ |
| X | 50 | Side Walls Cedar Shiplap | 1/4″ x 3-1/2″ x 45″ |
| Y | 2 | Front & Back Roof Trim | 3/4″ x 2-1/2″ x 74-1/2″ |
| Z | 2 | Side Roof Trim | 3/4″ x 2-1/2″ x 63″ |
| Aa | 2 | Side Wall T1-11 Siding | 9/16″ x 48″ x 88″ |
| Bb | 1 | Back Wall T1-11 Siding | 9/16″ x 48″ x 75-9/16″ |
| Cc | 1 | Back Wall Filler T1-11 Siding | 9/16″ x 13-1/2″ x 75-9/16″ |
| Dd | 2 | Front Wall T1-11 Siding | 9/16″ x 48″ x 88″ |
| Ee | 2 | Front Wall Filler T1-11 Siding | 9/16″ x 13-1/2″ x 88″ |
| Ff | 2 | Front Corner Trim | 3/4″ x 2-1/2″ x 88″ |
| Gg | 2 | Back Corner Trim | 3/4″ x 2-1/2″ x 75″ |
Project step-by-step (14)
The Sauna Floor Base
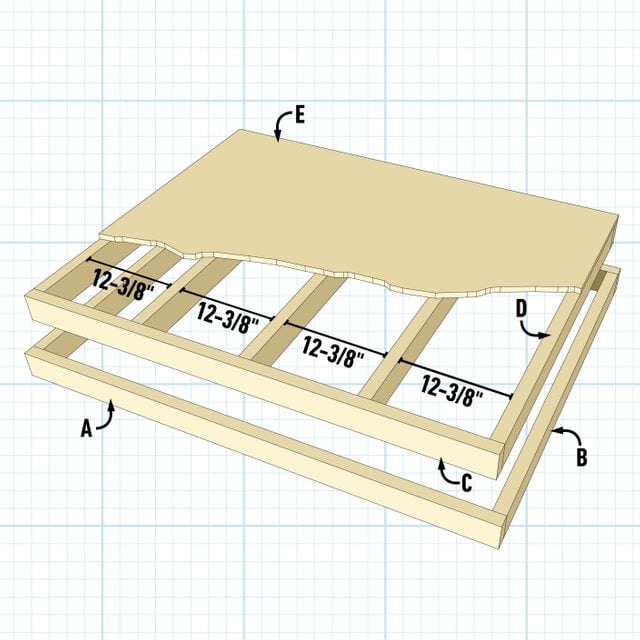
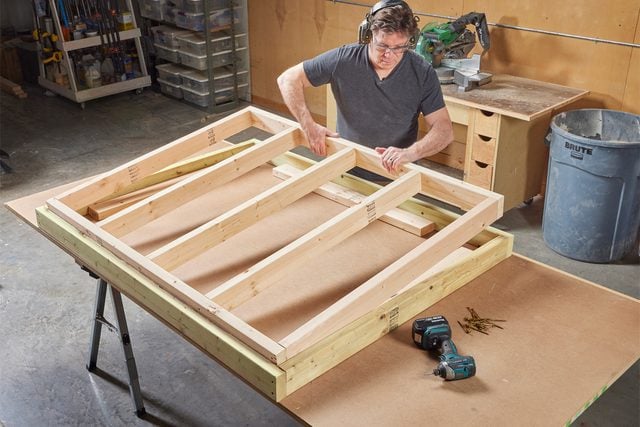
- Let’s start this project from the ground up and build the floor base first. Start by cutting and assembling four pressure-treated ground contact 2x4s for the floor outer base frame using #9 x 3-in. deck screws.
- Next, measure the inside of the outer frame to get the dimensions for the inner frame. Then cut and assemble the inner frame adding support boards evenly spaced as shown above.
- Insert and attach the inner frame to the inside of the outer frame, letting the inner frame stick up 1-1/2-inches from the top edge of the outer frame.
Install the Floor
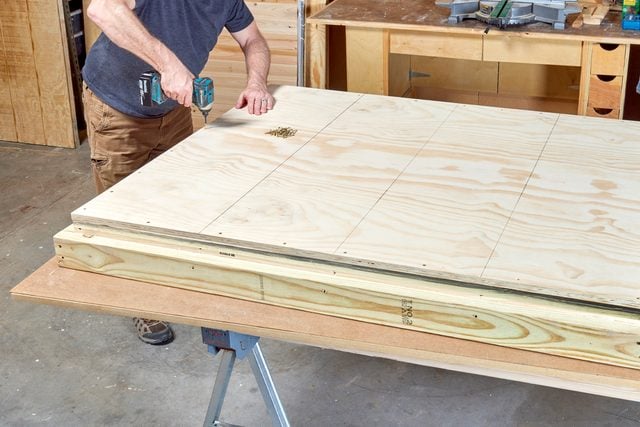
- Cut a piece of 3/4-in. plywood the size of the base inner frame.
- Before attaching the plywood floor to the base, insulate the spaces between each stud with 1-1/2-inch foam insulation.
- Attach the plywood to the floor base using #8 x 2-in. exterior screws.
Front Wall Frame
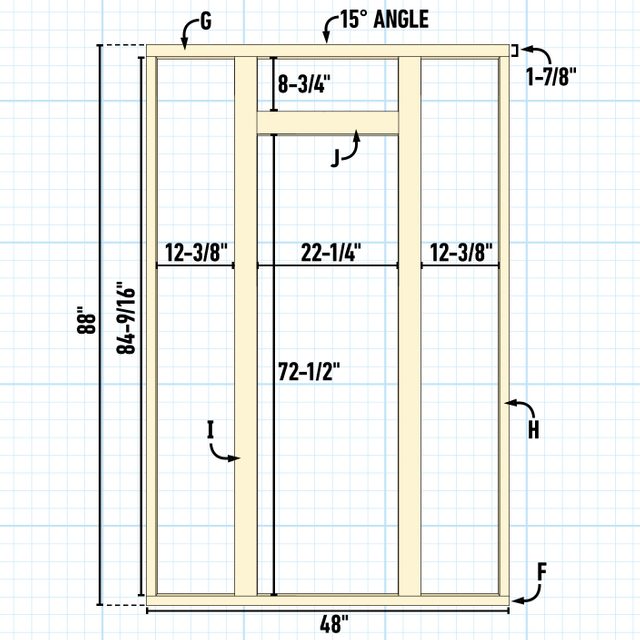
- Moving on to framing walls, let’s start with the front wall. Refer to the cut list and cut all the 2x4s and 2x2s to length for the front wall. (See above.)
- Rip a 15-degree angle down the center of a 2×4 for your top board. Save the falloff piece for the top board of the back wall.
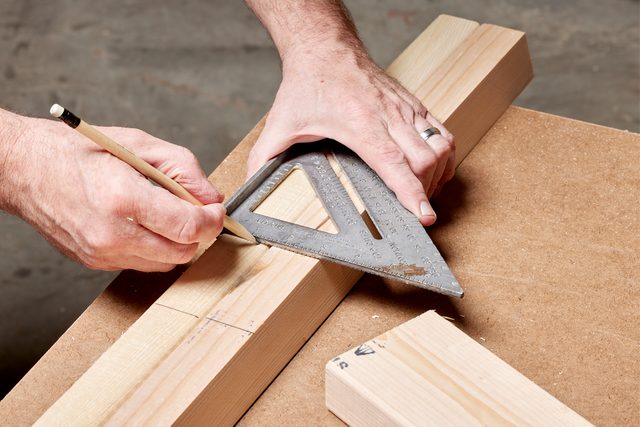
- To lay out the stud placement on the wall, hold the top and bottom boards together and draw lines where each stud will be attached.
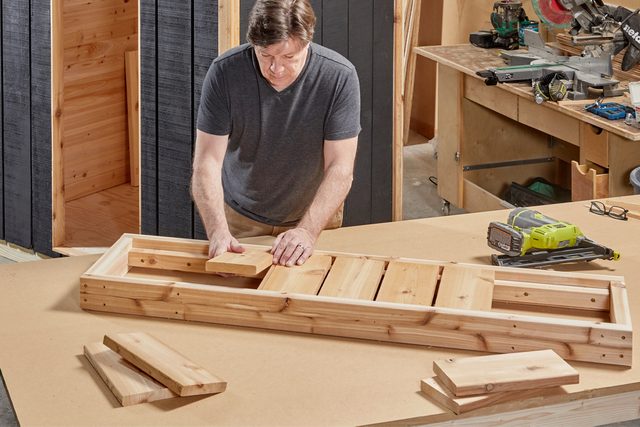
- Lay all the boards on a flat surface. Using #9 x 3-in. deck screws, attach all the studs to the top and bottom board at the lines you made.
- Attach a 2×4 as a header of your door opening. (See photo below.)
Back Wall Frame
- Refer to the cut list and cut all the 2×2 studs to length.
- Using the fall-off piece from the front wall top board you ripped the 15-degree angle on, as before, hold the top and bottom boards together and draw lines where each stud will be attached.
- Assemble the back wall frame the same way you did the front wall, using #9 x 3-in. deck screws.
Side Wall Frames
Cut studs
- The two side walls are identical, so you can cut all your parts on the cut list for both walls.
- Pro tip: First cut the 15-degree angles on the ends of all the 2×2 and 2×4 studs. Then trim the studs so that when assembled, the high point of the side wall is the same height as your front wall, and the low point of the side wall matches the height of the back wall. (See above.)
Attaching studs
- Attach the two 2×4 studs to the top and bottom boards.
- Cut a few blocks for spacers for the space between studs. This will help you evenly space the studs.
- Working from right to left, place two spacer blocks against the first 2×4, one near the top and one near the bottom. Then place a 2×2 stud against the spacer blocks and tight to the top board. You may have to trim the studs before attaching them.
Bracing
- Add bracing between the studs on the back and side wall where the two benches and heater will be attached.
Exterior Wall Covering
Side walls
- There are many siding products out there; choose what works for you and your budget. We went with T1-11 plywood siding.
- Start by laying one of your side wall frames flat on your work surface, with the outside of the wall facing up. Place a sheet of siding on top of your wall frame keeping it flush with the bottom of the frame. Hold it in place with a few clamps or drive a few nails along the bottom edge.
- Once the wall frame is square with the long edge of the siding, finish nailing it to all the studs using #11-1/2 x 2 in. galvanized siding nails.
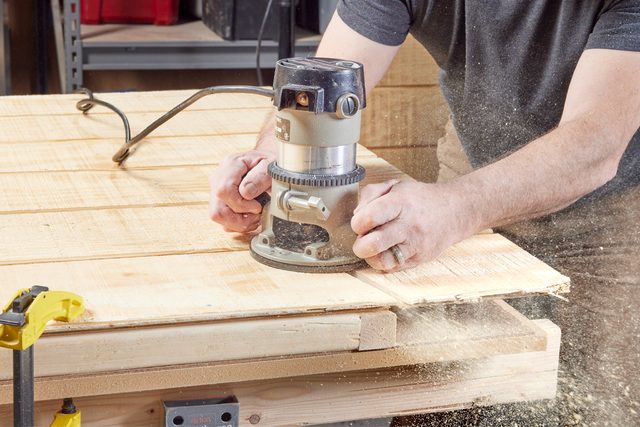
- Cut the angle along the top edge of the wall, using a router with a flush trim bit.
- Repeat this on the other side wall.
Front and back walls
- Attaching siding to the front and back walls the same way as the side walls. The only difference: After you’ve squared the siding with the wall frame, draw a line on the underside of the siding along the top board. Then cut a 15-degree angle along the line.
- When attaching the siding, let it hang over 2-1/4-inches on both sides of the walls. Since the side walls are five feet wide, fill in the remainder of the siding, being sure to let it hang over 2-1/4-inches off the other edge.
- When the siding is securely fastened to the frame, cut out the door opening on the front wall using a router with a flush trim bit.
Insulating
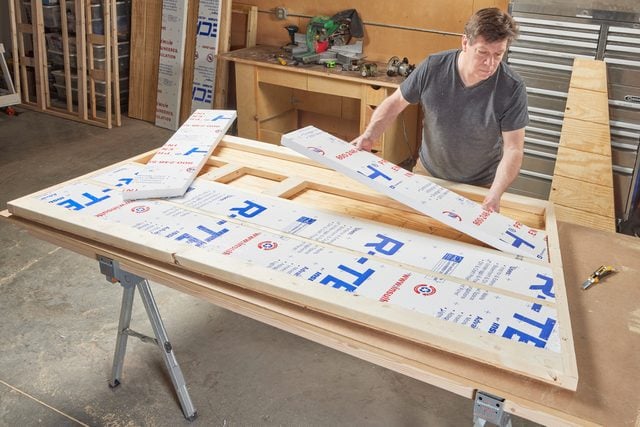
- Now on to insulating the walls. Start by measuring the spaces between studs. Using a table saw or a long blade utility knife, cut pieces of 1-1/2-inch foam insulation for each stud space.
- The foam insulation simply friction fits into each stud space. Cut the angle on the top of each piece for the side walls.
Vapor barrier
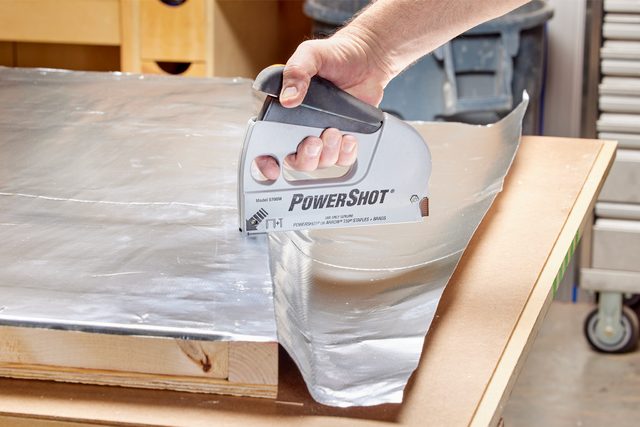
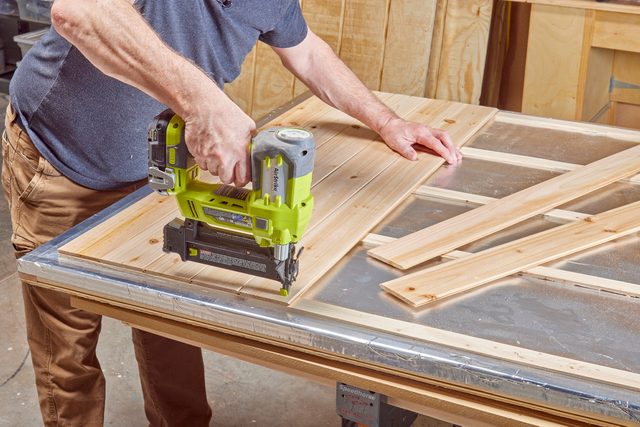
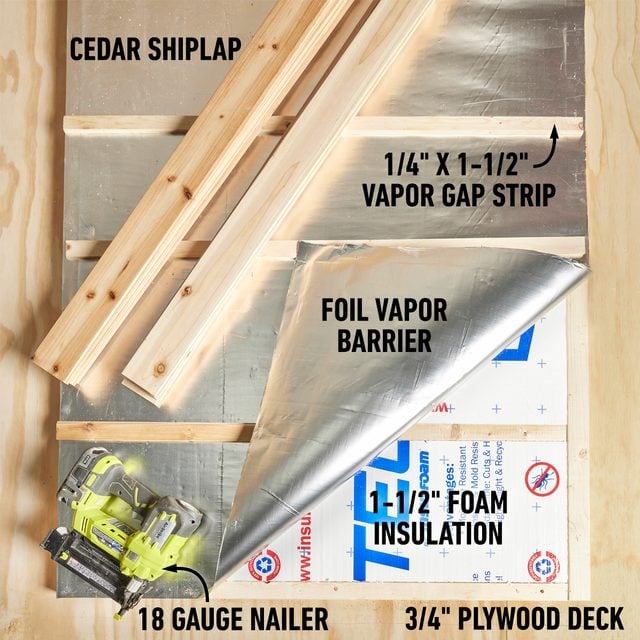
- Cut and attach radiant foil vapor barrier to the interior of all four walls with a staple gun.
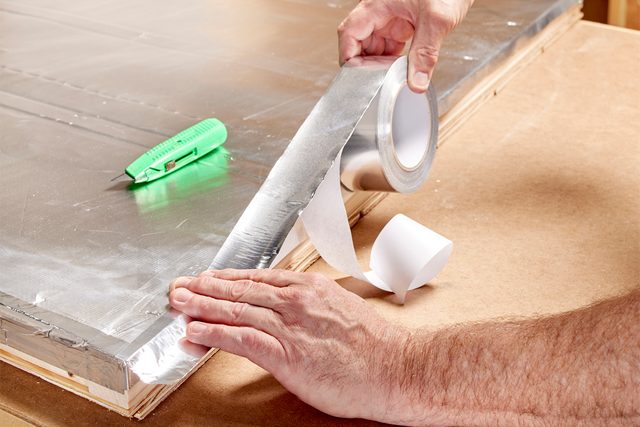
- Seal the edges and any seams with foil tape.
Cedar Shiplap
- Before installing the cedar shiplap, be sure there’s a 1/4-in. vapor gap between the vapor barrier and the shiplap. This allows moisture to evaporate.
- Cut and attach 1/4-in. x 1-1/2-in. wood strips onto each stud, the full length of all four walls.
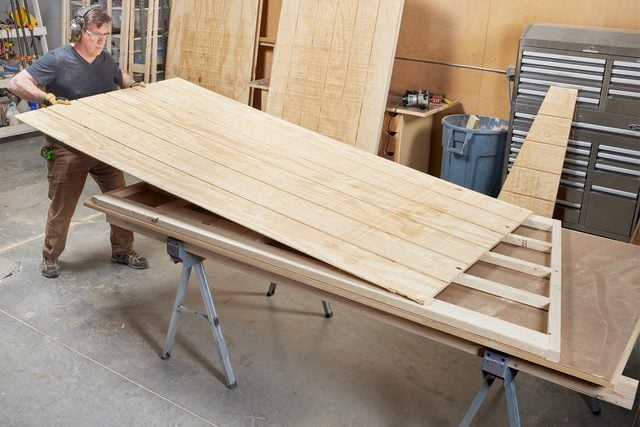
- For the side walls shiplap, start your first row 2-1/4-in. from the bottom and 1-1/2-in. from each side, then attach the cedar shiplap to each stud using 1-1/4-in. nails. When you reach the top of the wall, let the shiplap hang over the angle, then trim off the pieces using a router with a trim bit.
- For the front and back wall cedar shiplap, again start your first row of shiplap 2-1/4-in. from the bottom — this time, only a 1/2-in. from each side.
Assemble Walls
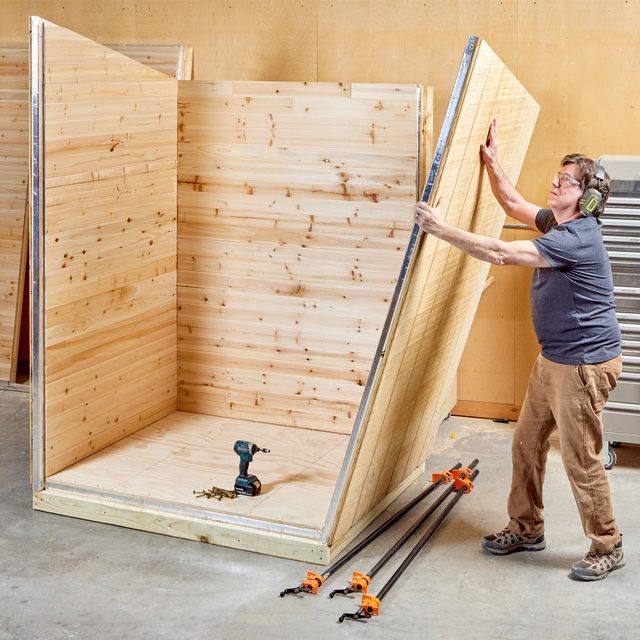
- Start by setting the back wall on the floor base first. Have a helper hold it in place or attach a 2×4 from the edge of the wall to the floor base.
- Set one of the side walls on the floor base and secure it to the back wall with bar clamps.
- Check to see if the tops of the walls line up – this will assure your box is square. Then secure the two walls together with 5/16- x 4-in. structural screws. Attach the other side wall to the back wall in the same manner.
- Set the front wall on the base and clamp all four walls together. Again, check to see if the tops of the walls line up. Then secure both side walls to the front wall with 5/16- x 4-in. structural screws.
The Roof
Roof frame
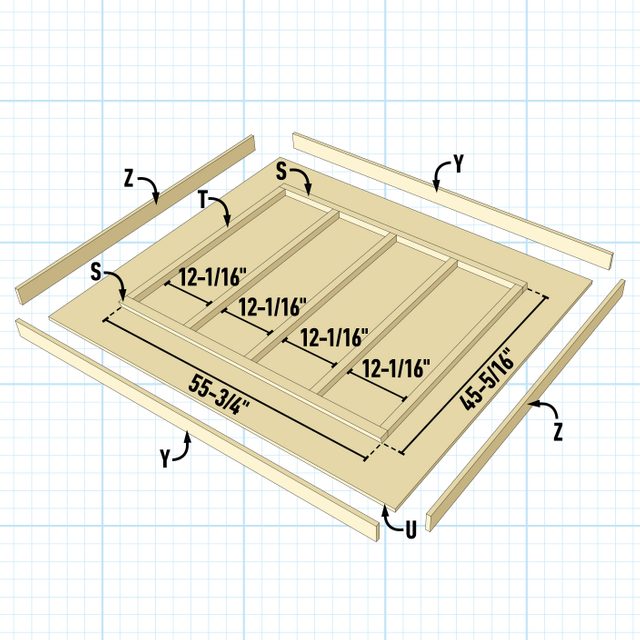
- Start by measuring the width of the inside of your sauna and cut a 2×4 to that dimension. Then rip the 2×4 in half at a 15-degree angle just like you did for the top boards of the front and back walls.
- Clamp those two boards along the top ridge of the front and back walls, aligned with the 15-degree angle. Measure the distance between the two boards, then cut five 2×2 studs to that length.
- Attach the studs to the front and back 15-degree angled boards with 3-in. screws. (See Fig. 6.)
Roof deck
- Cut 3/4-in. plywood for the roof deck. Depending on the size of your roof, you may need to butt two pieces of plywood together.
Attach the roof frame
- Center the roof frame on the plywood deck and attach it with #8 x 2-in. exterior screws from the underside of the plywood.
Insulation, vapor barrier and cedar shiplap
- Insulate each stud space and attach a vapor barrier to the frame as you did the walls.
- Cut and attach 1/4-in. wood strips to each stud as before.
- Cut and attach cedar shiplap to the frame, keeping it flush on all four edges of the frame.
Roof trim
- Flip the roof over and measure for trim.
- Cut and install 1×4-inch cedar trim along all four sides of the roof deck with #13 x 2-in. galvanized finish nails.
Ice and water roof shield
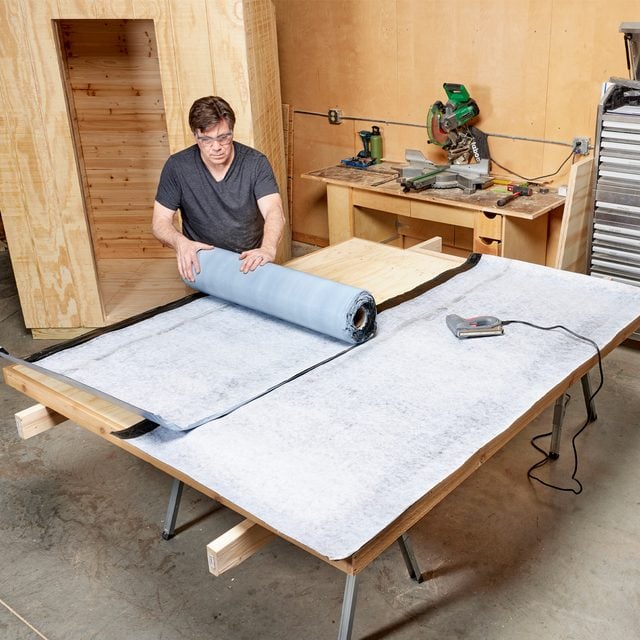
- Starting at the bottom of the roof, staple an ice and water roof shield to the roof deck overlapping it three inches as you work your way up the roof.
Metal roof
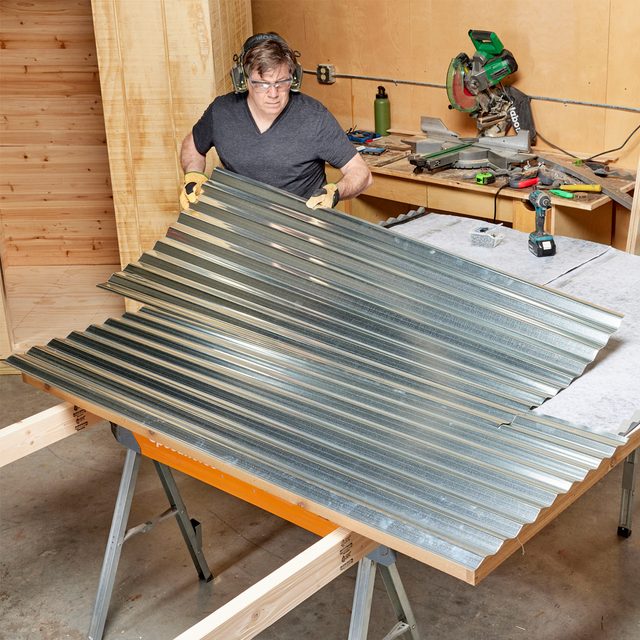
- Cut corrugated metal roof panels so they overhang the roof deck at least two inches on all four sides.
- Attach horizontal plastic closure strips at the top and bottom edges of the roof deck to seal the gaps between the corrugated roof panel and the ice and water roof shield.
- Attach the corrugated roof panels using roofing screws. Be sure to overlap the panels at least three inches with Butyl sealant tape between each panel.
Install the roof
- With a helper, lift the roof assembly on top of the sauna walls and set it into place. Secure it with 5/16- x 4-in. structural screws along the top rim of the walls.
Exterior Paint
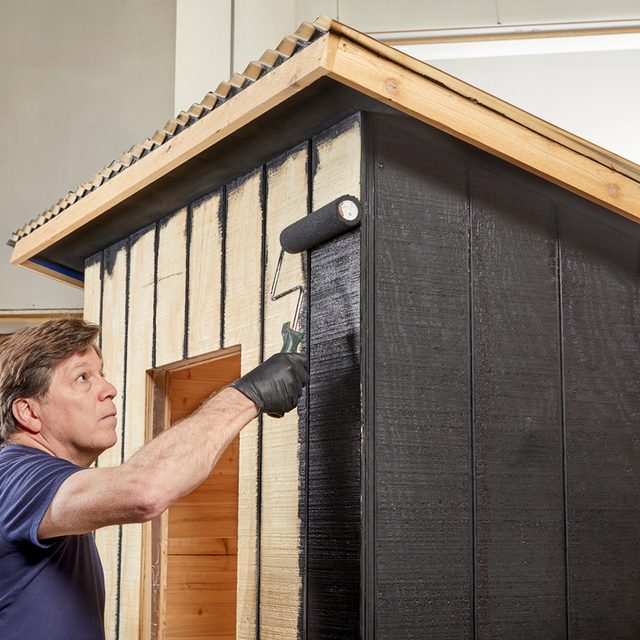
- The plywood siding should be sealed with an exterior paint or deck stain.
Trim
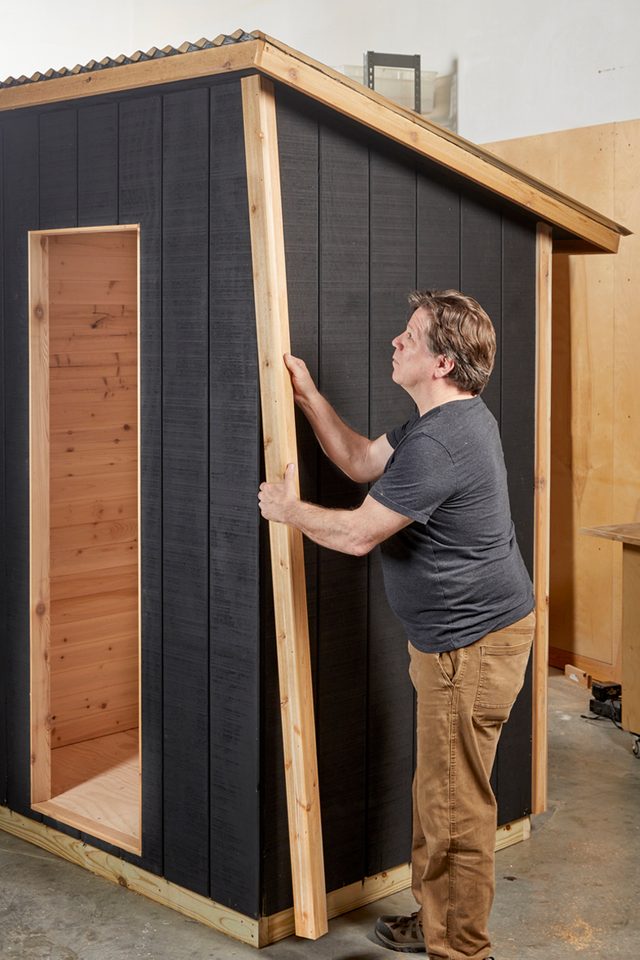
- Attach 1×4-in. cedar trim to the four exterior corners of the sauna. Be sure to use the #8 x 2 in. finish screws to attach the trim so it can be removed later when you disassemble the sauna for transportation. Add trim around the exterior of the door if desired.
Benches
Upper bench dimensions: 3-1/2-in. H x 56-in. W x 15-in. D.
Lower bench dimensions: 3-1/2-in. H x 56-in. W x 26-in. D.
Benches Cutting List
| KEY | QTY. | PART | DIMENSIONS |
| A | 4 | Front & back frame boards | 1-1/2″ x 3-1/2″ x 56″ |
| B | 2 | Upper bench frame sides | 1-1/2″ x 3-1/2″ x 12″ |
| C | 5 | Nailing cleats | 1-1/2″ x 1-1/2″ x 53″ |
| D | 2 | Lower bench frame sides | 1-1/2″ x 3-1/2″ x 23″ |
| E | 2 | Upper bench decking | 1″ x 5-1/2″ x 12″ |
| F | 5 | Lower bench decking | 1″ x 5-1/2″ x 23″ |
- In a sauna, you typically have two benches: an upper bench about 30 inches from the floor, and a cool-down bench no more than 18 inches from the floor.
- These benches are simply designed as a 2×4 cedar frame with 1×6 cedar decking attached to nailing cleats set inside the frames.
- Start by measuring the width of the inside of your sauna. Then make yourself a cut list. Cut all the boards to length, assemble the frames and attach the nailing cleats.
- Place the deck boards on the nailing cleats between the front and back boards with a 1/2-in. gap between each board. Attach the deck boards with #8 x 2-in. finish screws.
Install benches
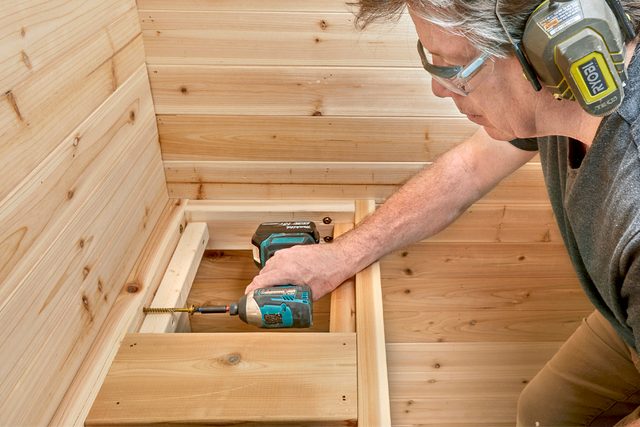
- Attach the benches (level) to the back and side walls using 5/16- x 4-in. structural screws through the cedar shiplap into the bracing inside the walls.
The Door
- The door for your sauna could be as simple as a piece of plywood on hinges with a door pull. Your sauna door should always open out and never have a lock.
- We decided to make our glass panel door using 1-1/2-inch cedar boards. To save money on tempered glass, we chose tempered glass cutting boards. Visit Family Handyman.com to learn how to make a glass panel door.
The Heater
- Here’s the most important question to ask when choosing a heater for your sauna: What’s your power source? You can heat your sauna with natural gas or propane, electricity or wood.
- Natural gas or propane heaters are efficient and work well for larger sauna rooms. You’ll need to plumb and vent the heater just like a gas furnace.
- Electric sauna heaters are the most common and affordable. They’re also convenient — with the flip of a switch, you have heat. You can find them in different kilowatt sizes to fit any size sauna. You may, however, need a 220-volt circuit depending on the size of the heater.
- If your sauna is in a remote area with no gas or electricity, fire up a wood-burning heater. Vent it just like you would a wood stove.
- Infrared panels and infrared light bulbs are other options if electricity is nearby.
- We always recommend hiring a licensed plumber or electrician to install any gas or electric appliance. Visit FamilyHandyman.com to learn more about how to heat your sauna.
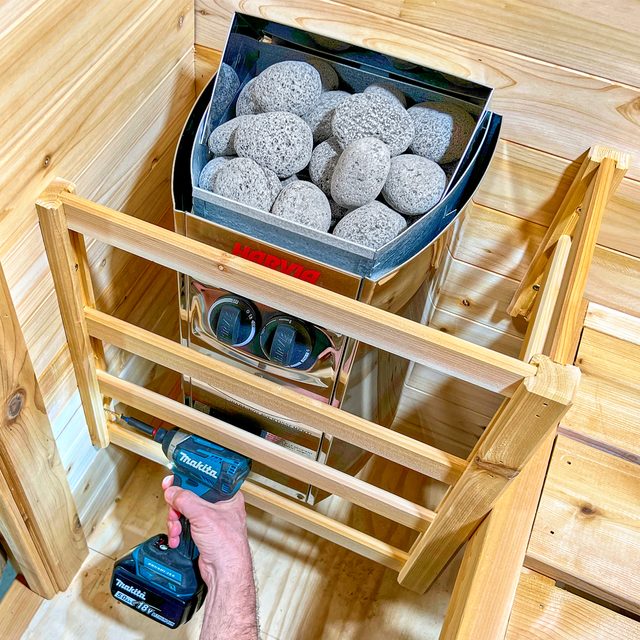
Install a guard rail
- No matter what heater you decide on, always build a guard rail around it to protect you and your sauna guests from burns.
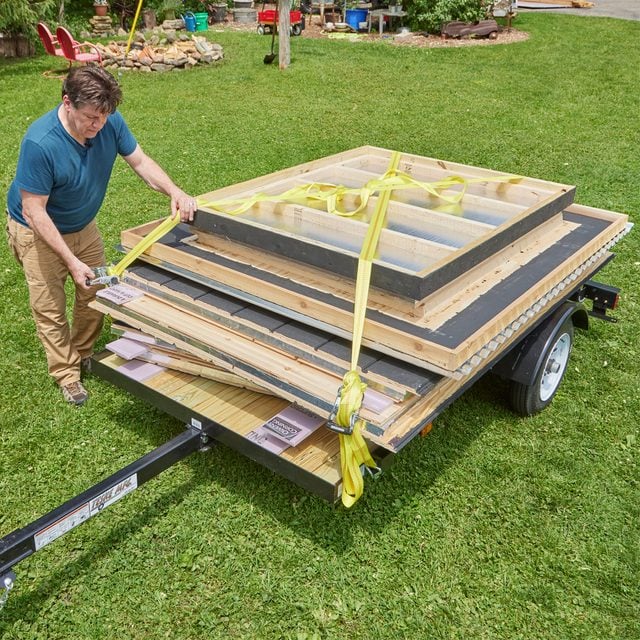
Disassemble and Transport
- Now that your sauna is complete, it’s time to disassemble it in reverse order of how it was assembled so you can take it to your next destinations.
- Visit FamilyHandyman.com to learn how to safely transport your sauna.
