Saturday Morning Workshop: Modern Floating Headboard
A few hours
Intermediate
$51–100
Introduction
Watch the video tutorial and follow the step-by-step instructions below to build this one-sheet-of-plywood minimalist headboard.Tools Required
- Circular saw
- Clamps
- Drill/driver
- Iron
- Miter saw
- Table saw
Materials Required
- 1x2 board
- 2" edge banding
- 3/4" edge banding
- 3/4" x 4' x 8' plywood
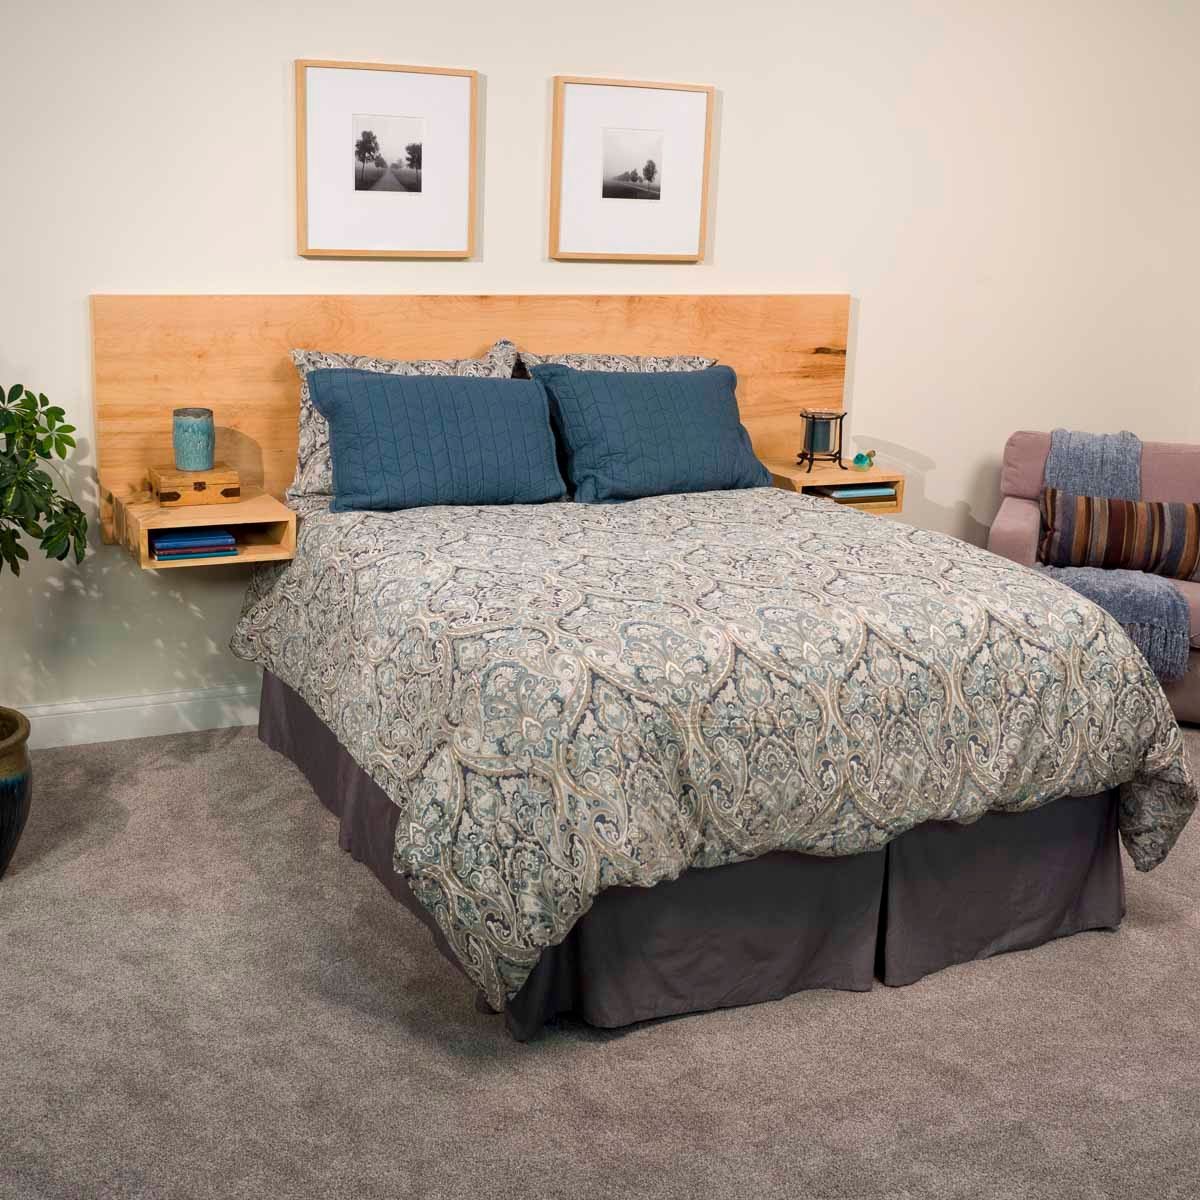
A headboard is a furniture piece that not too many of your houseguests will see, but it is something that you should take pride in every time you walk into your bedroom. If you want to build your own, they can become hopelessly complicated and cost a lot of money. I wanted to counter this thinking and come up with a modern, minimalist headboard that looks slick and doesn’t cost a lot of money. This floating headboard is a great project that you can be proud of, and it only uses one sheet of plywood and some edge banding.
Tech Art
Cutting List
Project step-by-step (10)
Rip Plywood Strips to Size
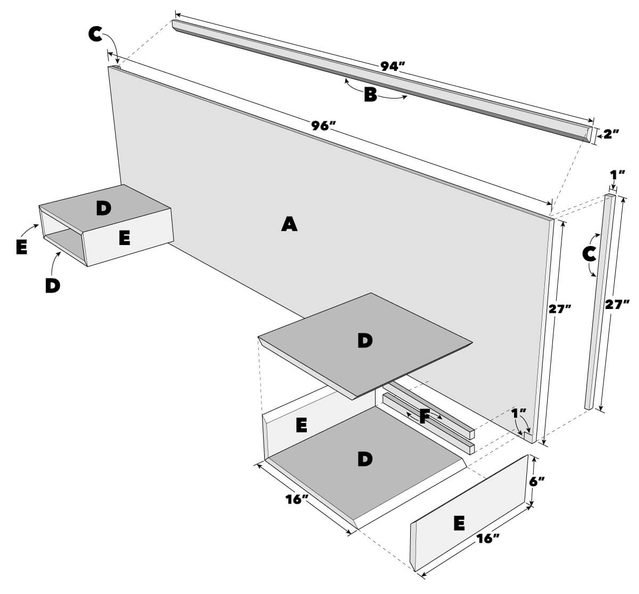
Use a table saw to cut two 2-in. strips for the cleats (Part B) and one 1-in. strip for the vertical struts (Part C). Rip a 16-in. strip for the cubbies from the maple plywood. The rest of the plywood will be around 27 in. for the main headboard (Part A).
Crosscut Strips for the Vertical Struts
Crosscut one of the 2-in. strips to two 27-in. pieces for the vertical struts (Part C) and attach them to the back of the headboard (Part A) using 1-1/4-in. construction screws.
Cut Angles for the Cleats
Rip a 45-degree angle into the other two strips and crosscut them to 88 in. to create the French cleats (Part B). Fasten one of these to top of the back of the headboard with the long side of the strip facing out and the angled edge pointing towards the center of the headboard (Part A). The other will be used later as the wall cleat.
Rough Cut Cubby Pieces
From the 16-in. plywood board, use a circular saw and temporary fence to crosscut four 17-in. pieces and four 7-in. pieces.
Miter 45-Degree Angles into the Cubby Pieces
Cut an initial 45-degree angle into all of the rough-cut pieces. Measure the width of the cubby boards and mark a line. Use a miter sled and table saw to crosscut the second 45-degree angle to make the long (Part D) and short (Part E) cubby pieces.
Tape and Glue to Create the Cubby Sideboards
Tape the corners of the mitered boards together and test your angles. Glue the joints, close the assembly and tape the final mitered-angles together to finish the cubby side tables.
Crosscut Pieces for the Mounts
Use a miter or circular saw to crosscut the 1×2 board into four 14-in. pieces (Part F) and fasten one of them to the inside of the cubbies with pocket holes.
Fasten the Side Tables to the Headboard
Screw the other cubby cleat (Part F) to the headboard with 1-3/4-in. reveals on the end and base of the headboard. Place the cubby on top of the headboard and fasten the cubby to the cleat from the bottom of the cubby. Screw the pocket-holed cleat to the to the headboard from the inside of the cubby.
Edge Band the Plywood
Iron on the 2-in. maple edge banding to the headboard and trim the excess with a utility knife. Then iron on the 3/4-in. maple banding to the side tables. You shouldn’t need to clean up these edges, but take it slow so you don’t have to go back and try to take it off.
Mount the Cleat to the Wall; Then Mount the Headboard
Screw the last 2-in. cleat (Part B) with pilot holes and 3 in. construction screws to the wall so that the bottom of the cleat is 47 in. from the floor (this measurement can change depending on the height of your bed and where you want the side tables to sit). Set the floating headboard onto the cleat and enjoy!


