How to Tile a Backsplash
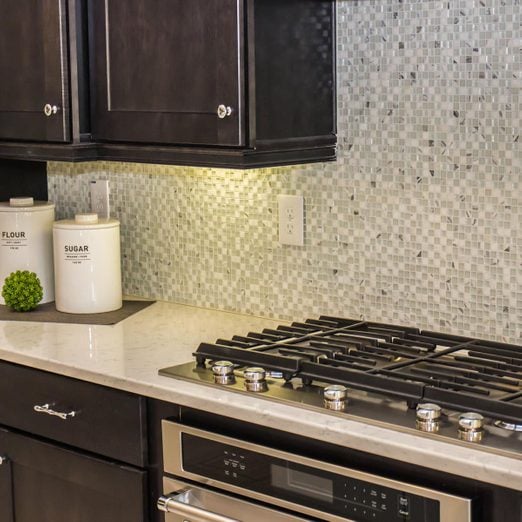
Install a mosaic tile backsplash for a whole new look in just one weekend.
Our editors and experts handpick every product we feature. We may earn a commission from your purchases.
Multiple Days
Intermediate
$101–250
Introduction
Tiling a backsplash above the counter is one of the easiest ways to upgrade an old, tired kitchen on a tight budget. You can choose from the vast array of handsome ceramic tiles available, including the easy-to-install one we show here—mosaic tiles.Tools Required
- 4-in-1 screwdriver
- Bucket
- Caulk gun
- Drill/driver - cordless
- Grout float
- Level
- Non-contact voltage tester
- Notched trowel
- Rubber mallet
- Self-centering drill bit
- Tape measure
- Utility knife
Materials Required
- Caulk
- Grout
- Grout sealer
- Mastic
- Outlet extenders
- Stone tile sealer
- Tile
- Tile spacers
Planning, Materials and Tools
Nothing packs more style per square inch than mosaic tile for a kitchen backsplash. So if your kitchen’s got the blahs, this is an easy way to give it a quick infusion of pizzazz. We’ll show you how to tile a backsplash in a weekend! The small tiles are mounted on 12 x 12-in. sheets, so installation of a tiled backsplash is fast. You can install the tile on Saturday and then grout it on Sunday.
Shopping for Mosaic Tile
Mosaic tiling sheets make it easy to achieve a great backsplash. Layout is a cinch—you can simply cut the mesh backing on the sheets to fit the tile along counters and cabinets. In fact, the hardest part of this or any other tiling backsplash project may be choosing the look—the tiles come in a variety of shapes and materials, and many sheets have glass or metallic tiles built in for accents.
To add to your options, strips of 4 x 12-in. tiles are available for borders. So you can match the existing look of your kitchen—or try something new!
Project step-by-step (8)
Clean the Wall
Before installing the tile, clean up any grease splatters on the wall (mastic won’t adhere to grease).
- Wipe the stains with a sponge dipped in a mixture of water and mild dishwashing liquid (like Dawn).
- If you have a lot of stains or they won’t come off, wipe on a paint deglosser with a lint-free cloth or abrasive pad so the mastic will adhere.
- Mask off the countertops and any upper cabinets that will have tile installed along the side.
- Leave a 1/4-in. gap between the wall and the tape for the tile.
- Cover the countertops with newspaper or a drop cloth.
What To Do With Outlets
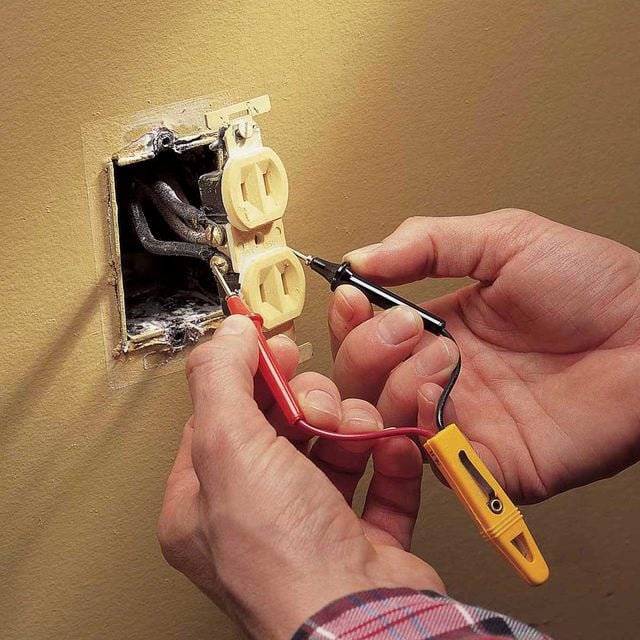
- Turn off power to the outlets in the wall and remove the cover plates.
- Make sure the power is off with a non-contact voltage detector.
- Place outlet extenders in the outlet boxes.
- Note: The National Electrical Code requires extenders when the boxes are more than 1/4-in. behind the wall surface. It’s easier to put in extenders now and cut tile to fit around them than to add them later if the tile opening isn’t big enough. Set the extenders in place as a guide for placing the tile. You’ll remove them later for grouting.
Draw a Center Line
The area between the range and the vent hood is usually the largest space on the wall—and certainly the most seen by the cooks in the house—so it’ll serve as your starting point for installing the tile.
- Mark a centerline between the upper cabinets so the tiles will be centered under the vent hood.
- Screw a ledger to the wall to support the tile.
- Measure from the centerline to the cabinets.
- Pro tip: If you’ll have to cut tile to fit, move the centerline slightly so you’ll only have to cut the mesh backing (at least on one side).
Spread Adhesive
- Using a 3/16-in. trowel, scoop some mastic adhesive out of the tub and put it on the wall (no technique involved here!).
- Spread the mastic along the centerline, cutting in along the ledger board, vent hood and upper cabinets. Then use broad strokes to fill in the middle.
- Pro tip: Hold the trowel at a 45-degree angle to the wall to spread the mastic thin—you should be able to see the layout lines where the points of the trowel touch the wall.
- Have a water bucket and sponge on hand to keep the trowel clean. Whenever the mastic starts to harden on the trowel, wipe it off with the wet sponge.
- Place plastic tile spacers on the ledger board and countertop. This leaves a gap so the tiles don’t sit directly on the countertop (you’ll caulk the gap later).
Here’s how to test if the mastic is too thick:
- Align the first tile sheet with the centerline, directly over the spacers.
- Press it onto the wall with your hand. If the sheet slides around and mastic comes through the joint lines, you’re applying the mastic too thick (remove the sheet, scrape off some mastic and retrowel).
- Scrape out any mastic in the joints with a utility knife.
Set the Tile
- Eyeball a 1/16-in. joint between sheets of tile (you don’t need spacers). After every two or three installed tile sheets, tap them into the mastic with a board and rubber mallet.
- Pro tip: If tiles fall off the sheets, dab a little mastic on the back and stick them right back in place.
- The sheets aren’t perfectly square, so you may need to move individual tiles to keep joints lined up. Move the tiles with your fingers or by sticking a utility knife blade in the joint and turning the blade.
- If an entire sheet is crooked, place a grout float over the tile and move the sheet. You’ll have about 20 minutes after installing the tile to fine-tune it.
Saw Tiles for Exact Fits
If you’re lucky, you can fit the tile sheets under upper cabinets and around outlets by cutting the mesh backing with a utility knife. If not, you’ll have to cut the tile with a wet saw. A wet saw is the best tool here, as nippers and grinders can cause the slate tiles to shatter or crumble.
- Slice the backing to the nearest full row of tile, install the sheet around the outlet or next to the cabinet, then cut tiles with a wet saw to fill the gaps.
- Cut the tiles while they’re attached to the sheet. Individual tiles are too small to cut (the blade can send them flying!).
- Let the tile sit for at least 30 minutes, then apply a grout sealer if you’re using natural stone (like slate) or unglazed quarry tile. The sealer keeps the grout from sticking to the tile (it’s not needed for nonporous tiles such as ceramic). Pour the sealer on a sponge, then wipe on just enough to dampen the tiles.
Apply the Grout
Wait 24 hours after installing the tile to add the grout. We used premium grout that has a consistent color and resists stains better than standard grout. Since the backsplash will be subject to splatters and stains from cooking and food prep, we recommend spending the extra money for a premium grout.
- Mix the grout with water until it reaches mashed potato consistency, then put some on the wall with a grout float. Work the grout into the joints by moving the float diagonally over the tiles.
- Pro tip: Hold the grout float at a 45-degree angle to the tile.
- Scrape off excess grout with the float after the joints are filled.
- Ten minutes after grouting, wipe the grout off the surface of the tiles with a damp sponge.
- If the grout pulls out of the joints, wait another 10 minutes for it to harden.
- Continually rinse the sponge in a bucket of water and wipe the tiles until they’re clean.
These slate tiles have a lot of crevices that retain grout. While most of the grout comes off the tiles with the wet sponge, some won’t. Most pro installers leave some grout in slate and other rough-surface tiles—it’s just part of the deal with some types of natural stone. But if you want the tile completely clean, remove the grout from individual tiles with a toothbrush.
Scrape Out Corners
- Rake the grout out of the joints at inside corners and along the bottom with a utility knife so you can fill them with caulk.
- Keep the dull side of the blade along the countertop.
- After cleaning the wall, use a utility knife to rake the grout out of the joints along the bottom of the backsplash and in the inside corners. These expansion joints allow the wall to move without cracking the grout.
- Two hours after grouting, wipe the haze off the tiles with microfiber cloths. Then caulk the expansion joints with latex caulk. Use a colored caulk that closely matches the grout.
- After seven days, sponge on a grout sealer to protect the grout against stains.
That’s it! Now every time your family and friends gather in your kitchen, they’ll be impressed with your custom backsplash. They may even ask you to help them add a backsplash to their kitchen!


